Posts in Recipes
Fall Oatmeal Cookies

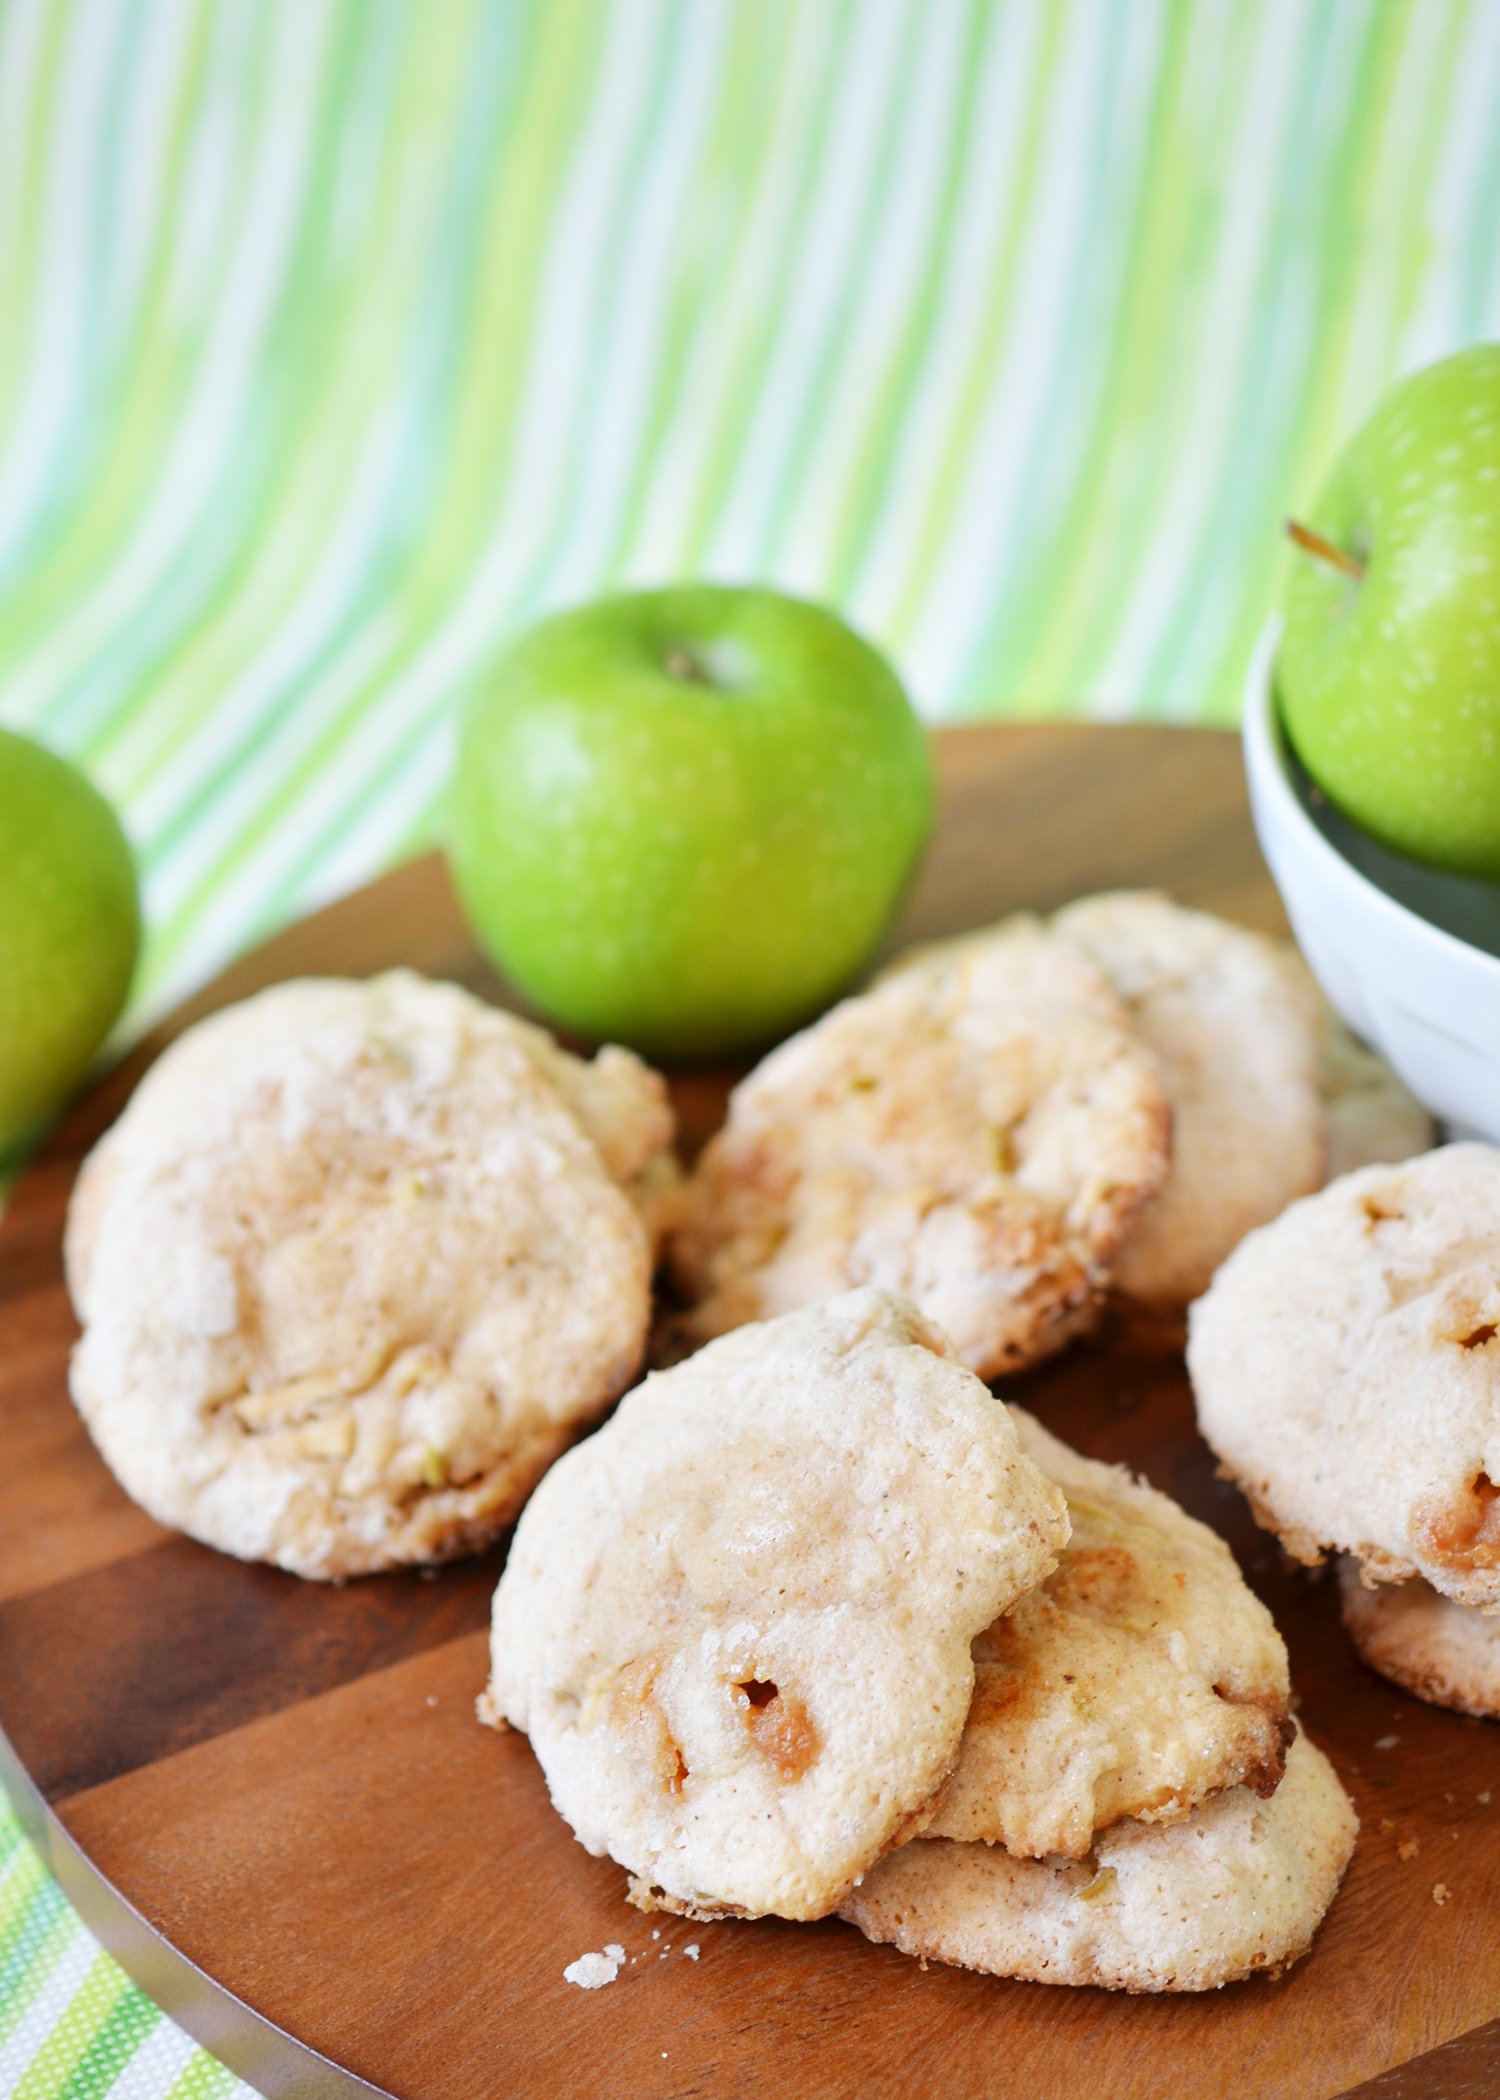
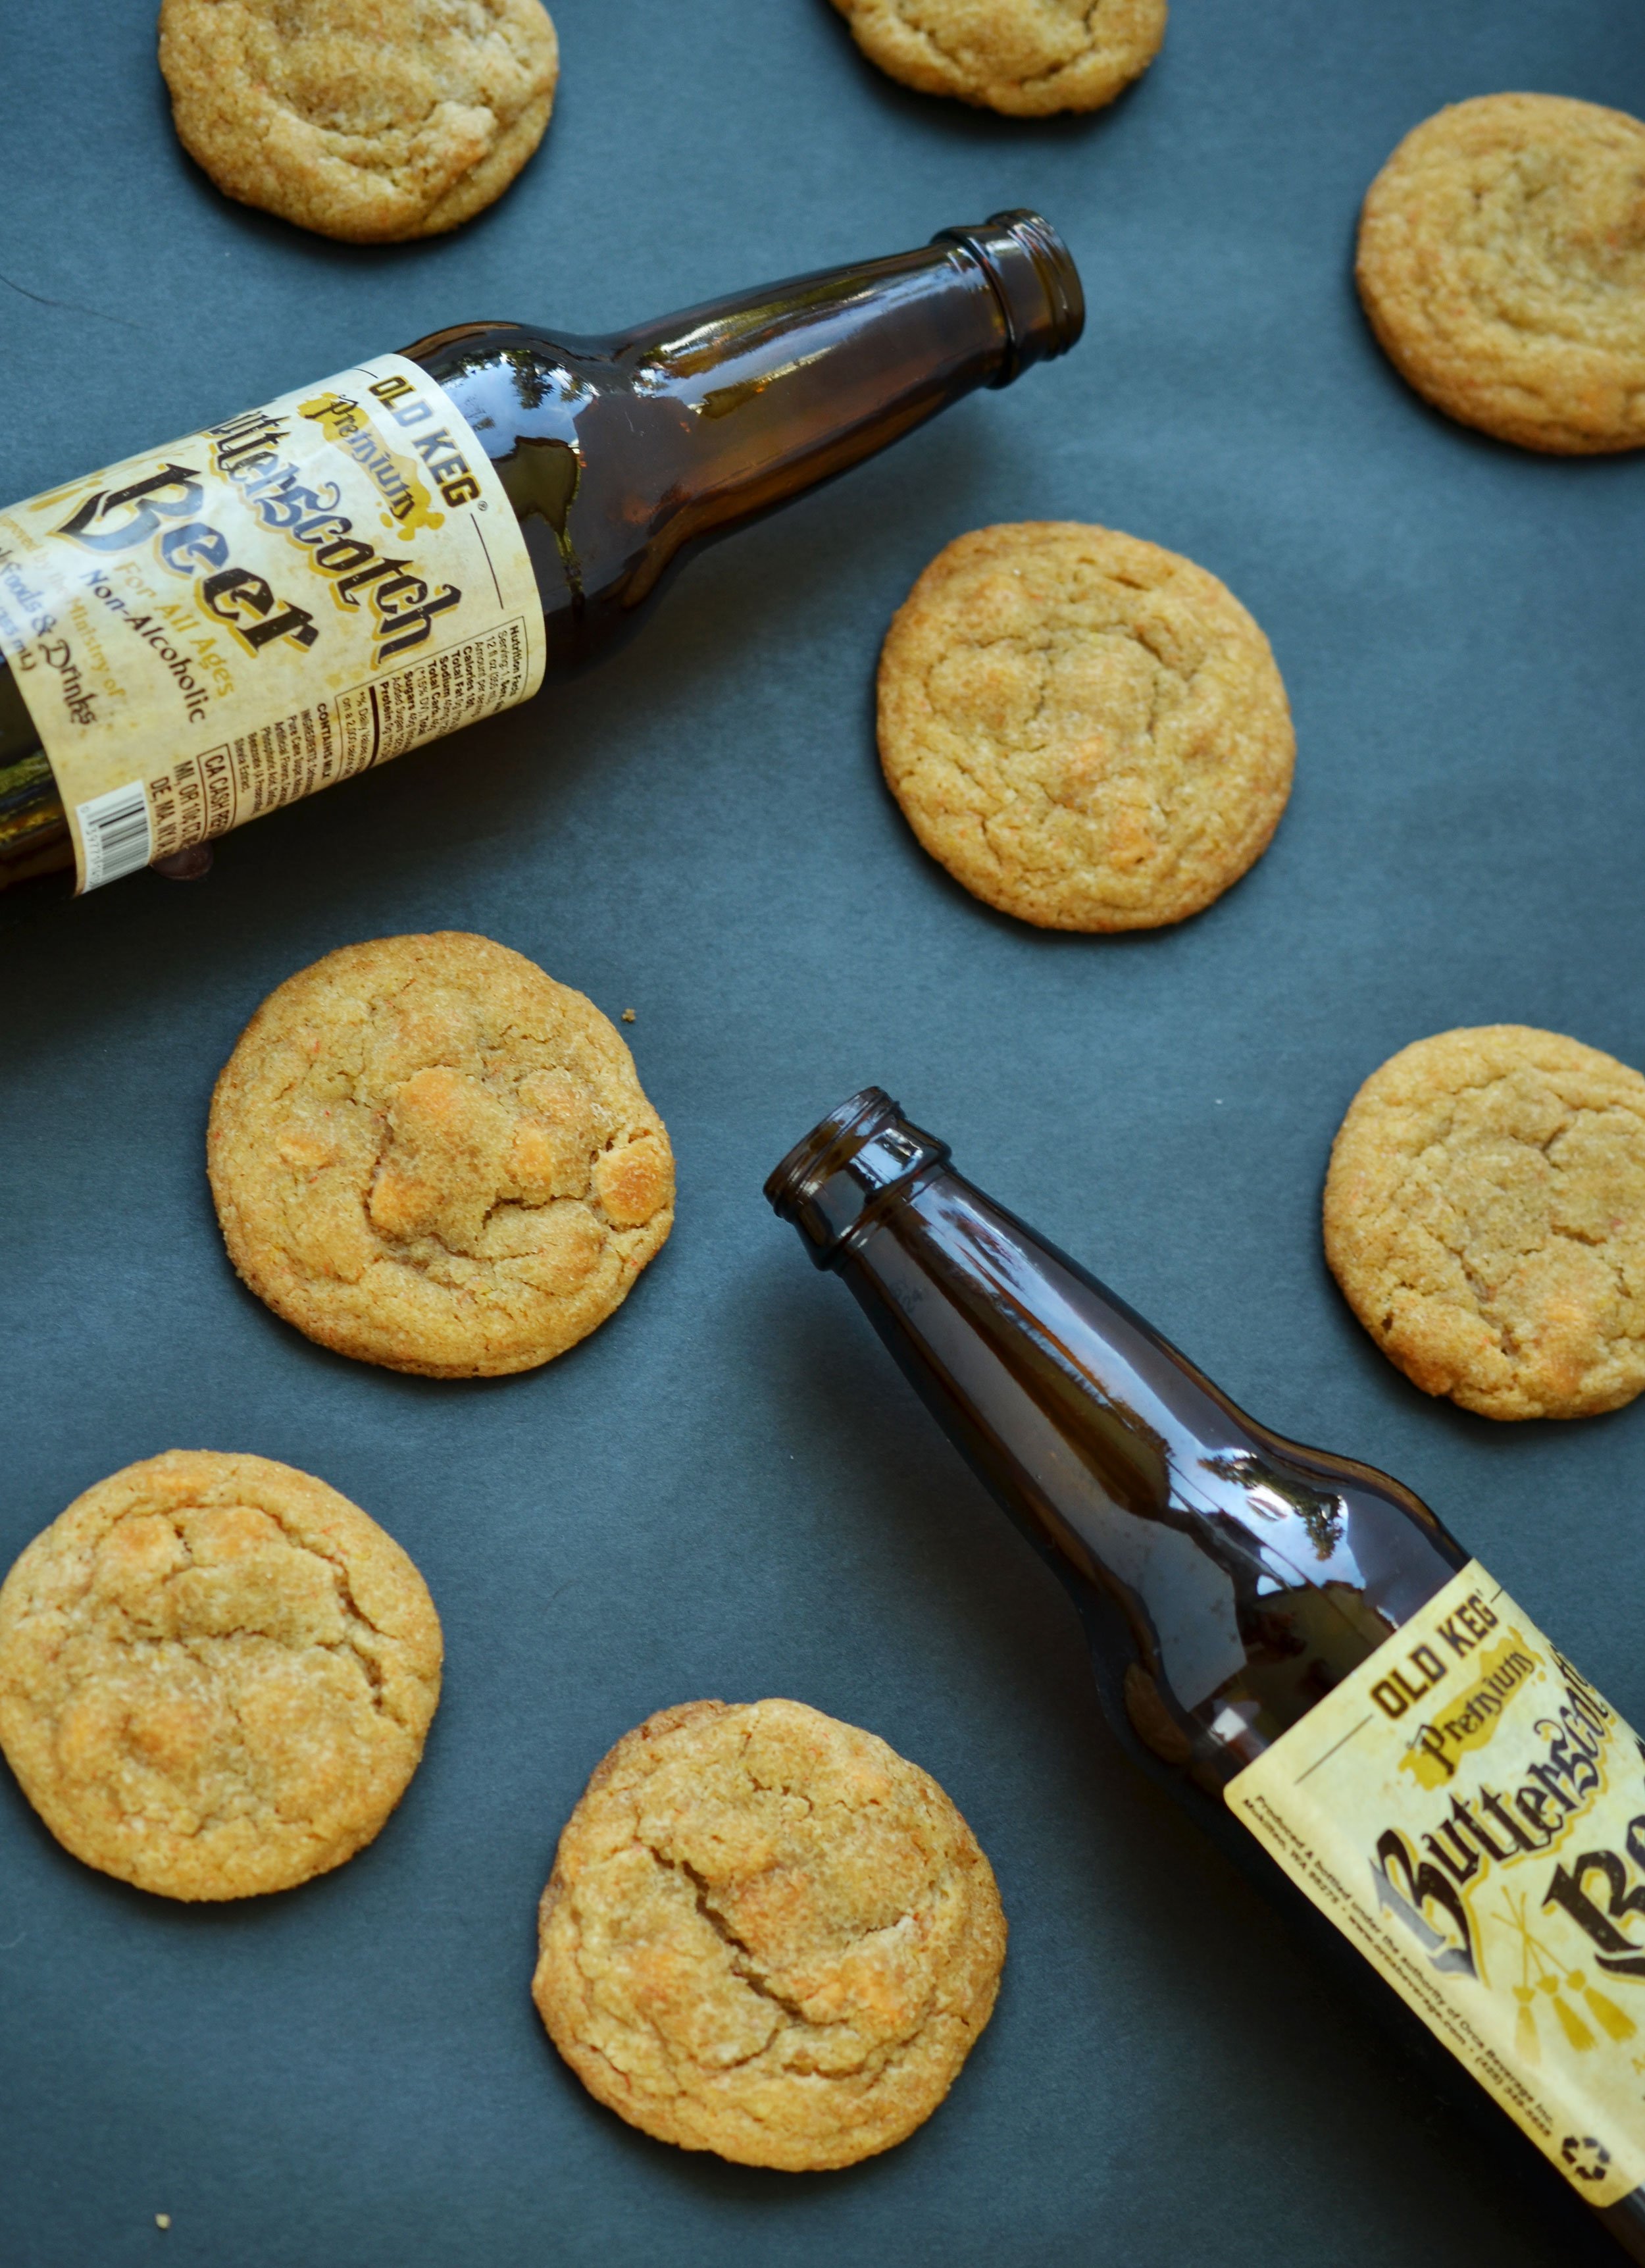
Fall just feels like oatmeal cookies to me. I used to make them for football games, because my mom made them for football games, so I’m sure that’s a part of the reason. This week I started to wonder how I could make them even more “fall” feeling. So I swapped out the raisins for craisins and added butterscotch chips (which are literally what fall tastes like). I think they are a pretty epic fall cookie. What do you think?

Fall Oatmeal Cookies

makes about two dozen


1 cup butter

1/2 cup sugar

1 1/2 cups brown sugar

2 eggs

1 teaspoon vanilla

1 1/4 cup flour

1 teaspoon baking powder

1 cup rolled oats

1 cup quick oats

2 cus butter scotch chips

1 cup craisins

STEP 1

Preheat oven to 350 degrees.

In the bowl of a stand mixer, combine together butter and sugar until smooth. Beat in eggs and vanilla. Whip until light and fluffy.

STEP 2

Combine together the flour, baking powder and oats - then blend into the stand mixer. Blend until just barely combined.

STEP 3

Toss in butterscotch chips and craisins and blend until totally incorporated.

STEP 4

Scoop on to a baking sheet and bake 12 minutes until browned on the edges. Let cool on a wire rack and keep in an airtight container for up to one week.

These go perfectly with a cup of hot apple cider. 😉


Apple Cider Cocktail

4 ounces fresh apple cider

2 ounces bourbon

1/2 ounce allspice dram

Fill two cocktail glasses with ice. In a pitcher, stir together all ingredients. Pour the cocktail over the ice dividing it equally between both glasses

Cin cin!

Halloweenies
Ali Hedin | Halloween Weenies in a Spooky Hand

What’s better than pigs in a blanket? The correct answer is nothing.

This time of year we are eating quite a few pigs in a blanket thanks to the football season - it’s the perfect food for grab and go eating. Which makes it the perfect food for grab and go Halloween eating. I don’t know about your house, but this holiday doesn’t exactly lend itself to sitting around and eating a large meal.

Ali Hedin | Halloween Weenies in a Spooky Hand

To make these, I used crescent rolls and lil’ smokies. It’s so simple. I don’t really think this needs a recipe, but I’ll type one out anyway. Usually I serve a lil’ smoky with mustard because ketchup is gross. But in this case, it needs to look like blood. So ketchup it is! (I put mustard in a bowl on the side when serving)

Ali Hedin | Halloween Weenies in a Spooky Hand

Halloweenines

1 package lil’ smokies

2 packages crescent rolls

STEP 1

Preheat oven to 350 degrees. Unroll one package of crescent rolls. Use one of the triangles to make the base of your hand.

STEP 2

Slice the remaining rolls into strips. Start wrapping the lil’ smokies and laying them out to form a ‘hand'.’ Use the remaining strips to drape across the top of the lil’ smokies to hold them all together. Repeat with the second roll of crescent rolls and the rest of the lil’ smokies to form a second hand.

STEP 3

Bake about 15-20 minutes until golden brown on a lined baking sheet. Serve with ketchup!

Ali Hedin | Halloween Weenies in a Spooky Hand

Eyeball Meringues

There is nothing the kids love more than when I make meringues. It’s a fan favorite - and one of the simplest treats you can make! They are literally three ingredients. The secrets are:

1. Don’t make these when it’s pouring down rain, the humidity kills them.

2. Don’t go too fast with the sugar. Be slow.

3. Watch your oven temperature and don’t rush anything.

These are super elegant for this holiday that doesn’t always inspire elegance!

Eyeball Meringues

Makes about 1 dozen

4 large egg whites

pinch of salt

1/2 cup sugar

1/4 teaspoon meringue powder

STEP 1

Preheat oven to 200 degrees.  Line two baking sheets with sil-pat or parchment paper.

In a stand mixer, whisk together egg whites and salt until bubbly.  With the mixer running slowly add sugar and meringue powder. Whisk until stiff peaks form - about five minutes.

STEP 2

Fit a piping bag with an Ateco number 12 piping tip. Paint stripes on the inside of the piping bag using red food coloring. Carefully fill the piping bag with white meringue.

STEP 3

Gently pipe out giant dollops. Place a candy eye in the center of each circle to flatten out the piping point.

STEP 4

Bake meringues two hours until crisp to the touch.  Remove from oven and let cool 10-15 minutes. Store in an airtight container (I use a ziploc bag) for about a week.


Apple Cider Cake Skulls

This is one of my favorite cakes to make this time of year! When you have cute cake molds, you need a cake that doesn’t need a frosting so you don’t cover up the design. I found this cute skull mold earlier this year - Pearl’s favorite holiday is Halloween - so I had to buy it when I found it!

This cake can be made in any shape. I usually choose a regular round cake mold. But you can change it up for the holiday. I hear there are turkey molds so this could be darling for Thanksgiving too.

APPLE CIDER CAKE


½ cup butter, room temperature

½ cup brown sugar

½ cup sugar

2 eggs

1 teaspoon vanilla

1 ½ cups flour

2 teaspoons baking powder

½ teaspoon cinnamon

¼ teaspoon nutmeg

¼ teaspoon ground cloves

½ cup apple cider

½ cup chopped apple


1/2 cup powdered sugar

2 tablespoons apple cider


STEP 1

Preheat the oven to 350 degrees. Grease the skull mold cake pans and dust them with flour. It’s super important to flour the pans when there are details like this!

In a small bowl combine flour, baking powder, and spices.  Set aside.


STEP 2

In the bowl of a stand mixer, cream together butter and sugars.  Add eggs and vanilla.  Whip together until it lightens slightly in color (about 1 minute).


STEP 3

Add half the flour to the sugar mixture in the stand mixer.  Stir until just barely combined.


STEP 4

Pour in apple cider and mix.  Add remaining flour and stir until just barely combined then incorporate the apples.


STEP 5

Pour the mixture into a greased 9-inch round pan.  Pop into the oven and bake 35 minutes – or until a toothpick comes out clean.  Let cool. Mix together the powdered sugar and cider - then pour it over the top of the cake slowly and let it drip off the sides.


Green Tomato Salsa Verde
Ali Hedin | Salsa Verde using green tomatoes

In Seattle, our window to grow tomatoes is short. If you don’t have your plants in the ground by early May, there’s no chance you’ll have very many ripe tomatoes. And then if it’s a cool summer, a rainy summer, or just a short summer, then you’re also out of luck. It’s a real risk to be a tomato farmer in the Pacific Northwest.

But totally one worth taking if you love tomatoes.

There’s a sunny side to this short season - green tomatoes! They are quite similar to tomatillos. So one year I tried making this salsa verde from our green tomatoes and I was pleasantly surprised at how delish it is! It’s just like when it’s made with tomatillos. And since I have a proliferation of green tomatoes - I can make a whole bunch of this to save for the winter.

Usually I freeze this sauce once it’s made. I have been known to can it as well, but that can be challenging. So why not just freeze it?!

Do you love Pork Verde as much as I do?! Here’s an easy weeknight dinner ready to go. Just defrost the sauce, simmer the pork in the sauce and serve with rice and beans.

green tomato salsa verde

5 pounds green tomatoes

2 jalapenos, sliced

1 large (or 2 small) onions, peeled and sliced

5 cloves garlic, peeled

2 tablespoons olive oil

1 large bunch cilantro

2 teaspoons cumin

1/2 cup chicken stock

salt

STEP 1

Preheat the oven to 400 degrees.

Chop the tomatoes into even pieces and spread them on a baking sheet. Add the onions, garlic and jalapeño to the sheet. Pour the oil over the top of everything and toss gently. Sprinkle with a healthy amount of salt. Pop it into the oven. Roast about 20 minutes until bubbly and toasty brown.

STEP 2

When the tomatoes are bubbly and getting a tiny bit brown on the edges, pull them from the oven. Scoop the entire pan of tomatoes, onions, jalapeños and garlic into a blender. Add the broth, cilantro, cumin and a bit more salt. Blend well.

STEP 3

Pour it over chicken, pork, or veggies. Or freeze for up to a few months! If you’re into canning, you can can this and keep it in the pantry.


Grandma Leona's Raisin Bars

I had completely forgotten about these cookies until I was looking for a totally different recipe this last week and ran across this gem! These are my Grandma Leona’s cookie bars. Grandma Leona died before I was born, but I have been told by many that she and I were kindred spirits. She was crafty, a cook, made things overly fancy for no reason - so clearly she was great.

There are a handful of things that have come down from her that are clear memories of my childhood; gaudy Christmas ornaments and these cookie bars are the top two.

My mom used to make these regularly when fall began and they still make me feel all the cozy fall feels. They are quirky to make, because they begin with cooking down the raisins. My mom always made them in the pan the raisins cooked in because that’s how Leona made them. I put them in a stand mixer because I’m lazier than both of them.

The key is to make sure the raisin mixture is hot when you use it so the shortening melts. I still use shortening because we are mostly dairy free around here - so that’s easy. If shortening is not your thing, they cook equally as well with butter!

Let me know what you think. Did your grandma have cookie bars that she made?

Ali Hedin | Grandma Leona's Old Fashioned Raisin Bars

Grandma Leona’s Raisin Bars

makes 2 dozen bars

1 cup raisins

1 cup water

1/4 cup shortening

1 cup sugar

1 egg

2 cups flour

1 teaspoon cinnamon

1/2 teaspoon allspice

1/2 teaspoon cloves

1 teaspoon baking soda

STEP 1

Preheat oven to 350 degrees. In a small sauce pan, cook together the raisins and water over low heat until the water is half evaporated.

STEP 2

When raisins are still warm, pour them into the bowl of a stand mixer and immediately add the shortening - you need it to melt down.

STEP 3

Whisk in eggs and sugar and beat until completely combined.

STEP 4

Add all dry ingredients - I usually mix them in a small bowl first, but you don’t have to. Stir until the dry ingredients are incorporated. It takes a minute so be patient. But don’t over mix!

STEP 5

Pour the batter into a greased 9x12 pan. The batter won’t look like it’s enough, but spread a thin layer and have faith. It will fill the pan! Bake at 350 for 20 minutes until golden brown on top.


White Chicken Chili

I’ve been making this chili for an eternity. It is literally the oldest recipe in my entire collection which is why I was shocked that I hadn’t already posted it! If you’ve been around a while and have my book - then you’ve seen it in there.

Otherwise, here’s her debut! The relaunch of an old favorite. It’s that recipe that you completely forgot about and then when you see it again, you’re beyond excited. This is that one. It’s so simple because I just cook the chicken in the broth. Let it go as long as you want, it will just shred easier.

Need a short cut? Buy rotisserie chicken and shred that. Buy the already shredded version. You do you. Just don’t leave out the sour cream topping. It’s the perfect creamy contrast. If you are non-dairy (we are here!) then just use the non-dairy sour cream. Yes, there’s a weird flavor sometimes - no worries. You’re adding cilantro and lime which will cover up any odd flavor. I’ve found the sour cream made from tofu seems to do the best with these sauces.

White Chicken Chili

Serves 4

1 tablespoon butter

2 tablespoons olive oil

1 jalapeno, seeded and diced

1 clove garlic, chopped

½ onion, finely diced

1 tbs cumin

1 tsp oregano

6 cups chicken stock

1 - 15 oz can garbanzo beans

1 – 15 oz can cannellini beans

1 pound chicken breasts

8oz sour cream

1 lime, zested and juiced

2 tablespoons chopped cilantro

STEP 1

In a large stock-pot cook jalapeno, garlic, and onion in butter and olive oil.  Cook until soft.  Add cumin and oregano, cooking until fragrant – about a minute.

STEP 2

Pour in stock and both cans of beans – undrained.  Bring to a boil and add chicken.  Cook on medium/low for about 30 minutes until chicken is cooked through.

STEP 3

In a blender, combine sour cream, lime zest, juice, and cilantro.  Pulse until combined.

STEP 4

Before serving, shred chicken with two forks.  Serve with cilantro cream.


End of Summer Corn Salad

Can you believe summer is over? Luckily, the summer produce is still hanging around the markets - I just found the most epic corn last weekend! I made this salad to go with our Sunday dinner and I thought you might like it too. It’s so ridiculously simple so it barely requires a recipe but those are the best recipes! You can totally mix and match to make it your own.

Don’t have parsley? Use basil! Don’t have basil, use thyme! No herbs in the house? No sweat - this will be amazing no matter what. As long as your corn and tomatoes are fresh, then you’re set.

End of Summer Corn Salad

3 cups corn, off the cob (3-4 cobs)

2 cups sliced tomatoes

1/4 cup chopped parsley

1/4 cup chopped basil

2 tablespoons chopped thyme

2 tablespoons olive oil

1 tablespoon red wine vinegar

salt to taste

Mix everything together and let it rest for about an hour before serving. That’s it!


Korean Beef + Sesame Vegetables

This is on heavy rotation at our house. It’s usually because I haven’t planned on what’s for dinner and this requires very few ingredients and all of them are on hand at our house! We are Korean food fanatics.

I’ve even cheated and made this when the ground beef is still frozen - just pop it in a low pan, cook until it’s browned. Then add all of the marinade ingredients to the pan. Just start the rice first and you’ll be done with the meat right when the rice gets done! Twenty minutes and you’ve got dinner on the table.

Korean Beef

with Sesame Vegetables & Rice

Serves 4

1 pear, grated

¼ cup soy sauce

2 tablespoons brown sugar

2 tablespoons gochujang

1 cloves garlic, grated

1 tablespoon ginger, fresh grated

1 pound ground beef

2 tablespoons sesame oil,

1 tablespoon sesame seeds

½ lb broccolini

½ lb asparagus, cut into 2 inch pieces

2 cups rice

1 jar Kim Chee, for serving

STEP 1

In a medium sauce pan pour in rice and 4 cups of water and bring to a boil.  Reduce heat to low, cover, and cook about 20 minutes until water is evaporated.  Check at 10-ish minutes and give it a stir and make sure it isn’t sticking.  Fluff with a fork before serving.

STEP 2

In a bowl or a Ziploc bag, combine pear, soy sauce, brown sugar, gochujang, garlic, and ginger.  Mix in ground beef and knead with your hands to make sure the beef is covered in sauce.  Set aside.

STEP 3

Heat sesame oil in a large saucepan over high heat.  Quickly sauté sesame seeds, broccolini, and asparagus.  Cook 3-5 minutes until vegetables are bright green and sesame seeds are toasted.  Pour vegetables out of the pan and set aside.

STEP 4

In the same pan, cook the ground beef breaking it up with a spoon while it cooks.  Cook until all pink has disappeared and liquid has evaporated.

STEP 5

To serve, scoop rice on the plate, top with ground beef and top with cooked vegetables.  Add kim chee at the table and let everyone help themselves.


Spicy Beef Kabobs

Now that school has started up again, I’m back to meal planning and weeknight prep. It’s sometimes a drag, but I found that I actually try new recipes during this phase so that works out! I had totally forgotten about these kabobs and they are delicious! I’m also a huge fan of couscous on the weeknight. It cooks in just minutes and then is done just in time for the meat to come off the grill. I’m legit making these tonight.

Oh, and don’t skip the sauce! I’ve discovered recently that having a sauce on the side of every meal makes it totally shine.

Spicy Beef Kabobs

with fresh couscous salad

Serves 4

2 lb sirloin steak, sliced thin

½ onion, grated

¼ cup parsley

¼ cup cilantro

½ tsp allspice

½ tsp coriander

¼ tsp red pepper flakes

½ tsp salt

2 cups chicken stock

1 ½ cups couscous

1 cucumber

1 cup sliced tomato

½ cup chopped parsley

½ sliced red onion

juice of one lemon

zest of one lemon

¼ cup olive oil

2 tbs red wine vinegar

4 oz feta cheese

1 cup plain greek yogurt

¼ cup grated cucumber

1 clove grated garlic

salt

STEP 1

Preheat oven broiler or the grill on high heat.  Soak skewers in water if using wooden skewers.  Combine herbs, spices, and grated onion in a Ziploc bag.

STEP 2

Bring chicken stock to a boil.  Remove from heat and add couscous.  Stir gently then cover and let rest for 5 minutes.

STEP 3

Place thinly sliced meat into the prepared marinade and let rest while the couscous cooks.

STEP 4

Thread meat onto skewers.  Place on a foil lined baking sheet and pop into the oven.  Bake 10-15 minutes until cooked through.

STEP 5

Loosen cooked couscous with a fork.  Toss with chopped cucumber, tomato, remaining parsley, red onion, and dress with lemon, olive oil and red wine vinegar.  Add feta cheese.

STEP 6

Mix together yogurt, grated cucumber, and grated garlic.  Serve couscous and top with kabobs straight from the oven with dipping sauce.