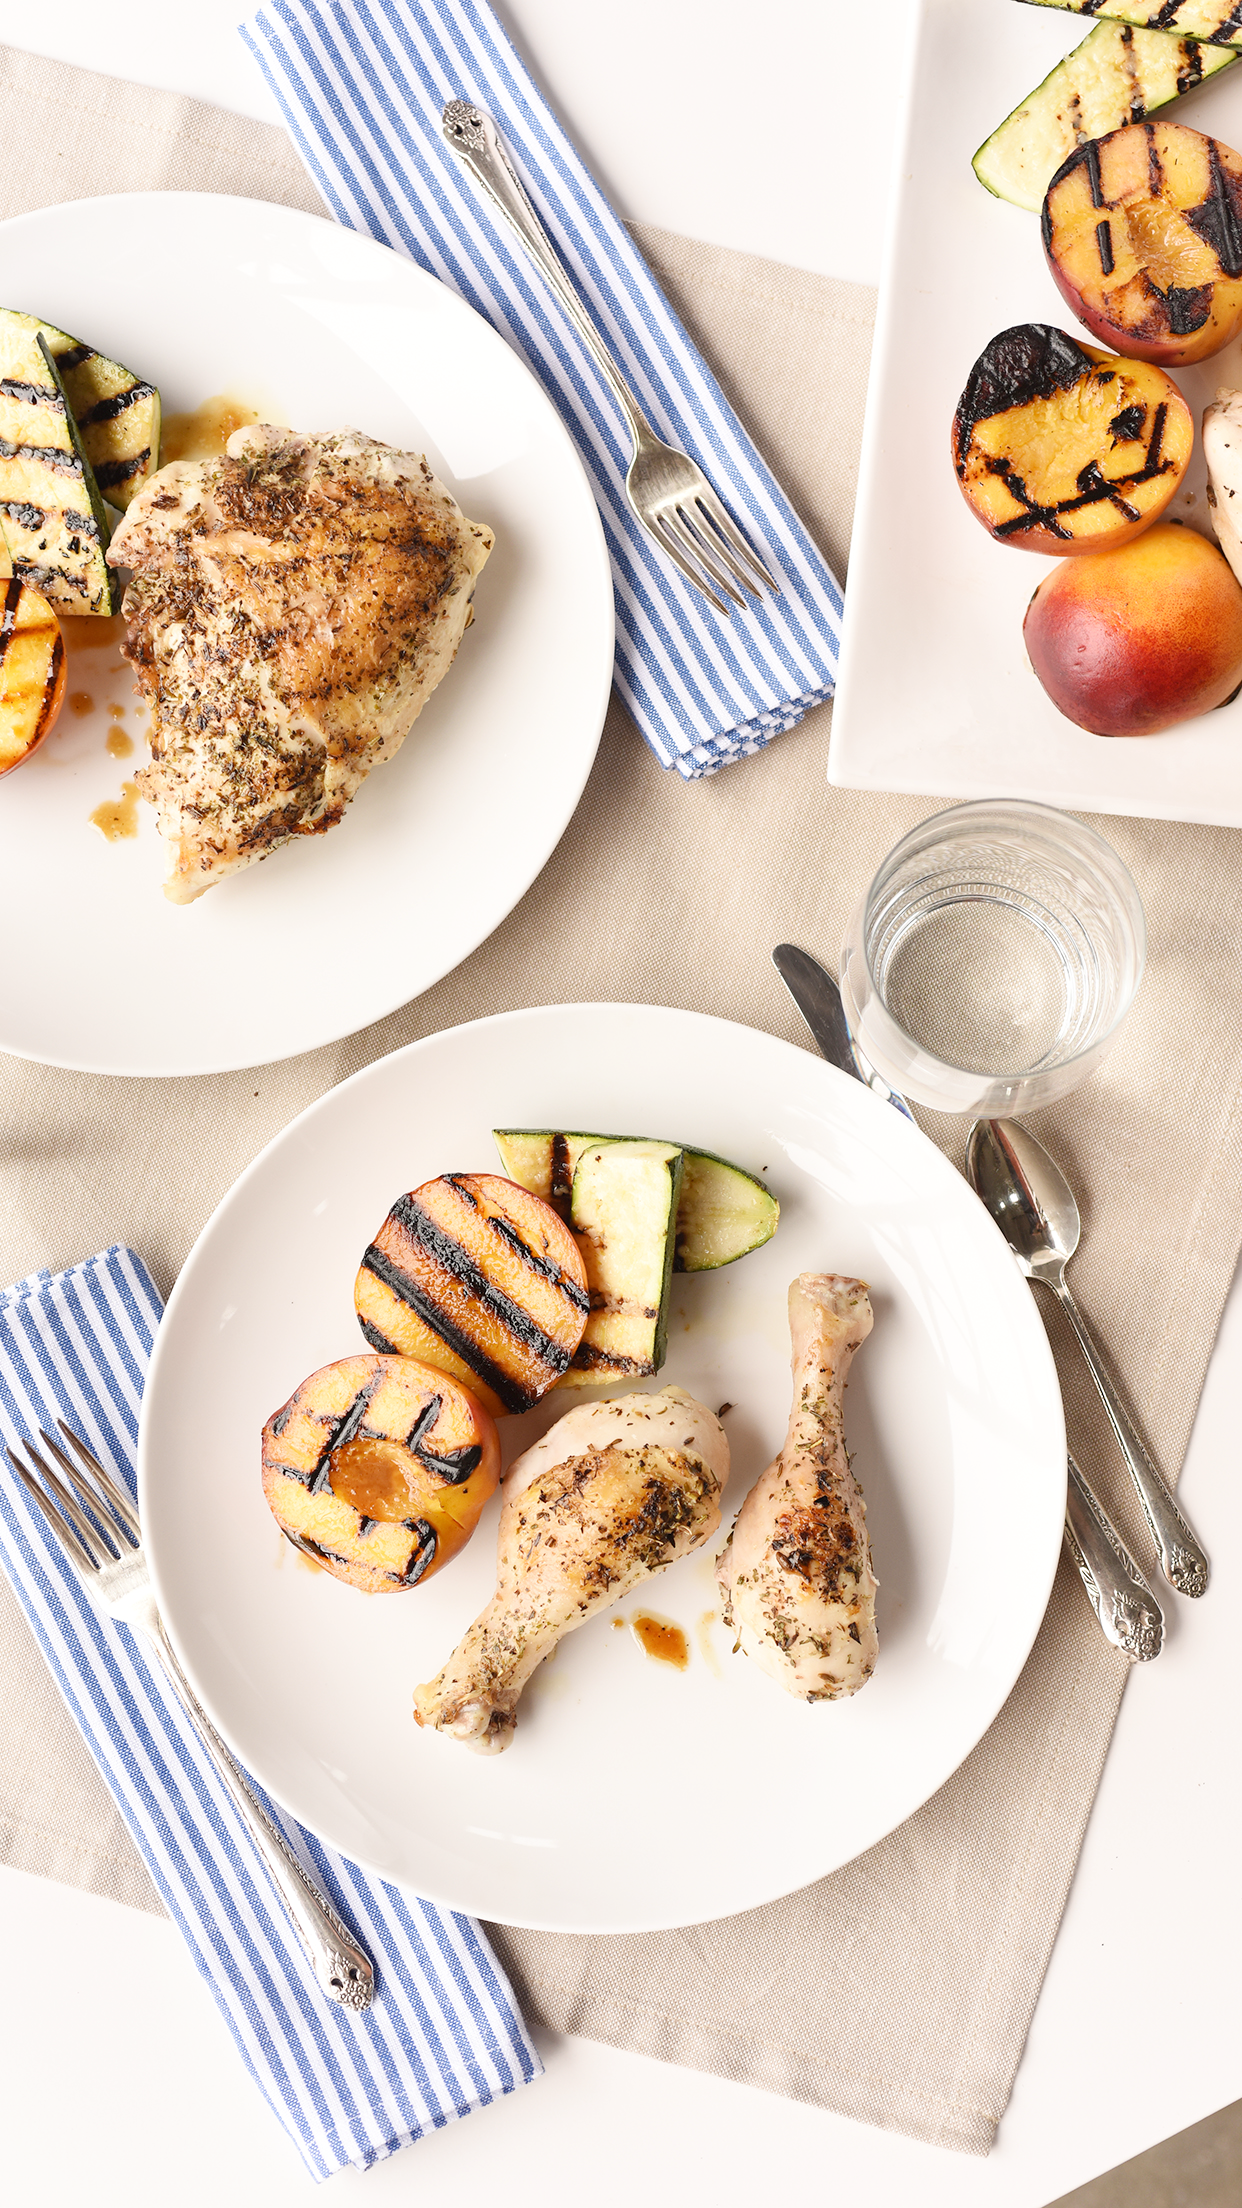
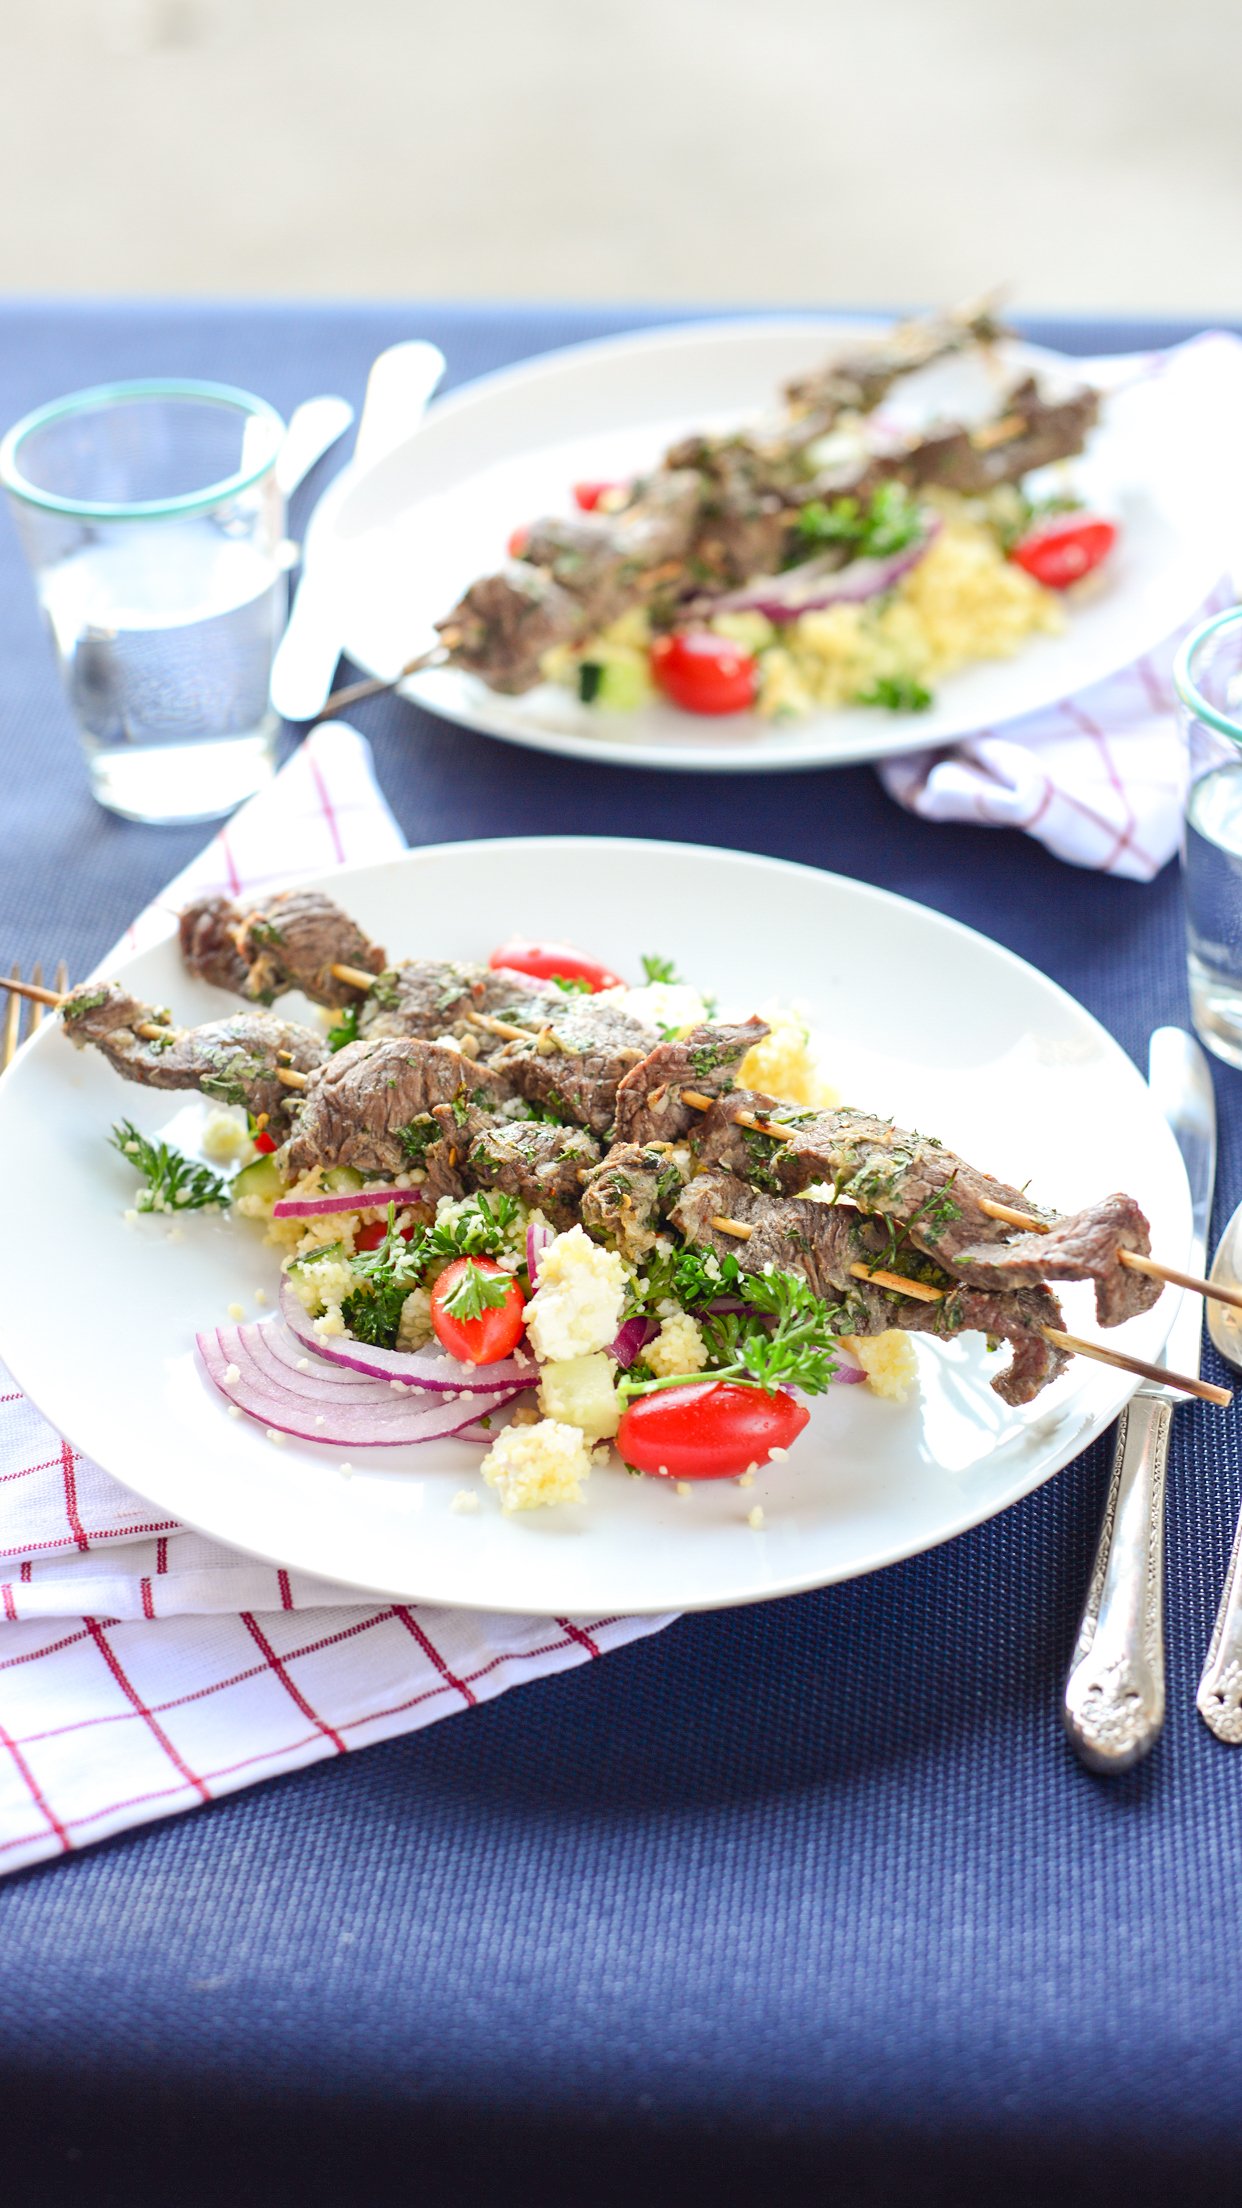
Mustard Chicken Kabobs

I used to make these all the time and I published them on Weeknight Society. This weekend I had a little chicken - not quite enough to make an entire dinner for all of the kids that ended up at my house - so I had to make do. I remembered these skewers. Because there is bread and tomatoes, the chicken goes further than just grilling up some chicken for a house full of hungry teenagers.
This is also a solution for your family dinner because the cut chicken cooks faster and the couscous will be done in less than five minutes. I love this dinner because it’s quick and easy AND full of flavor. Mustard + horseradish is a magical combination and a little mayo helps keep the chicken moist while it cooks. Chicken breasts have a tenancy to dry out.
Mustard Kabobs with lemon couscous
Serves 4
1 cup mayonnaise
½ cup Dijon mustard
2 teaspoons horseradish
2 lemons, one zested and both juiced
2 pounds chicken breast, cut into cubes
2 cups cherry tomatoes
1 large loaf crusty bread (cut into about 2 cups bread cubes)
1 cup couscous
1 ¼ cup chicken stock
2 tablespoons olive oil
salt and pepper
¼ cup parsley, chopped
STEP 1
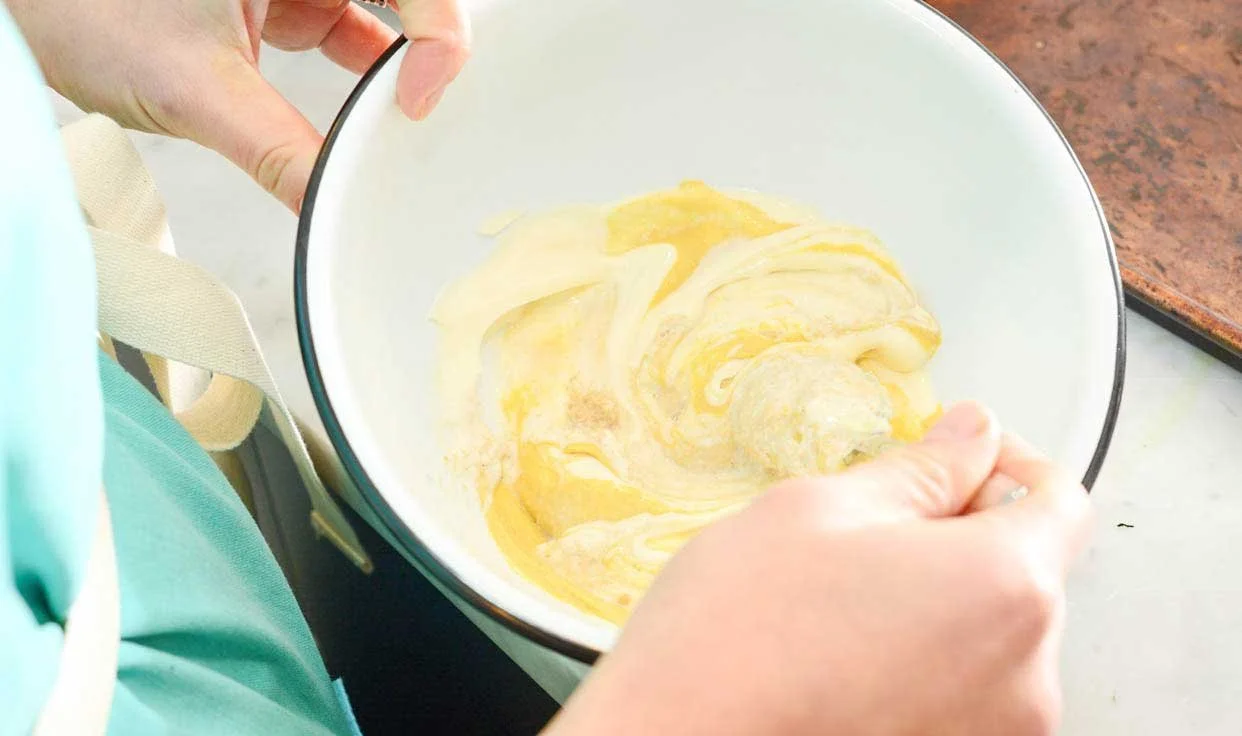
In a large bowl, whisk together mayonnaise, mustard, horseradish, lemon zest and juice. Scoop out a ½ cup to use for dipping sauce. Add the chicken to the large bowl and coat all of the pieces evenly.
STEP 2
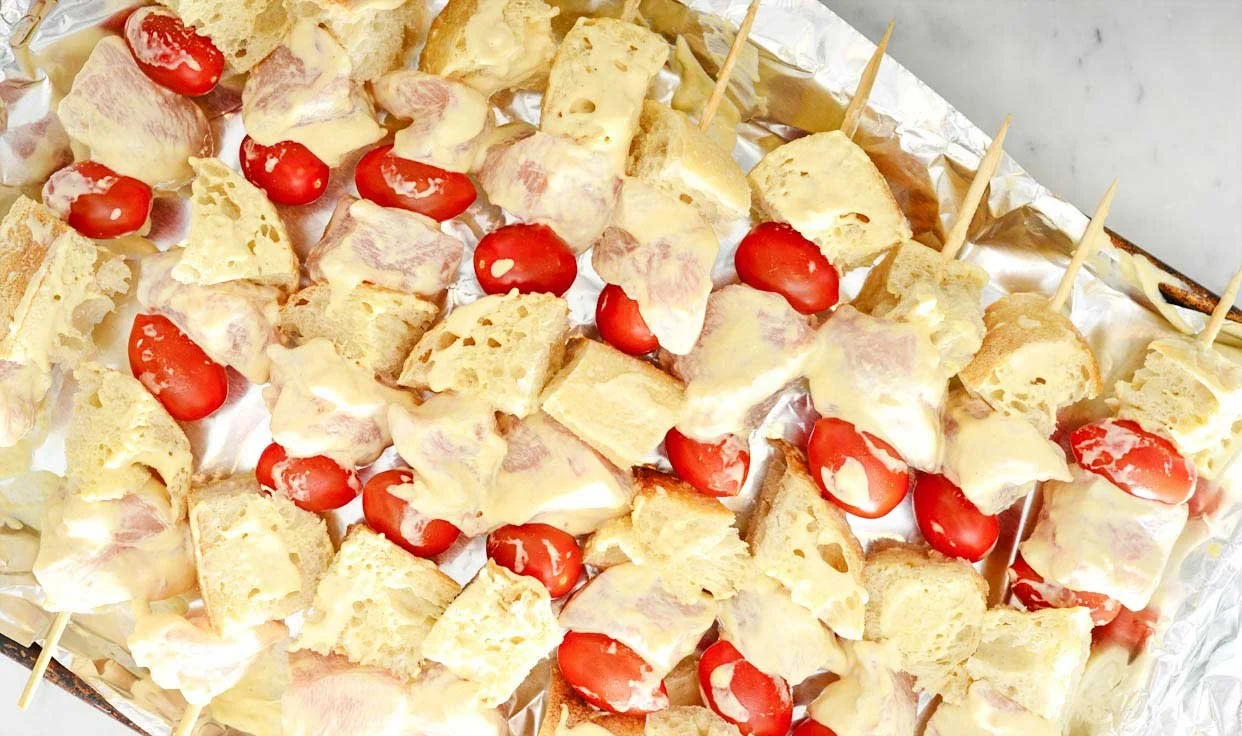
Preheat broiler to 500 degrees. Or heat the barbecue.
Line a baking sheet with foil. Thread chicken, tomatoes, and bread on bamboo skewers alternating every other one. Place skewers on the foil covered sheet. Pop into the hot oven and watch carefully. Flip skewers every five minutes to evenly brown on all sides. Chicken should be fully cooked after 15 minutes.
It’s the same routine on the barbecue - keep on a medium high heat and flip until the chicken is cooked through. The size of your cubes will determine how long the chicken needs to cook.
STEP 3
Bring chicken stock to a boil over high heat. Once it comes to a boil, shut the heat off and pour in couscous. Let sit – covered - five minutes. Fluff with a fork to loosen up the grains. Pour in oil, lemon juice, parsley, and season with salt and pepper. Toss to coat all couscous completely. Leave covered until ready to serve.


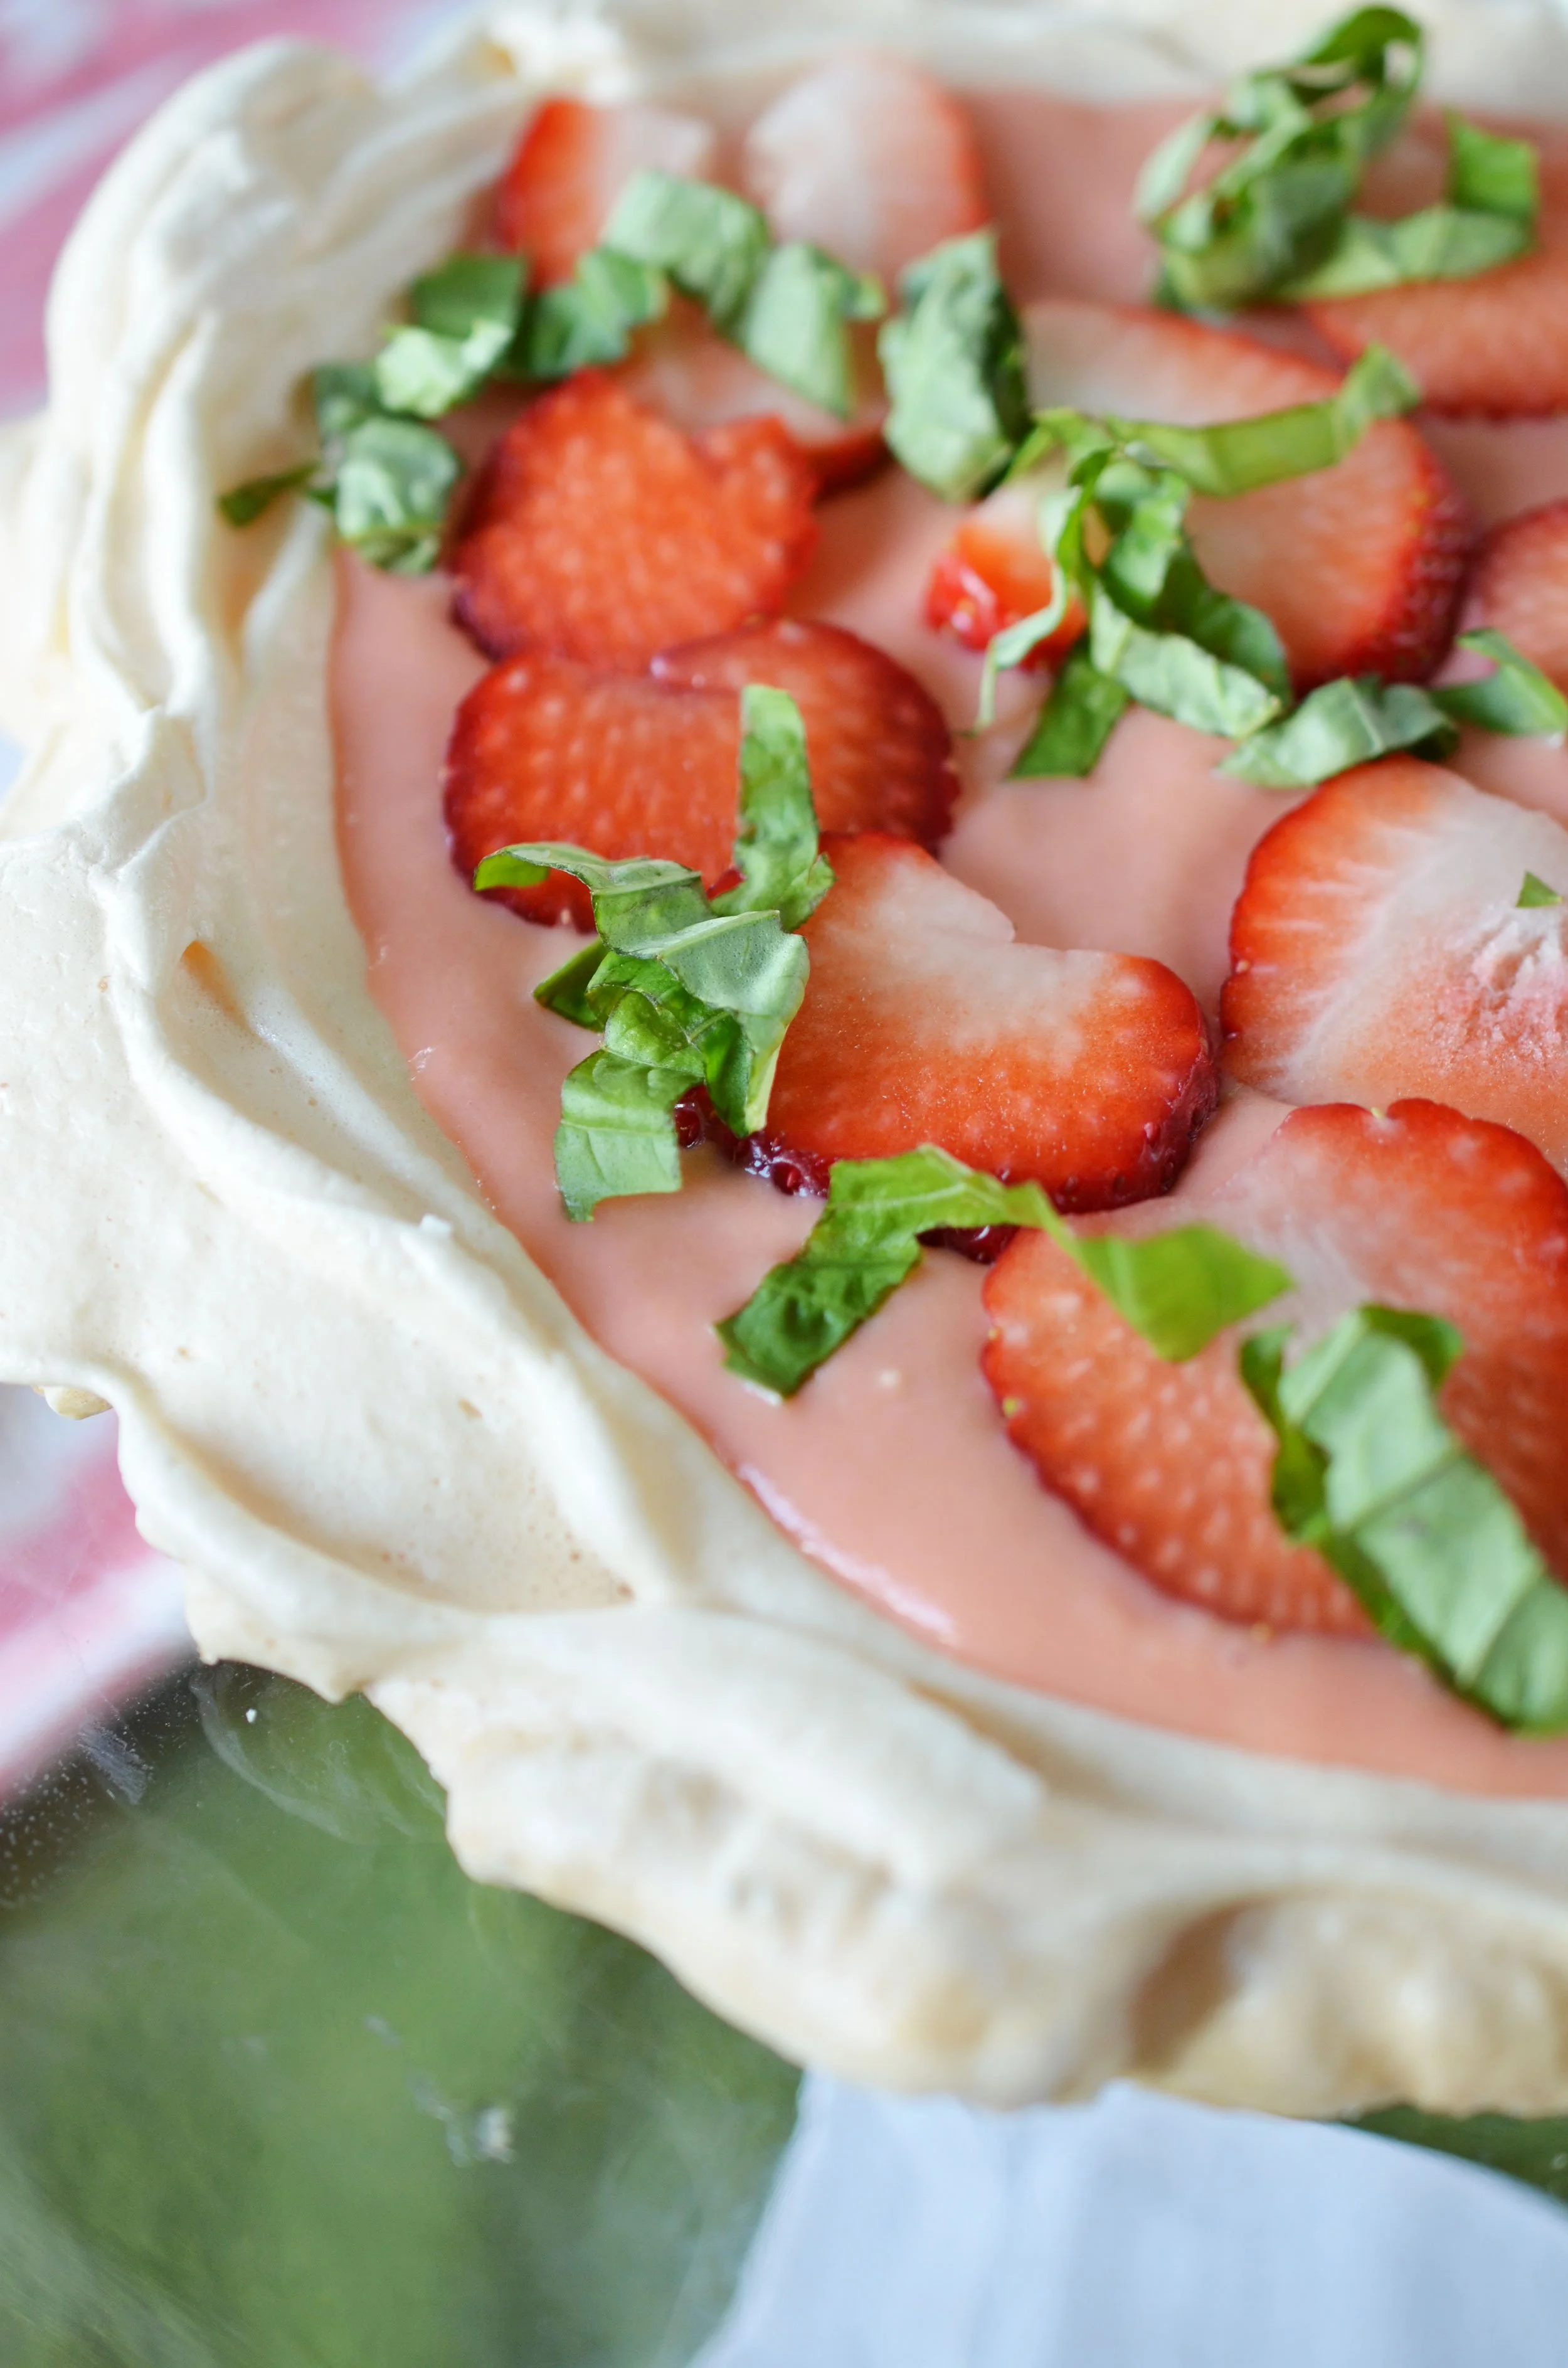
Rhubarb Curd Meringue

Rhubarb Curd
makes 2 cups
3 cups rhubarb, chopped
1 tablespoon water
2 eggs
2 egg yolks
1/2 cup sugar
1 teaspoon vanilla
6 tablespoons room temperature butter, cut into tablespoon measurements
STEP 1
Cook the rhubarb and water together over low heat until the rhubarb is soft. The water is just to make sure it doesn’t burn to start off. This step takes about 20 minutes. I often do this with frozen rhubarb, so then it takes a little longer.
STEP 2
Puree the rhubarb until totally smooth - with all of the liquid that has gathered in the pan. The pour the puree back into the pan. Let this cool completely. Like possibly even do it the next day, or slip it into the fridge. If not, the next step will lead to scrambled eggs.
STEP 3
Whisk in eggs. egg yolks, and vanilla while the puree is still cold. Turn on the heat to medium low and cook until the mixture begins to bubble. Once it is hot, whisk in the sugar in a slow stream to ensure it dissolves completely. Whisk over medium heat, keeping everything hot.
STEP 4
One tablespoon at a time, whisk in the butter. Make sure each one melts before you add the next one.
STEP 5
Once all of the butter has been fully incorporated, remove from heat and let cool. The mixture should have thickened up but will still seem saucy. Once it cools completely, the curd will be more like a jelly consistency.
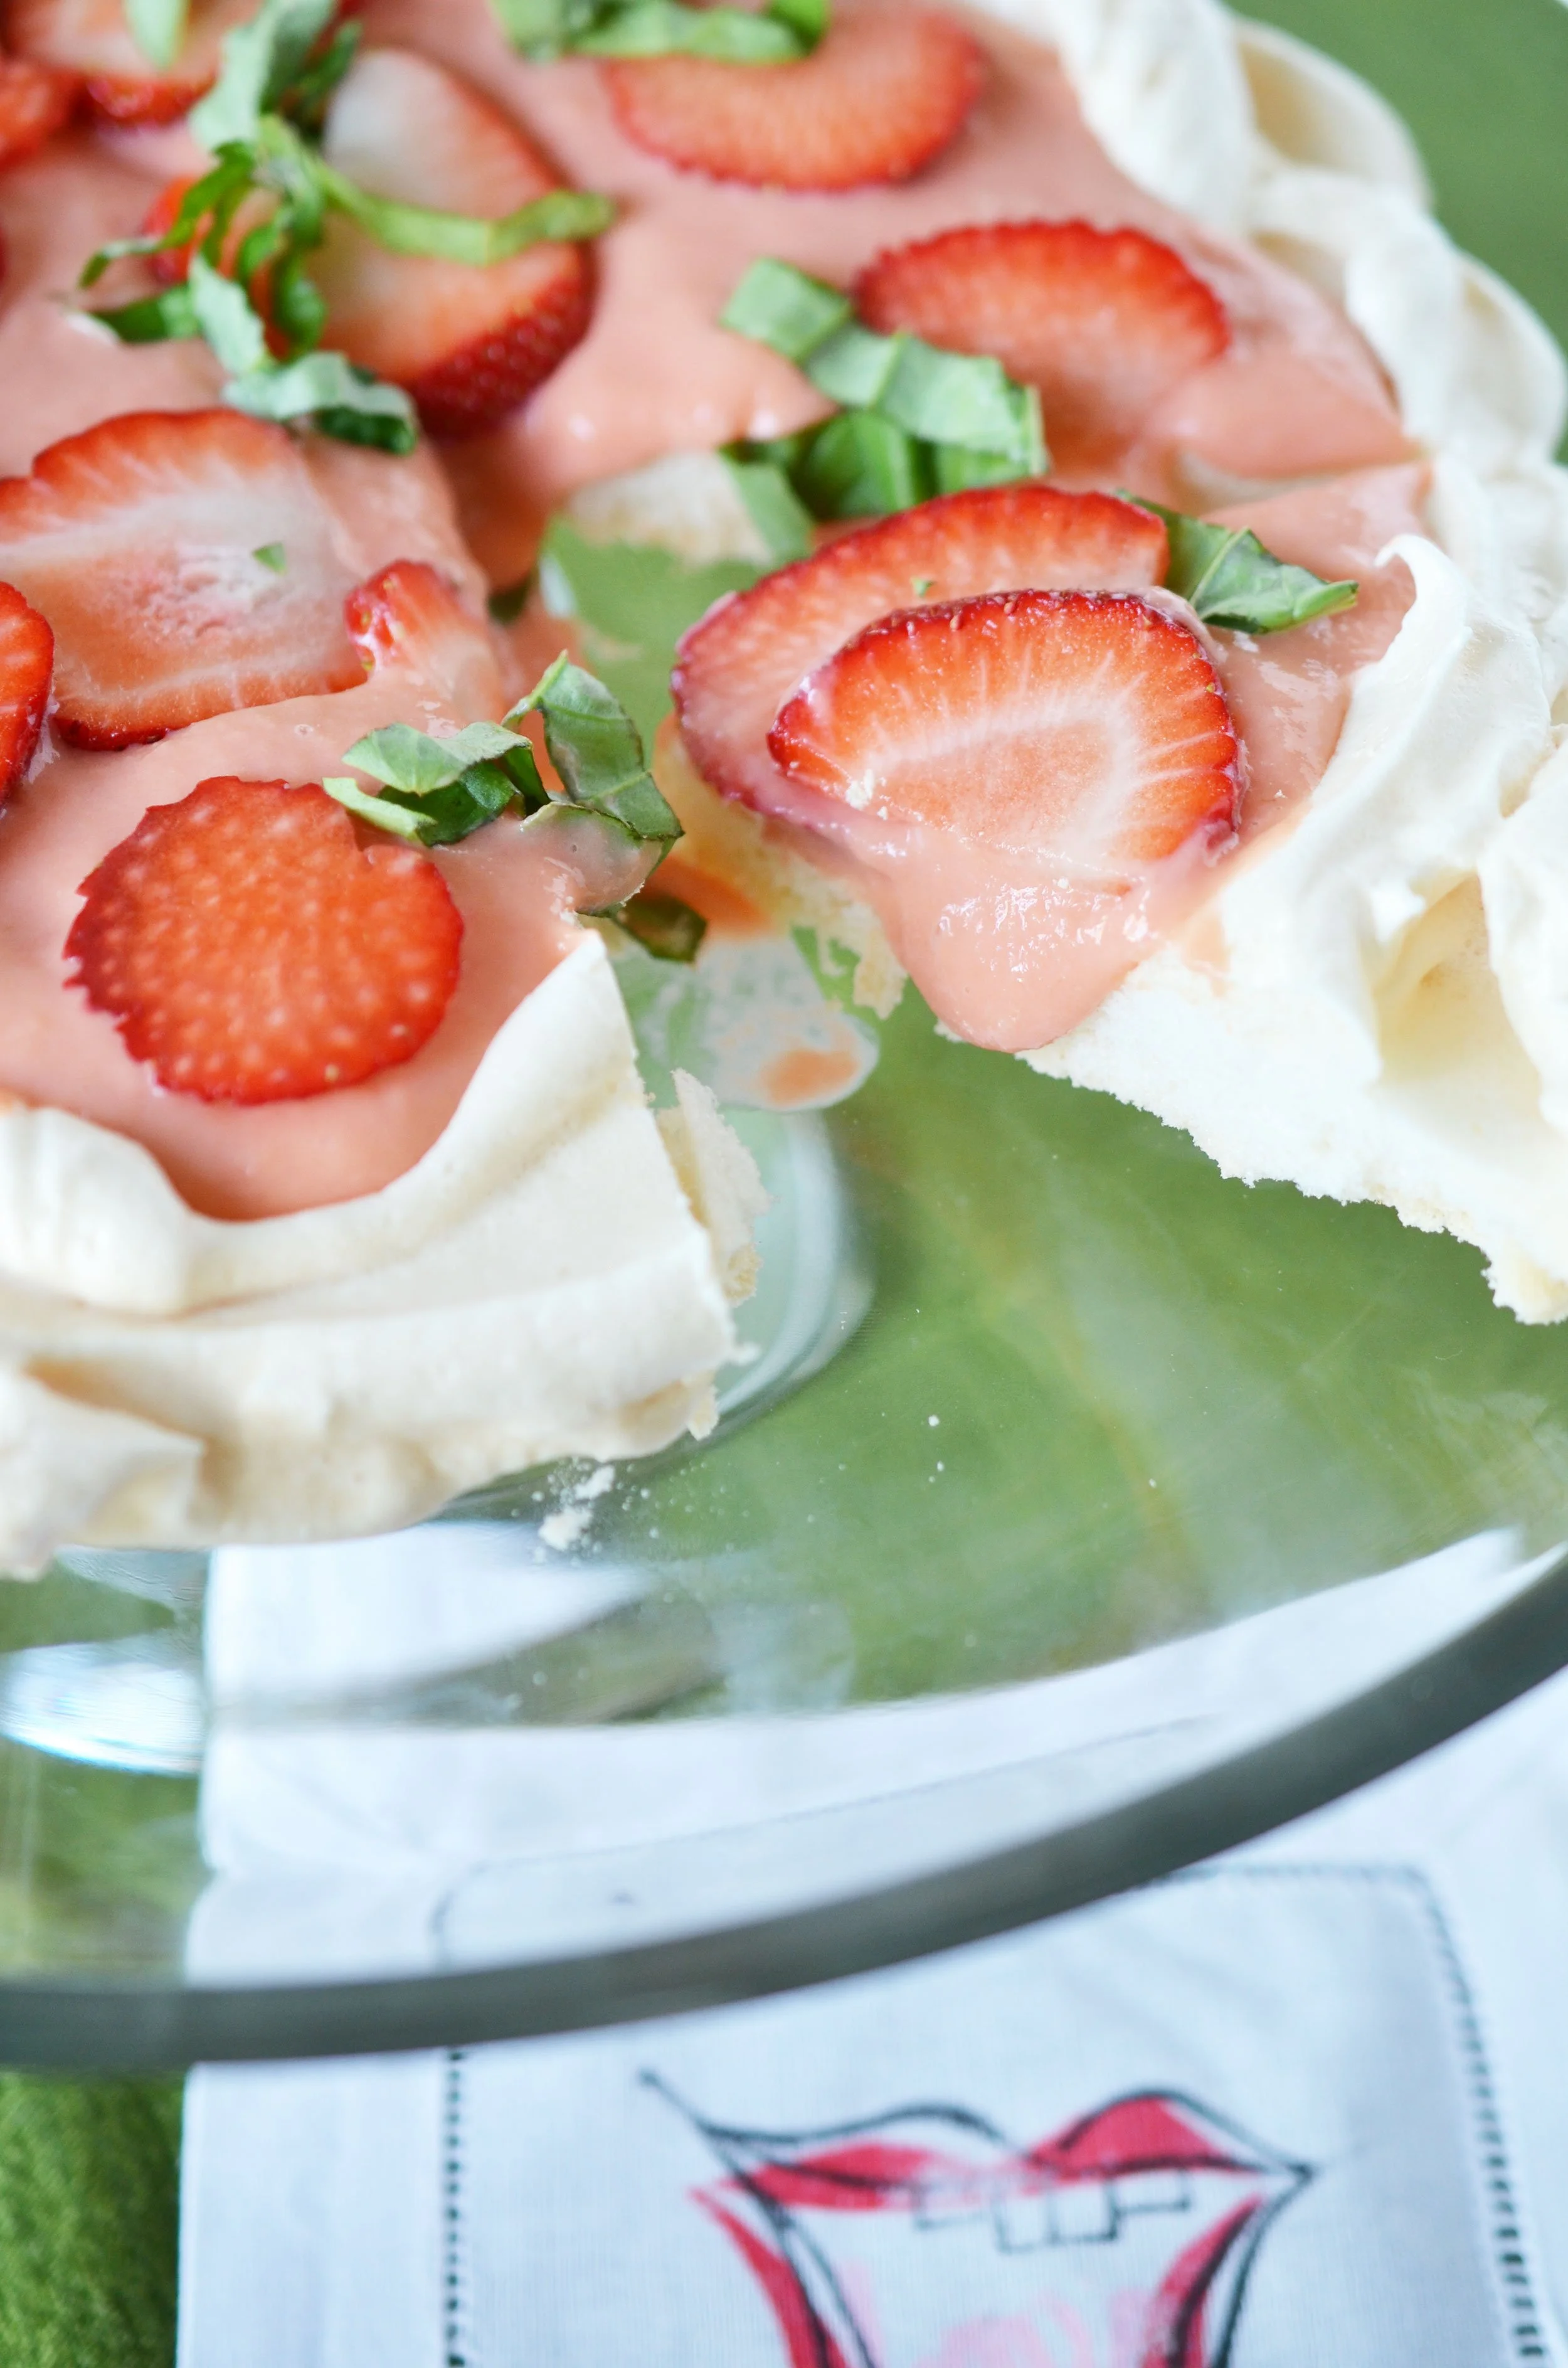
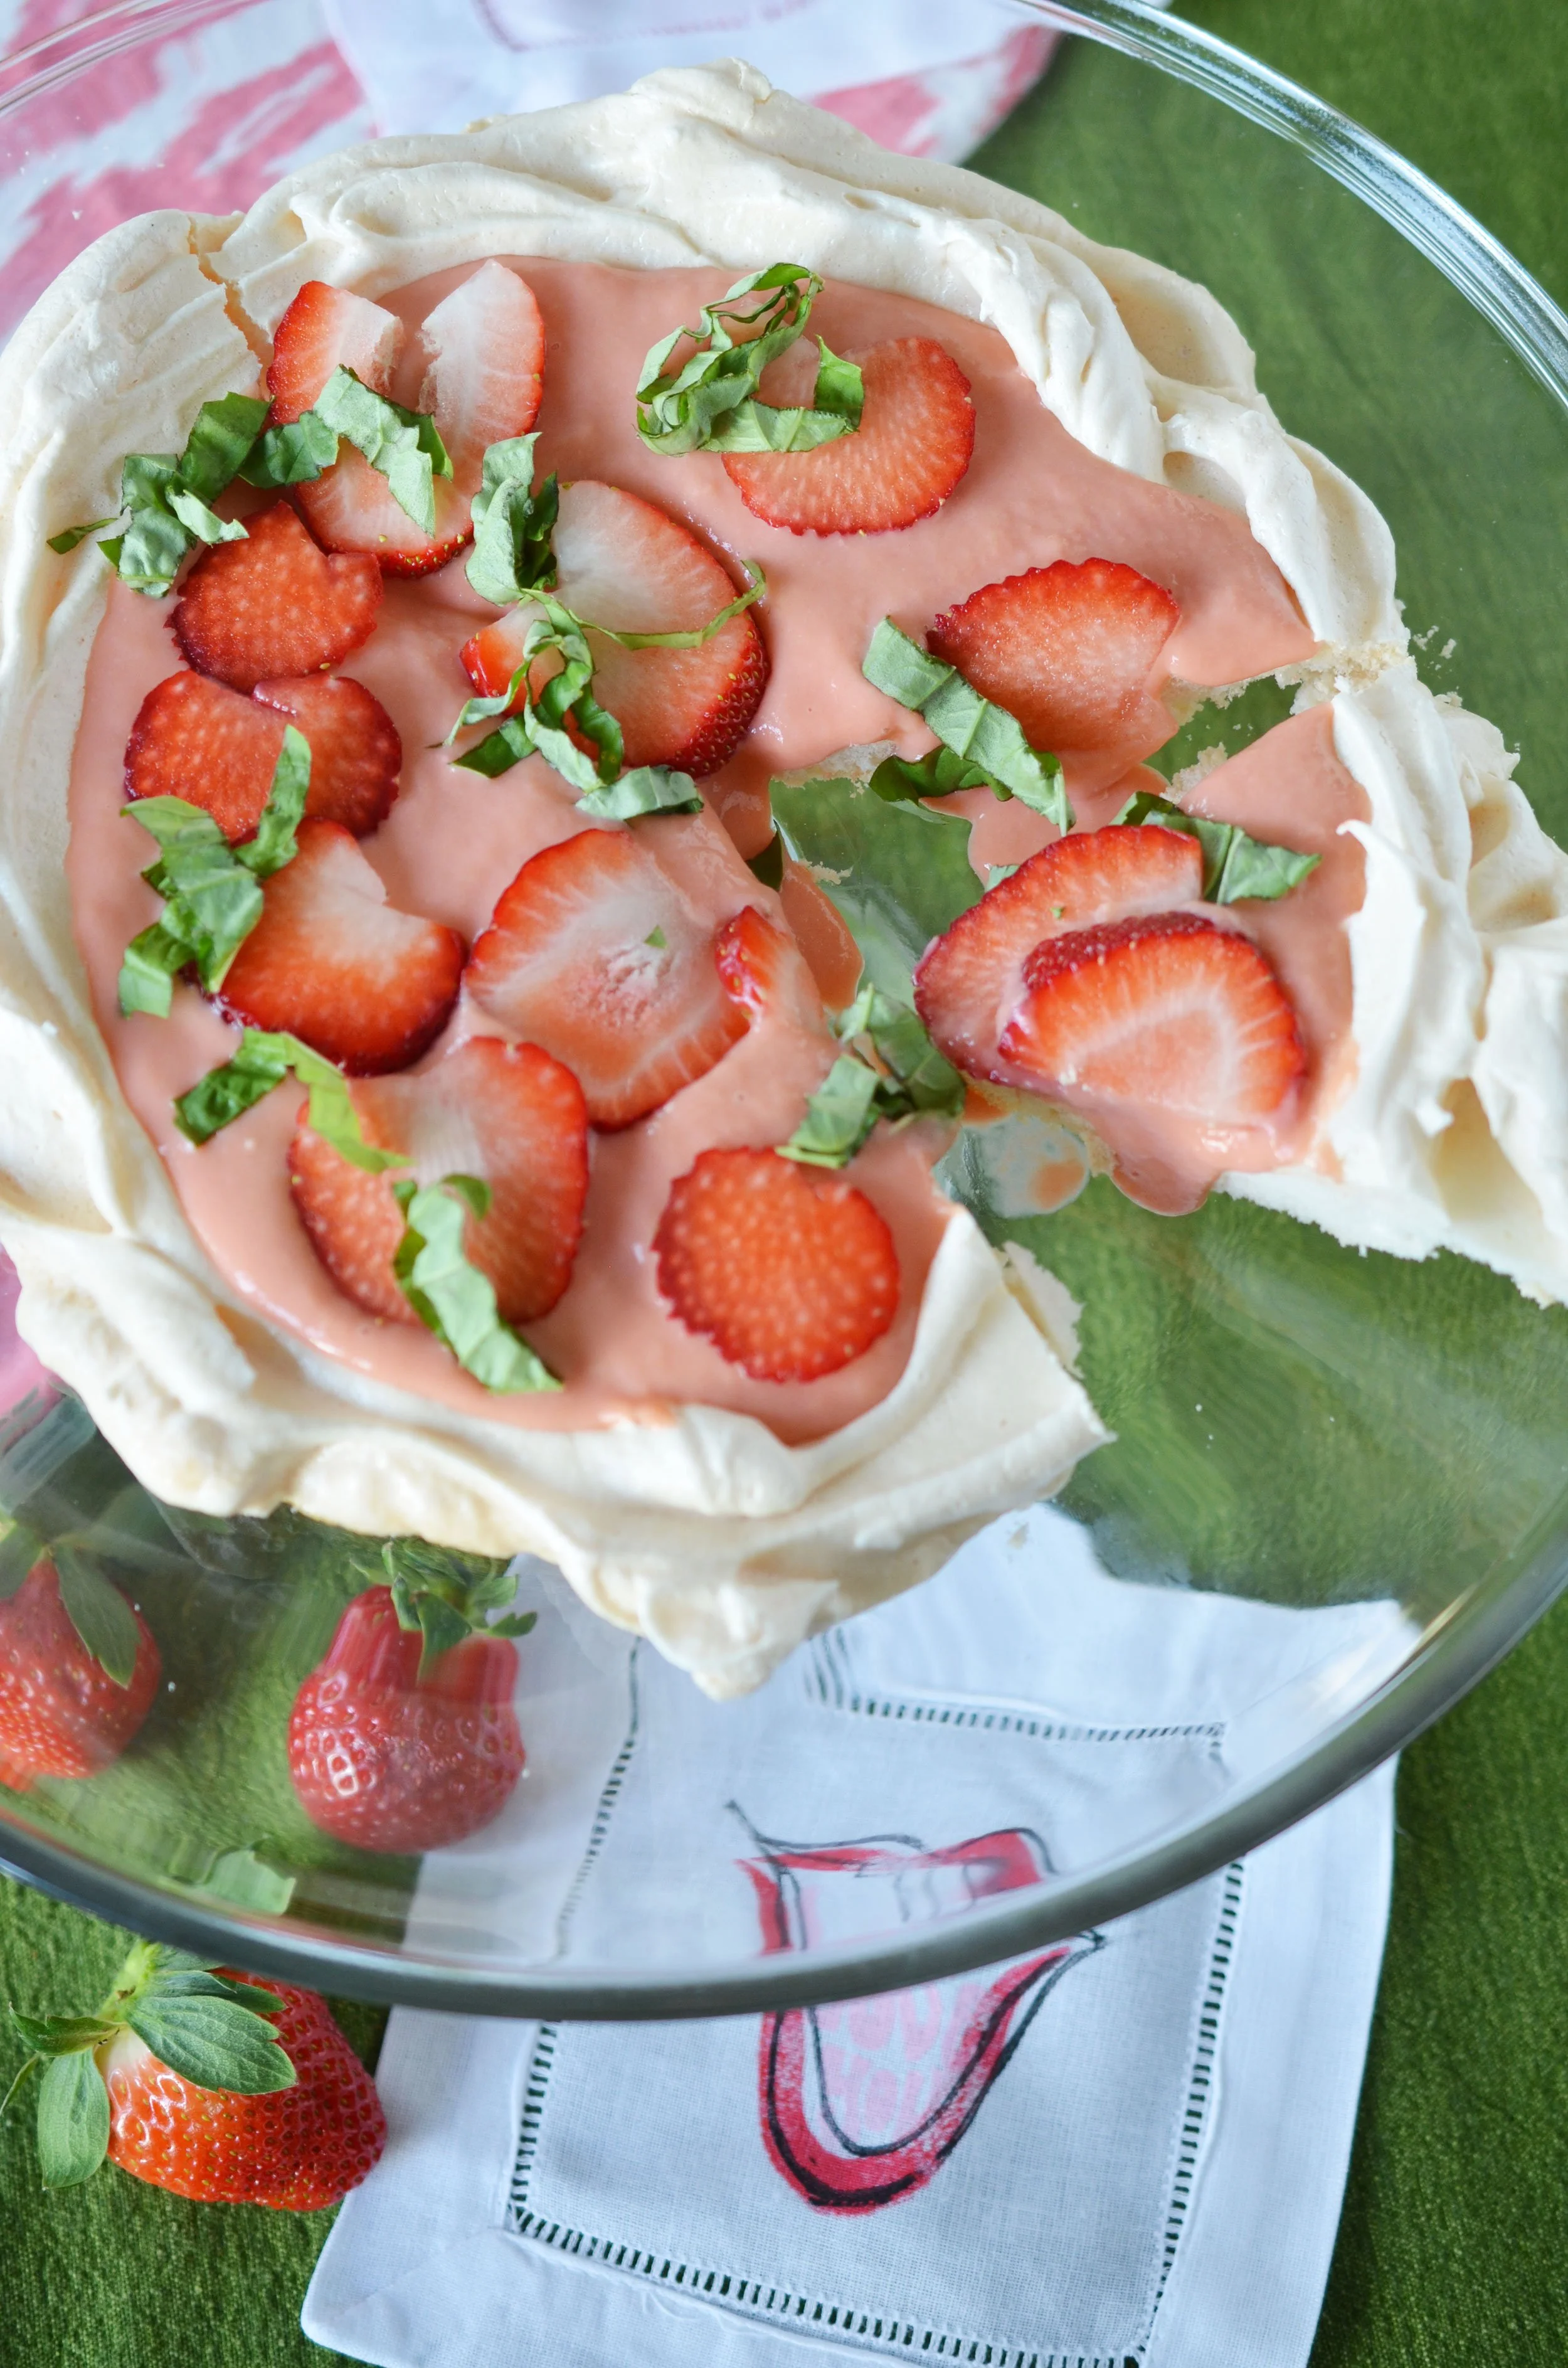
To assemble the meringue, make this meringue recipe into one large flat “cake” shape. Then layer the curd on top and dot the top of the curd with berries and chopped mint or basil. Serve right away!


Basic Meringue
Basic Meringue Recipe
For a few years I made a meringue all the time. It was Pearl’s request every birthday and they are so light and simple that it was an easy request to fill.
My mom has conditions, like the weather has to be right or the meringue won’t work. I imagine if you live somewhere outside of sea level, this probably works regularly for you. If you live in the Seattle area - or anywhere that has “misty” days, you will need to choose your day to make this accordingly. It really does seem to stay chewier on days when the weather is damp. A dry sunny winter day is actually the perfect day for meringue.
There are three secrets to making the perfect meringue:
1. Don’t make these when it’s pouring down rain, the humidity kills them.
2. Don’t go too fast with the sugar. Be slow.
3. Watch your oven temperature and don’t rush anything.

Basic MeringuE
4 large egg whites
pinch of salt
1/2 cup sugar
1/4 teaspoon meringue powder
STEP 1
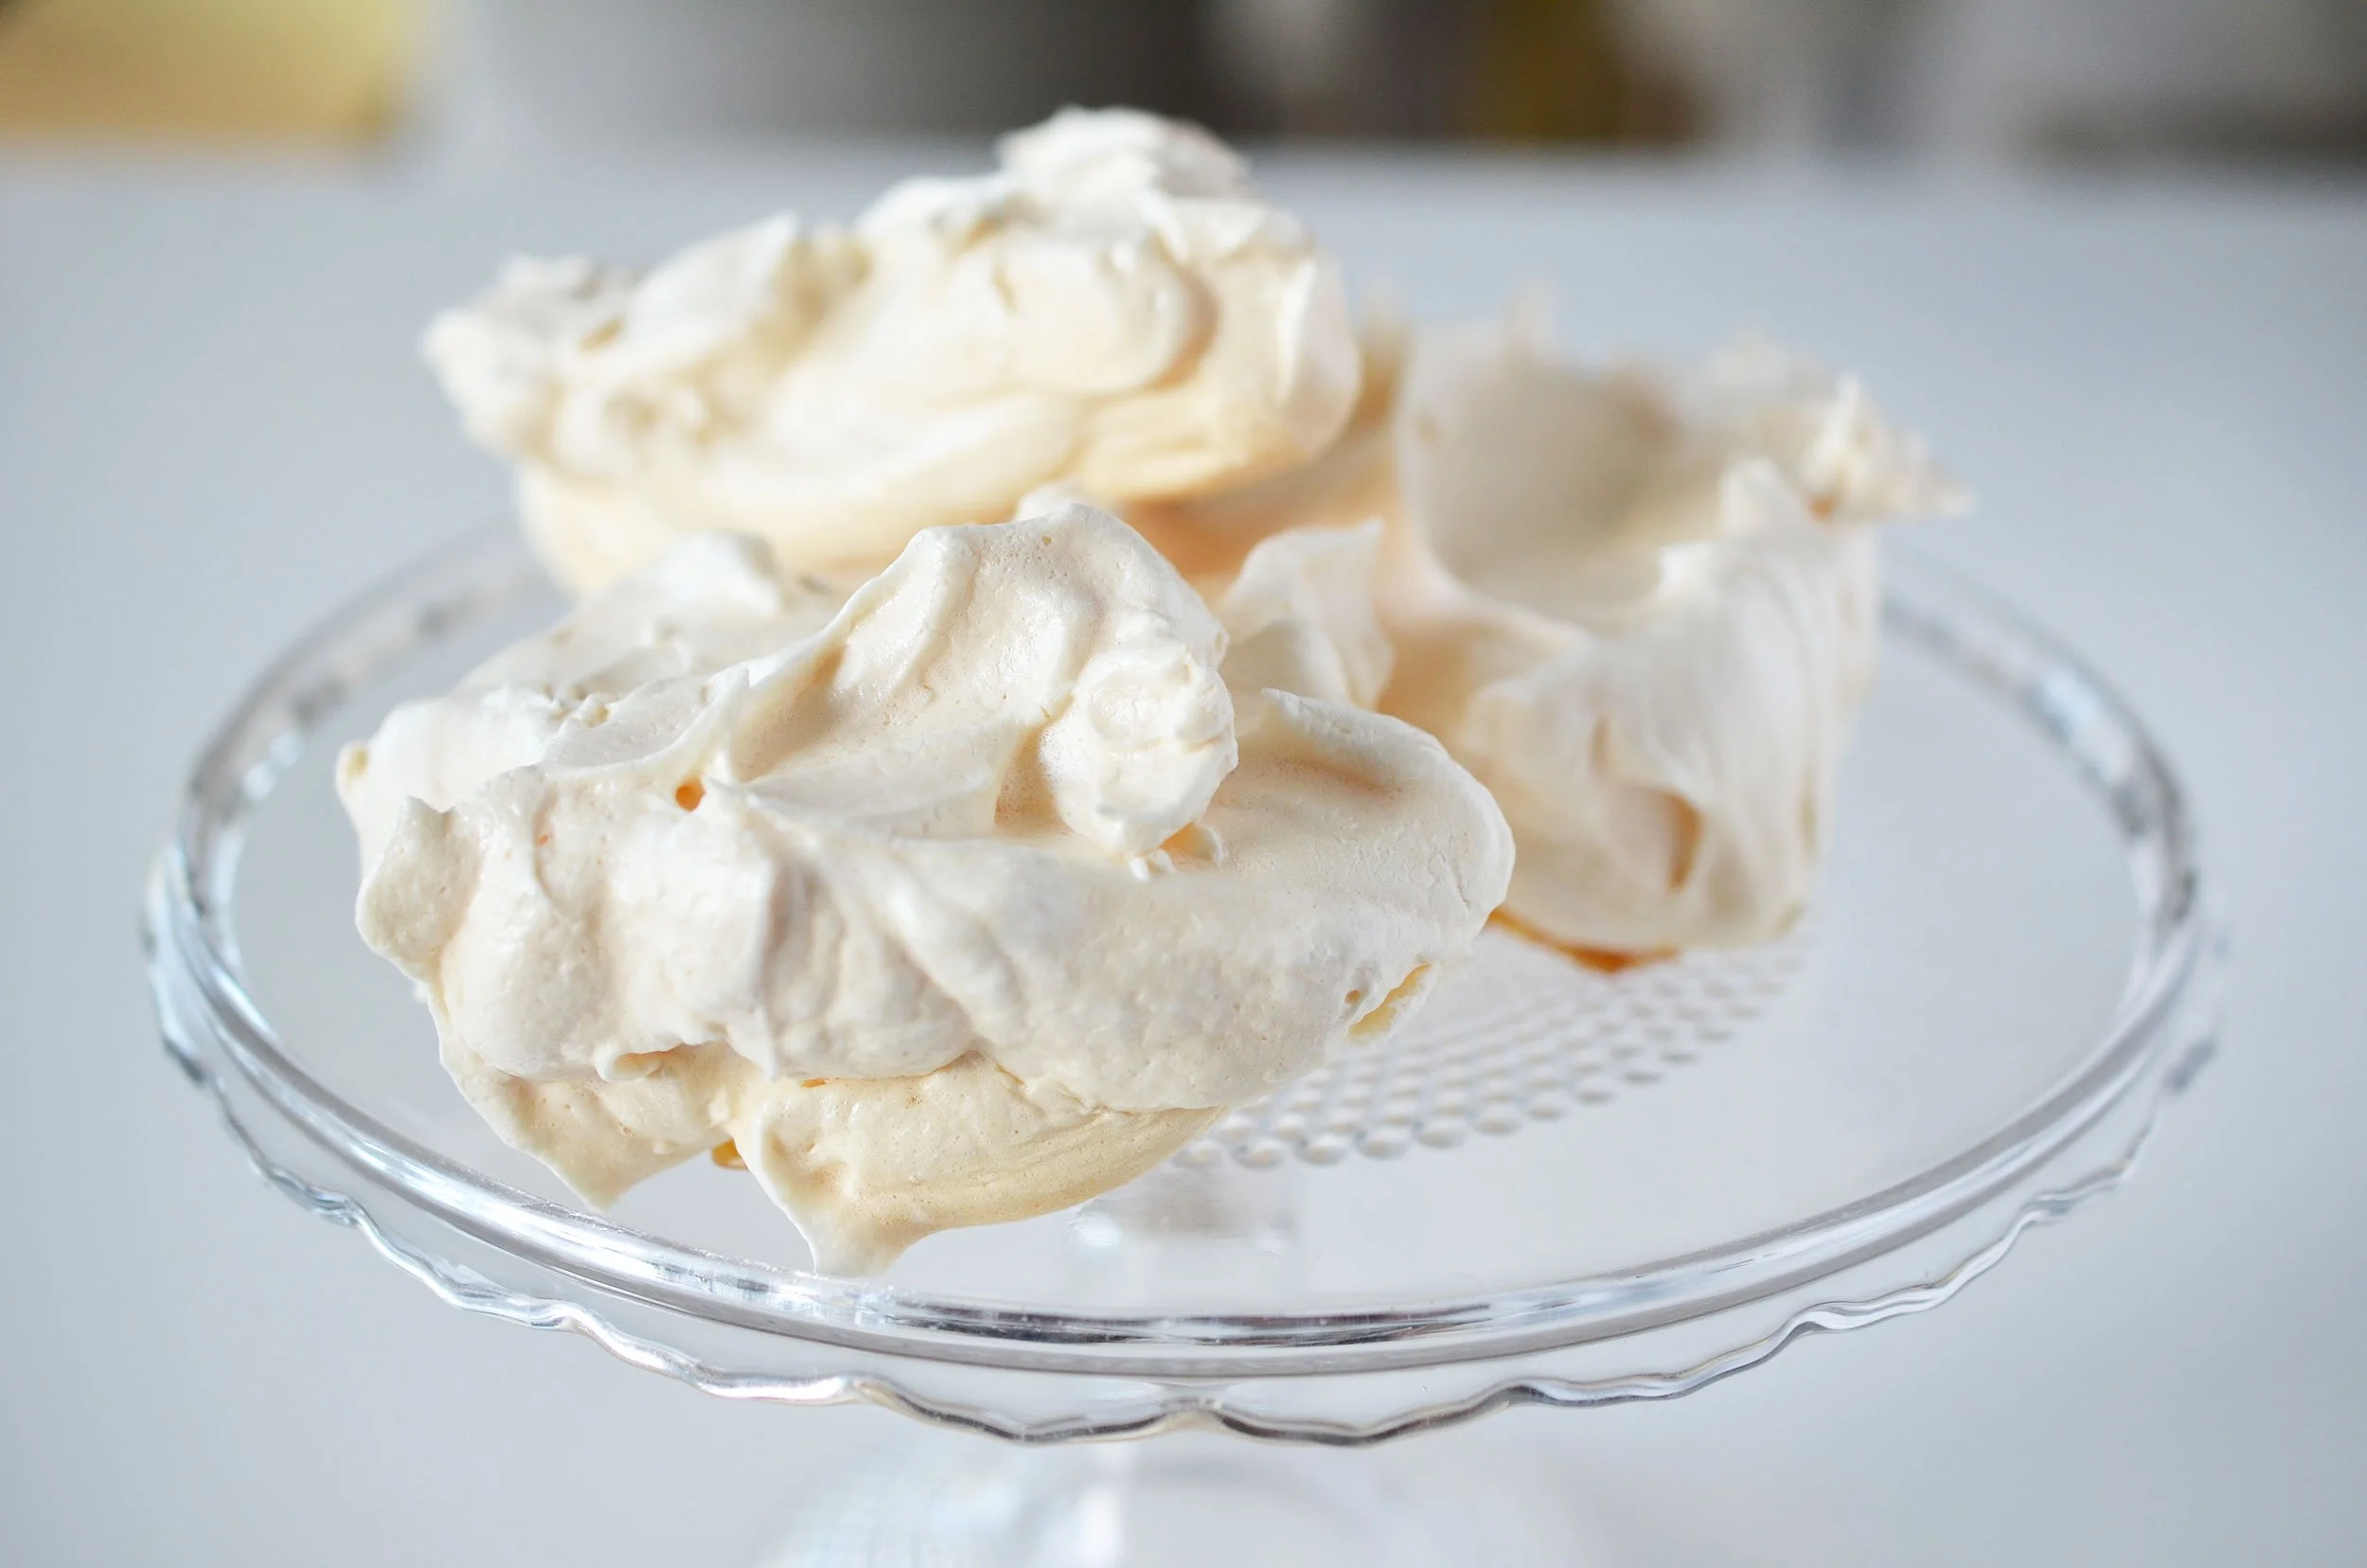
Preheat oven to 200 degrees. Line two baking sheets with sil-pat or parchment paper.
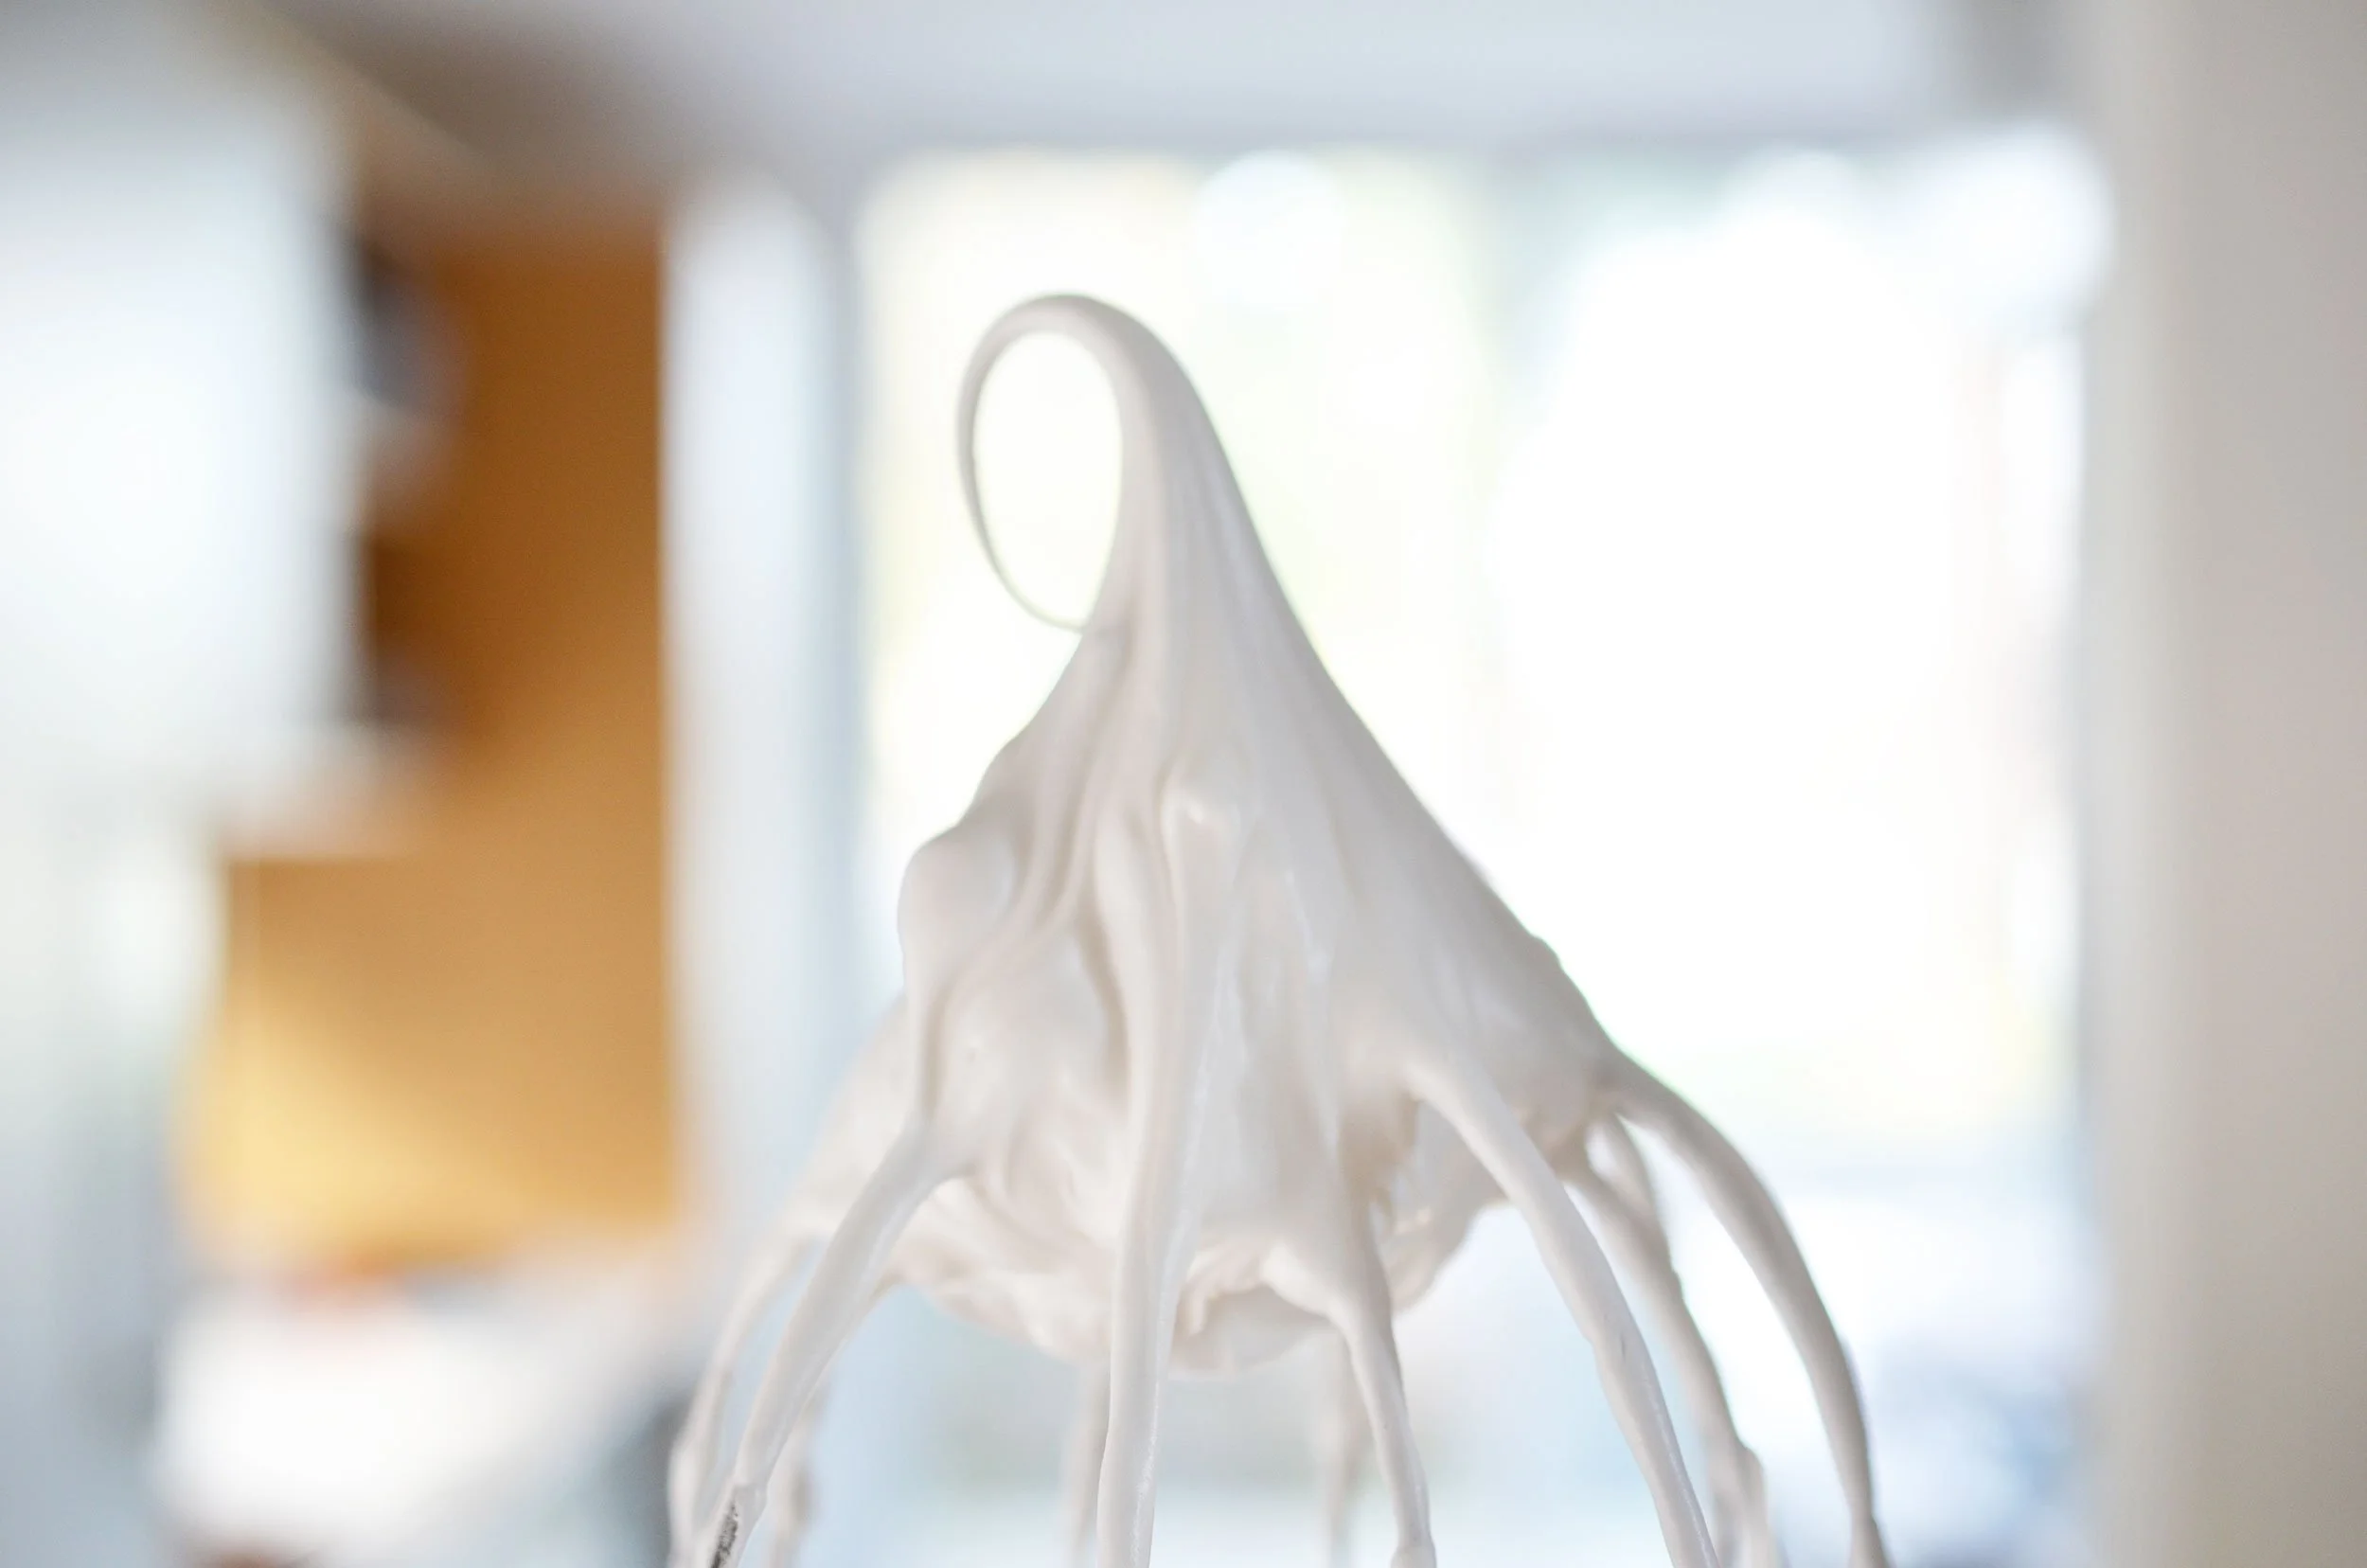
In a stand mixer, whisk together egg whites and salt until bubbly. With the mixer running slowly add sugar and meringue powder. Whisk until stiff peaks form - about five minutes.
STEP 2
Divide the meringue into two equal portions and spread to a 2” thick layer on each of the parchment lined pans.
STEP 3
Bake meringues two hours until crisp to the touch. Turn off the heat and let sit in the oven one hour - without opening the door. Remove from the oven and make sure they are completely cool before topping them.
These store about a week in an airtight container. But I recommend letting them cool, then immediately turning them into dessert! Either layer with my Rhubarb Curd, or any kind of berries and whipped cream.


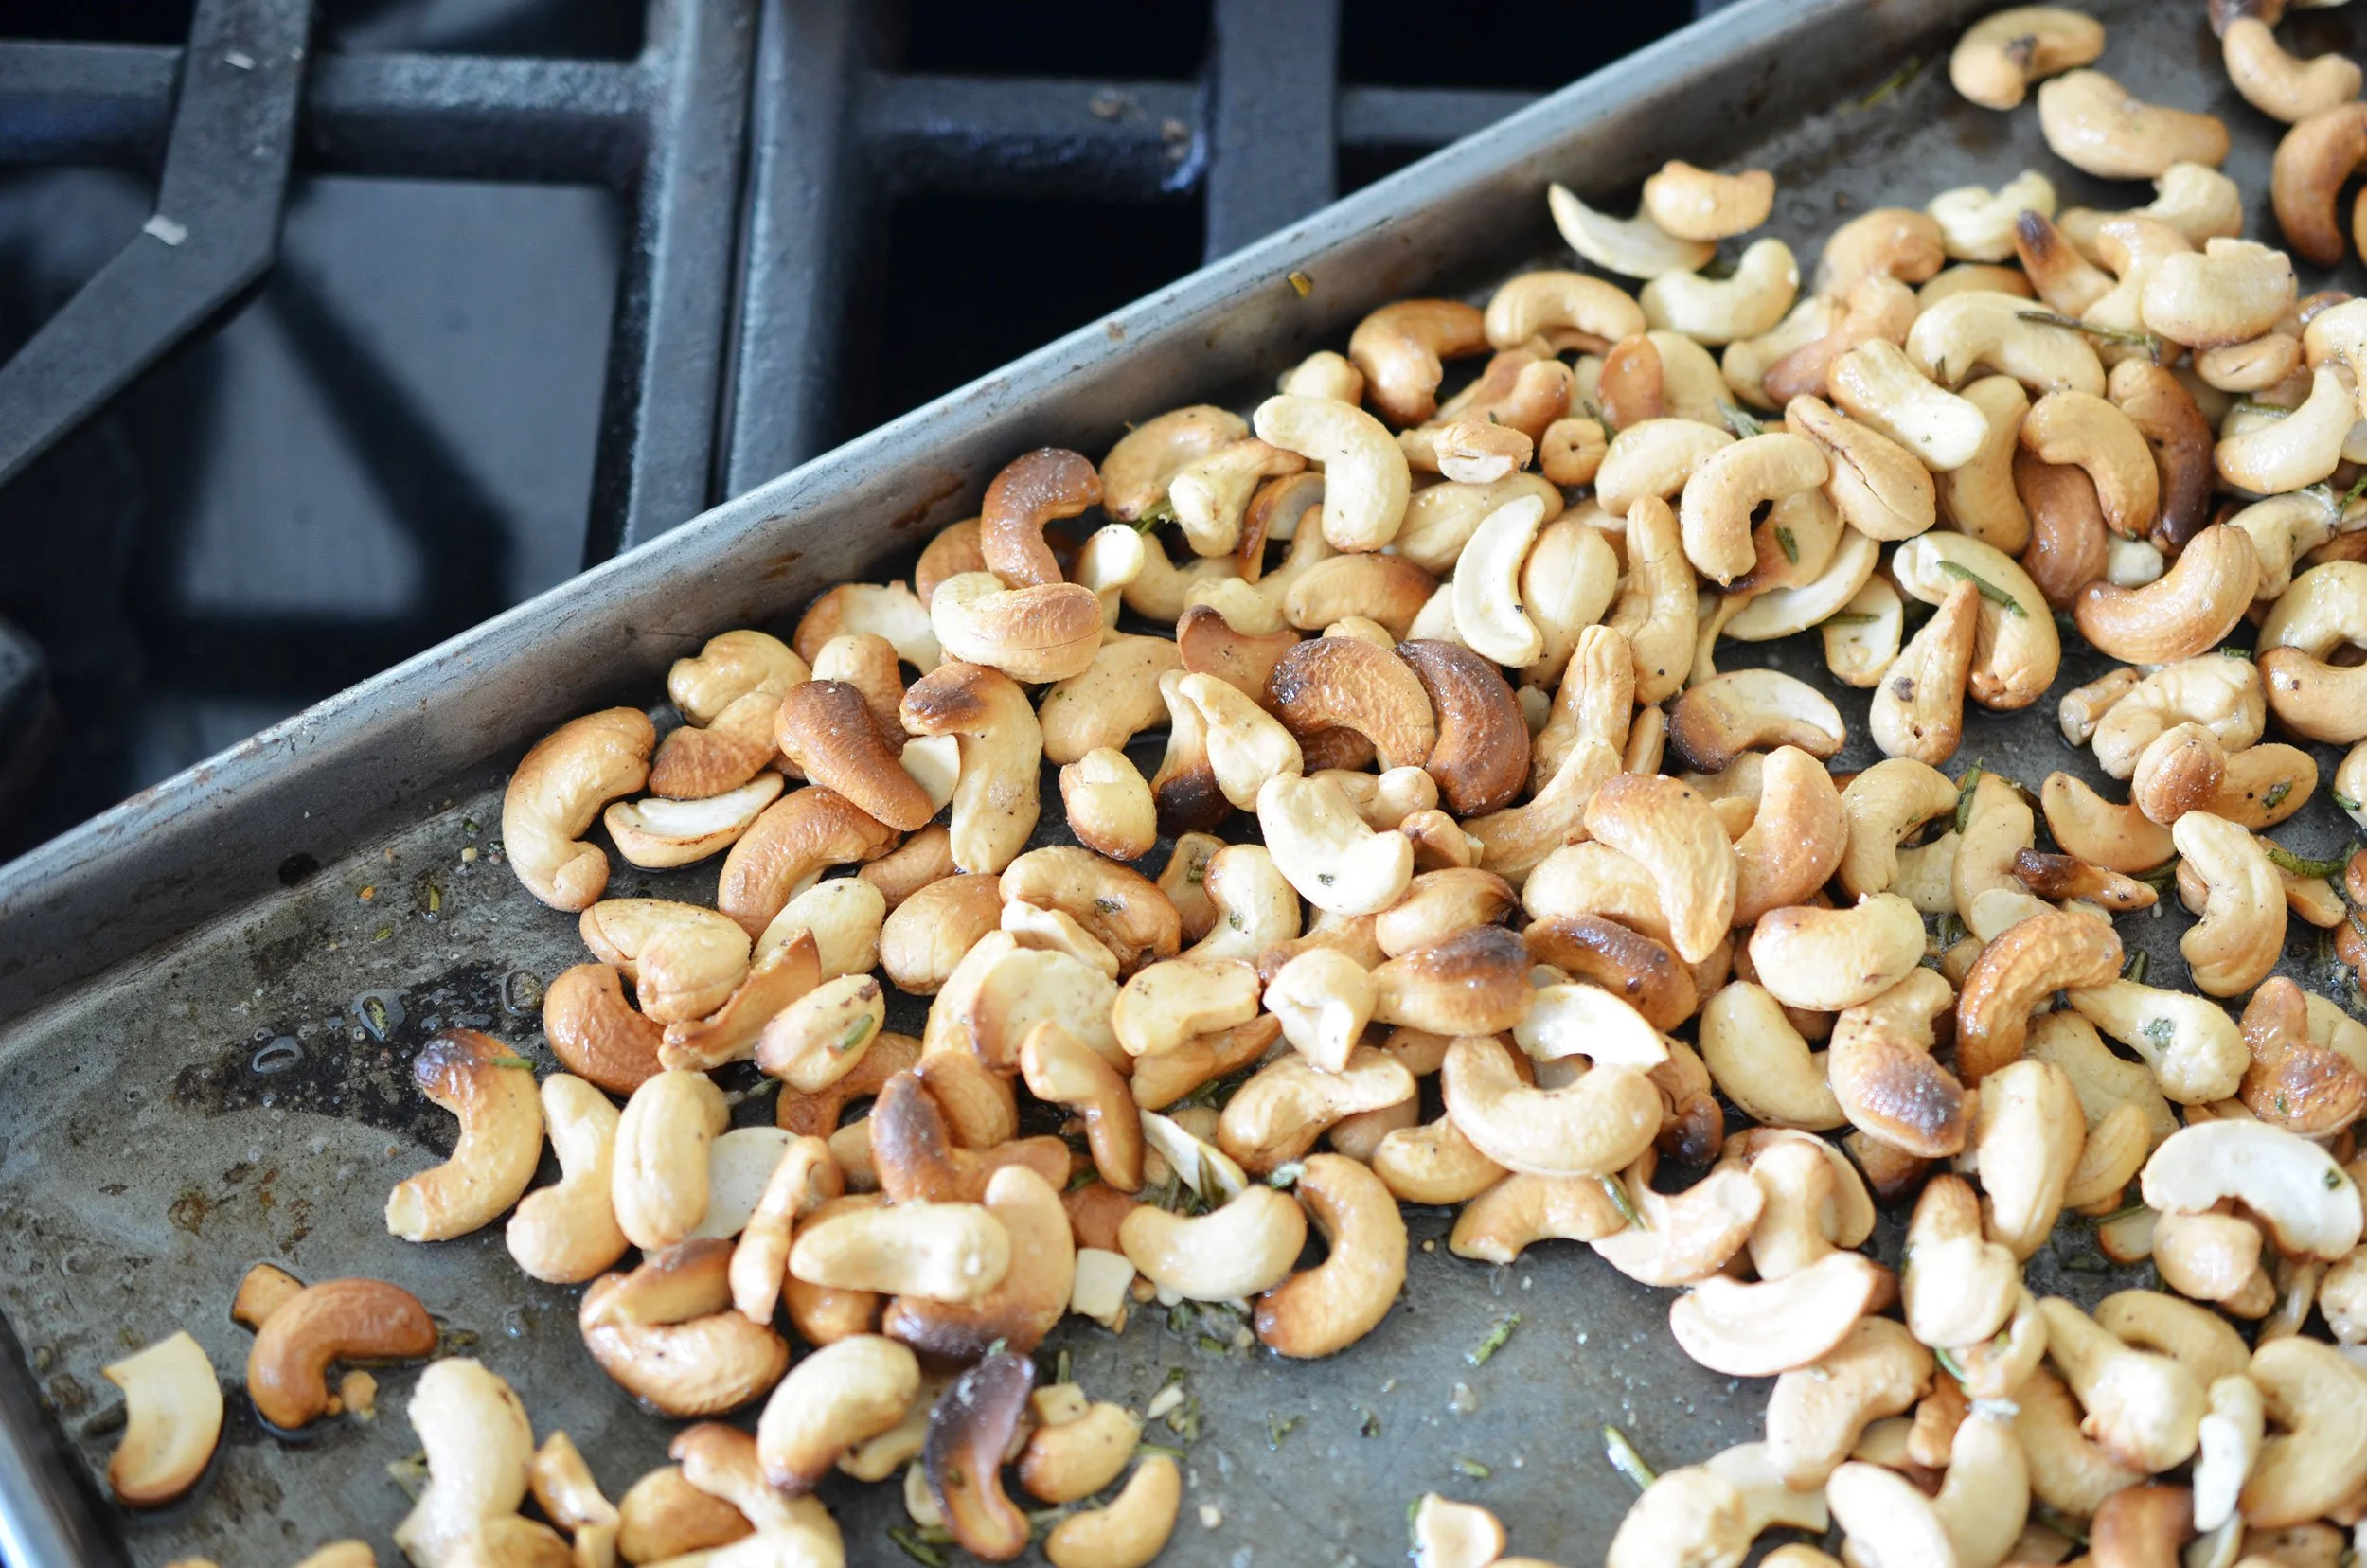
Rosemary Roasted Cashews
A crunchy snack is almost required for every party. I don’t make the rules - but it’s one of the key elements of an appetizer plate, a snack plate, or a football spread. For football, there’s something about crunching when nerves are running high.
These cashews are perfect. They feel healthier, are delicious, and are super simple to make. Our neighborhood has an annual sales for the Boy Scouts when they sell nuts, so if you also bought too many last year, then this is a great way to use them up!
Rosemary Roasted Cashews
1 lb cashews
2 tablespoons chopped fresh rosemary (about 3 sprigs)
2 tablespoons salt
fresh cracked pepper
2 tablespoons melted butter
2 tablespoons olive oil
STEP 1
Preheat the oven to 400 degrees. Melt the butter and toss everything into the butter. Coat completely.
STEP 2
Pour the nuts out onto a baking sheet and pop into the oven. Don’t walk away! They brown quickly, so watch them for about 10-15 minutes until all of the nuts are toasted. Let cool completely before serving.
Store in an airtight container for up to one week.


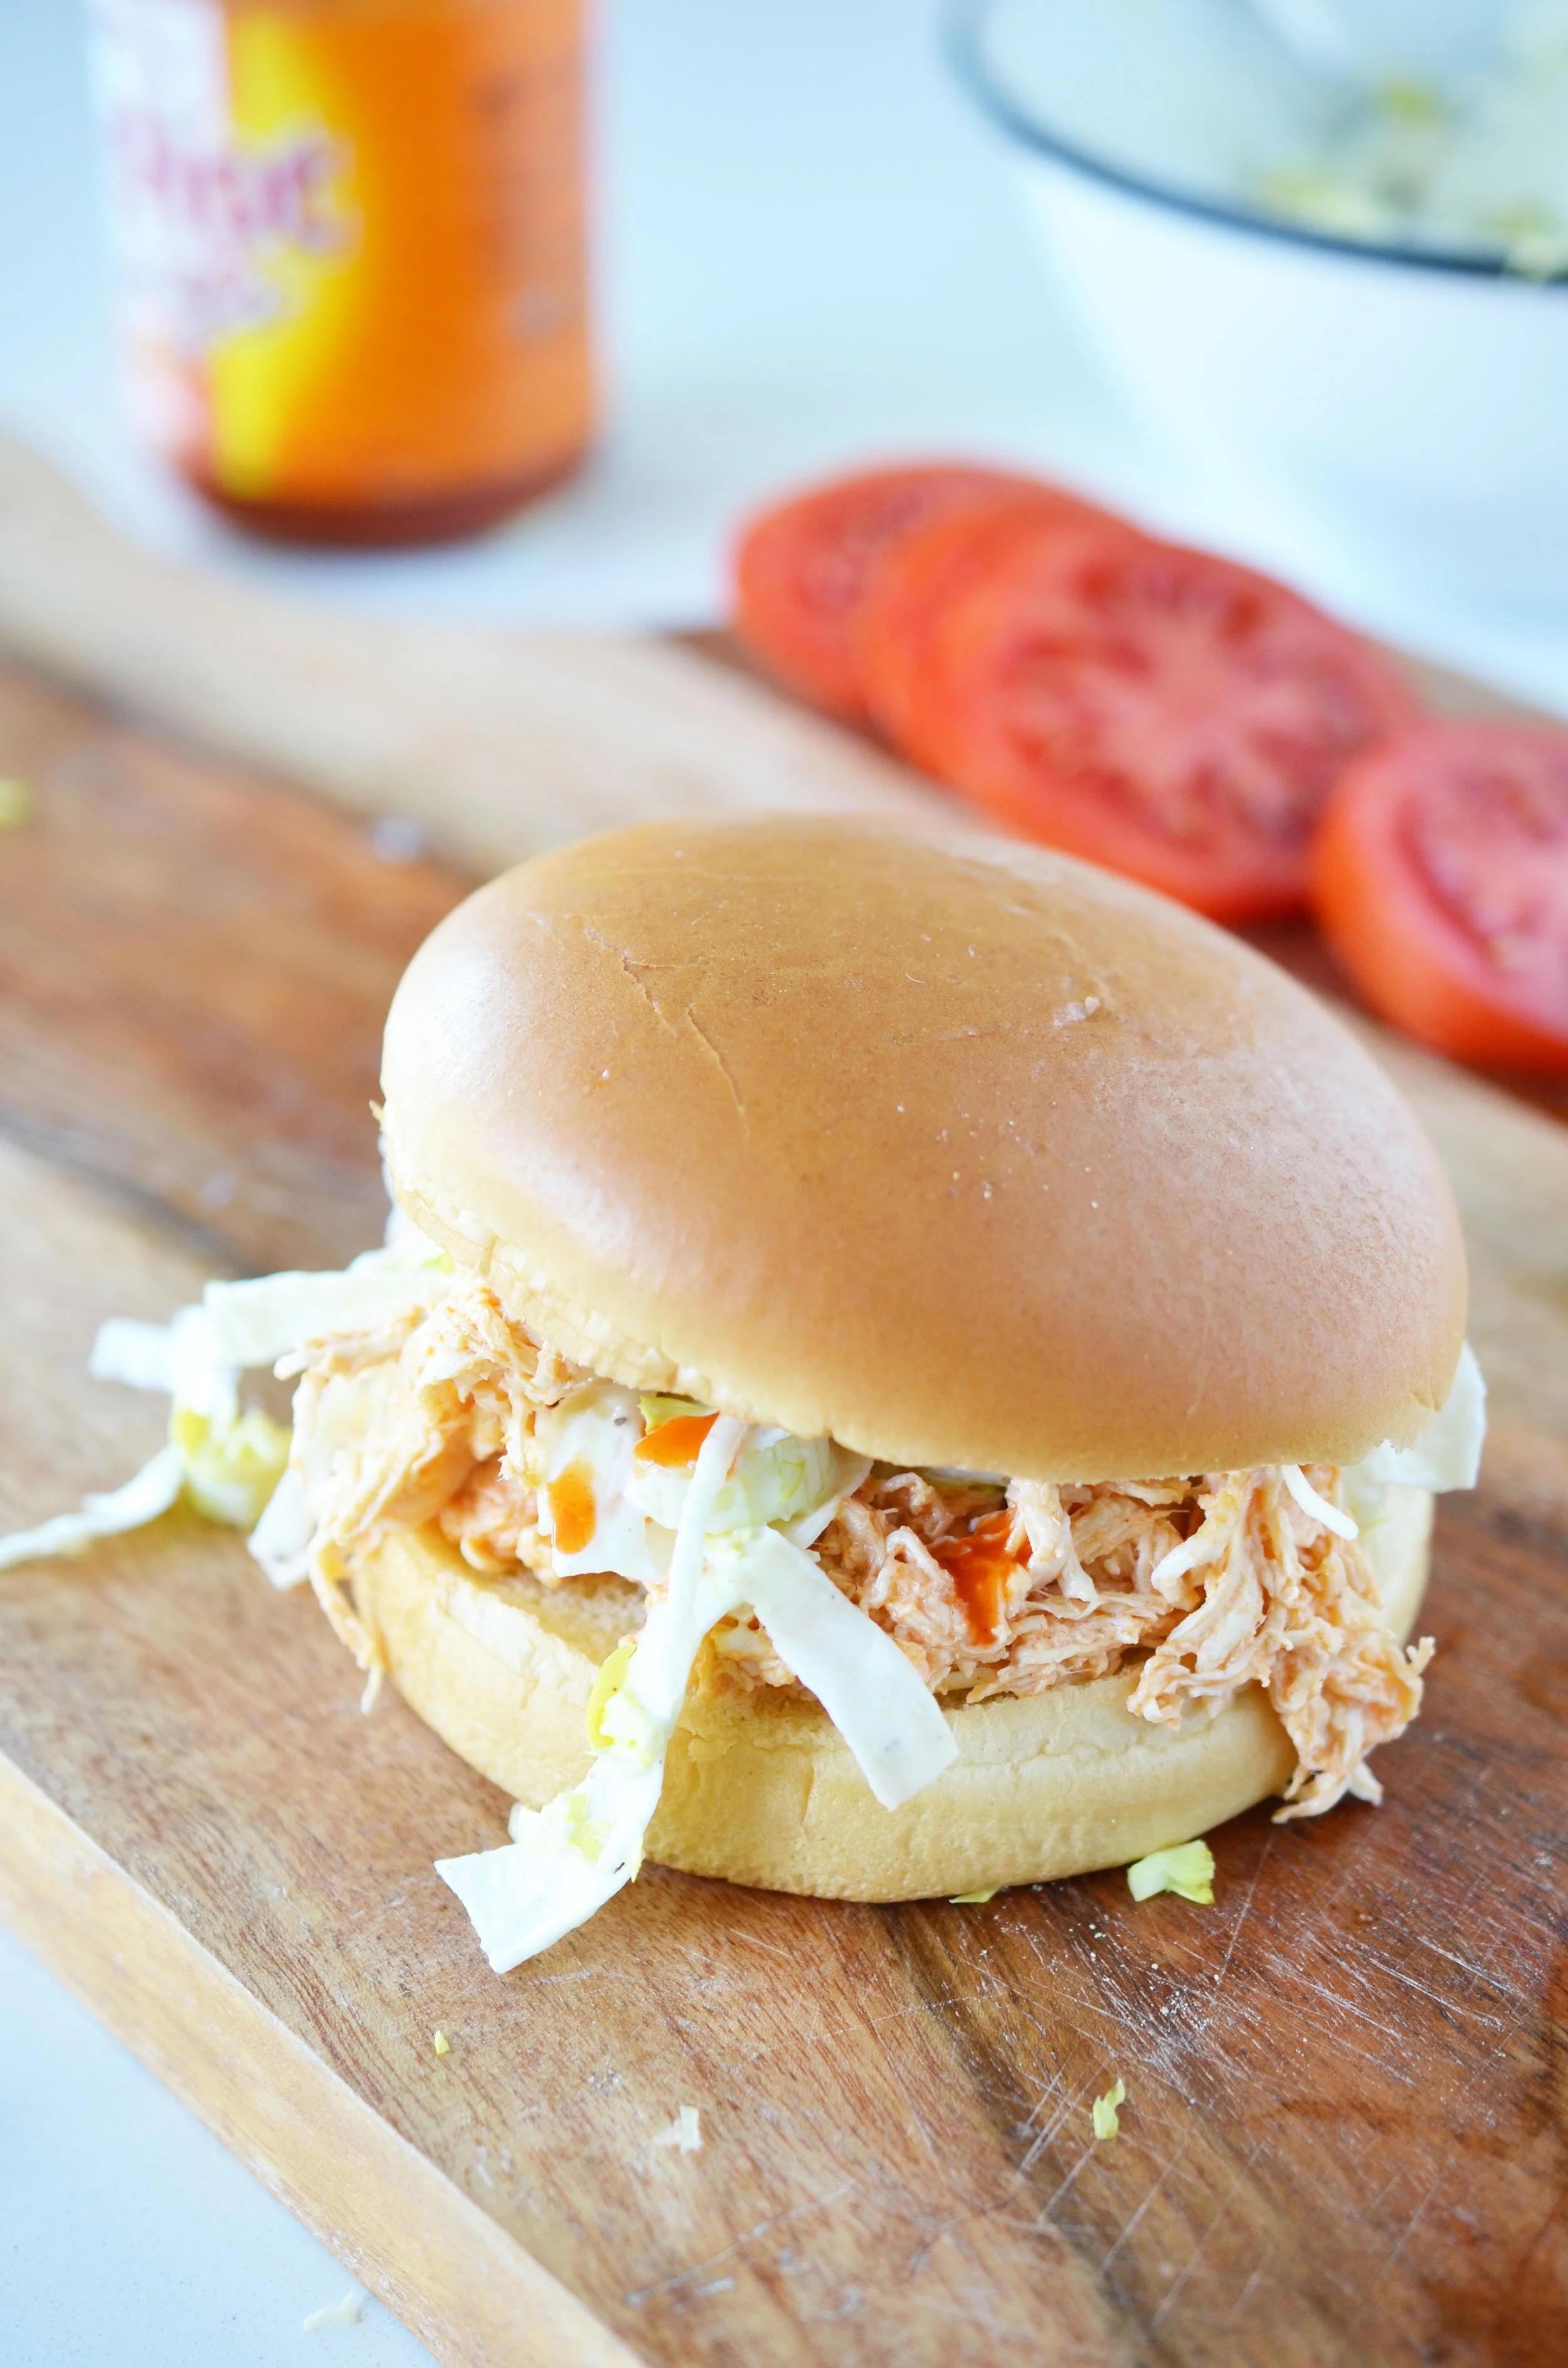


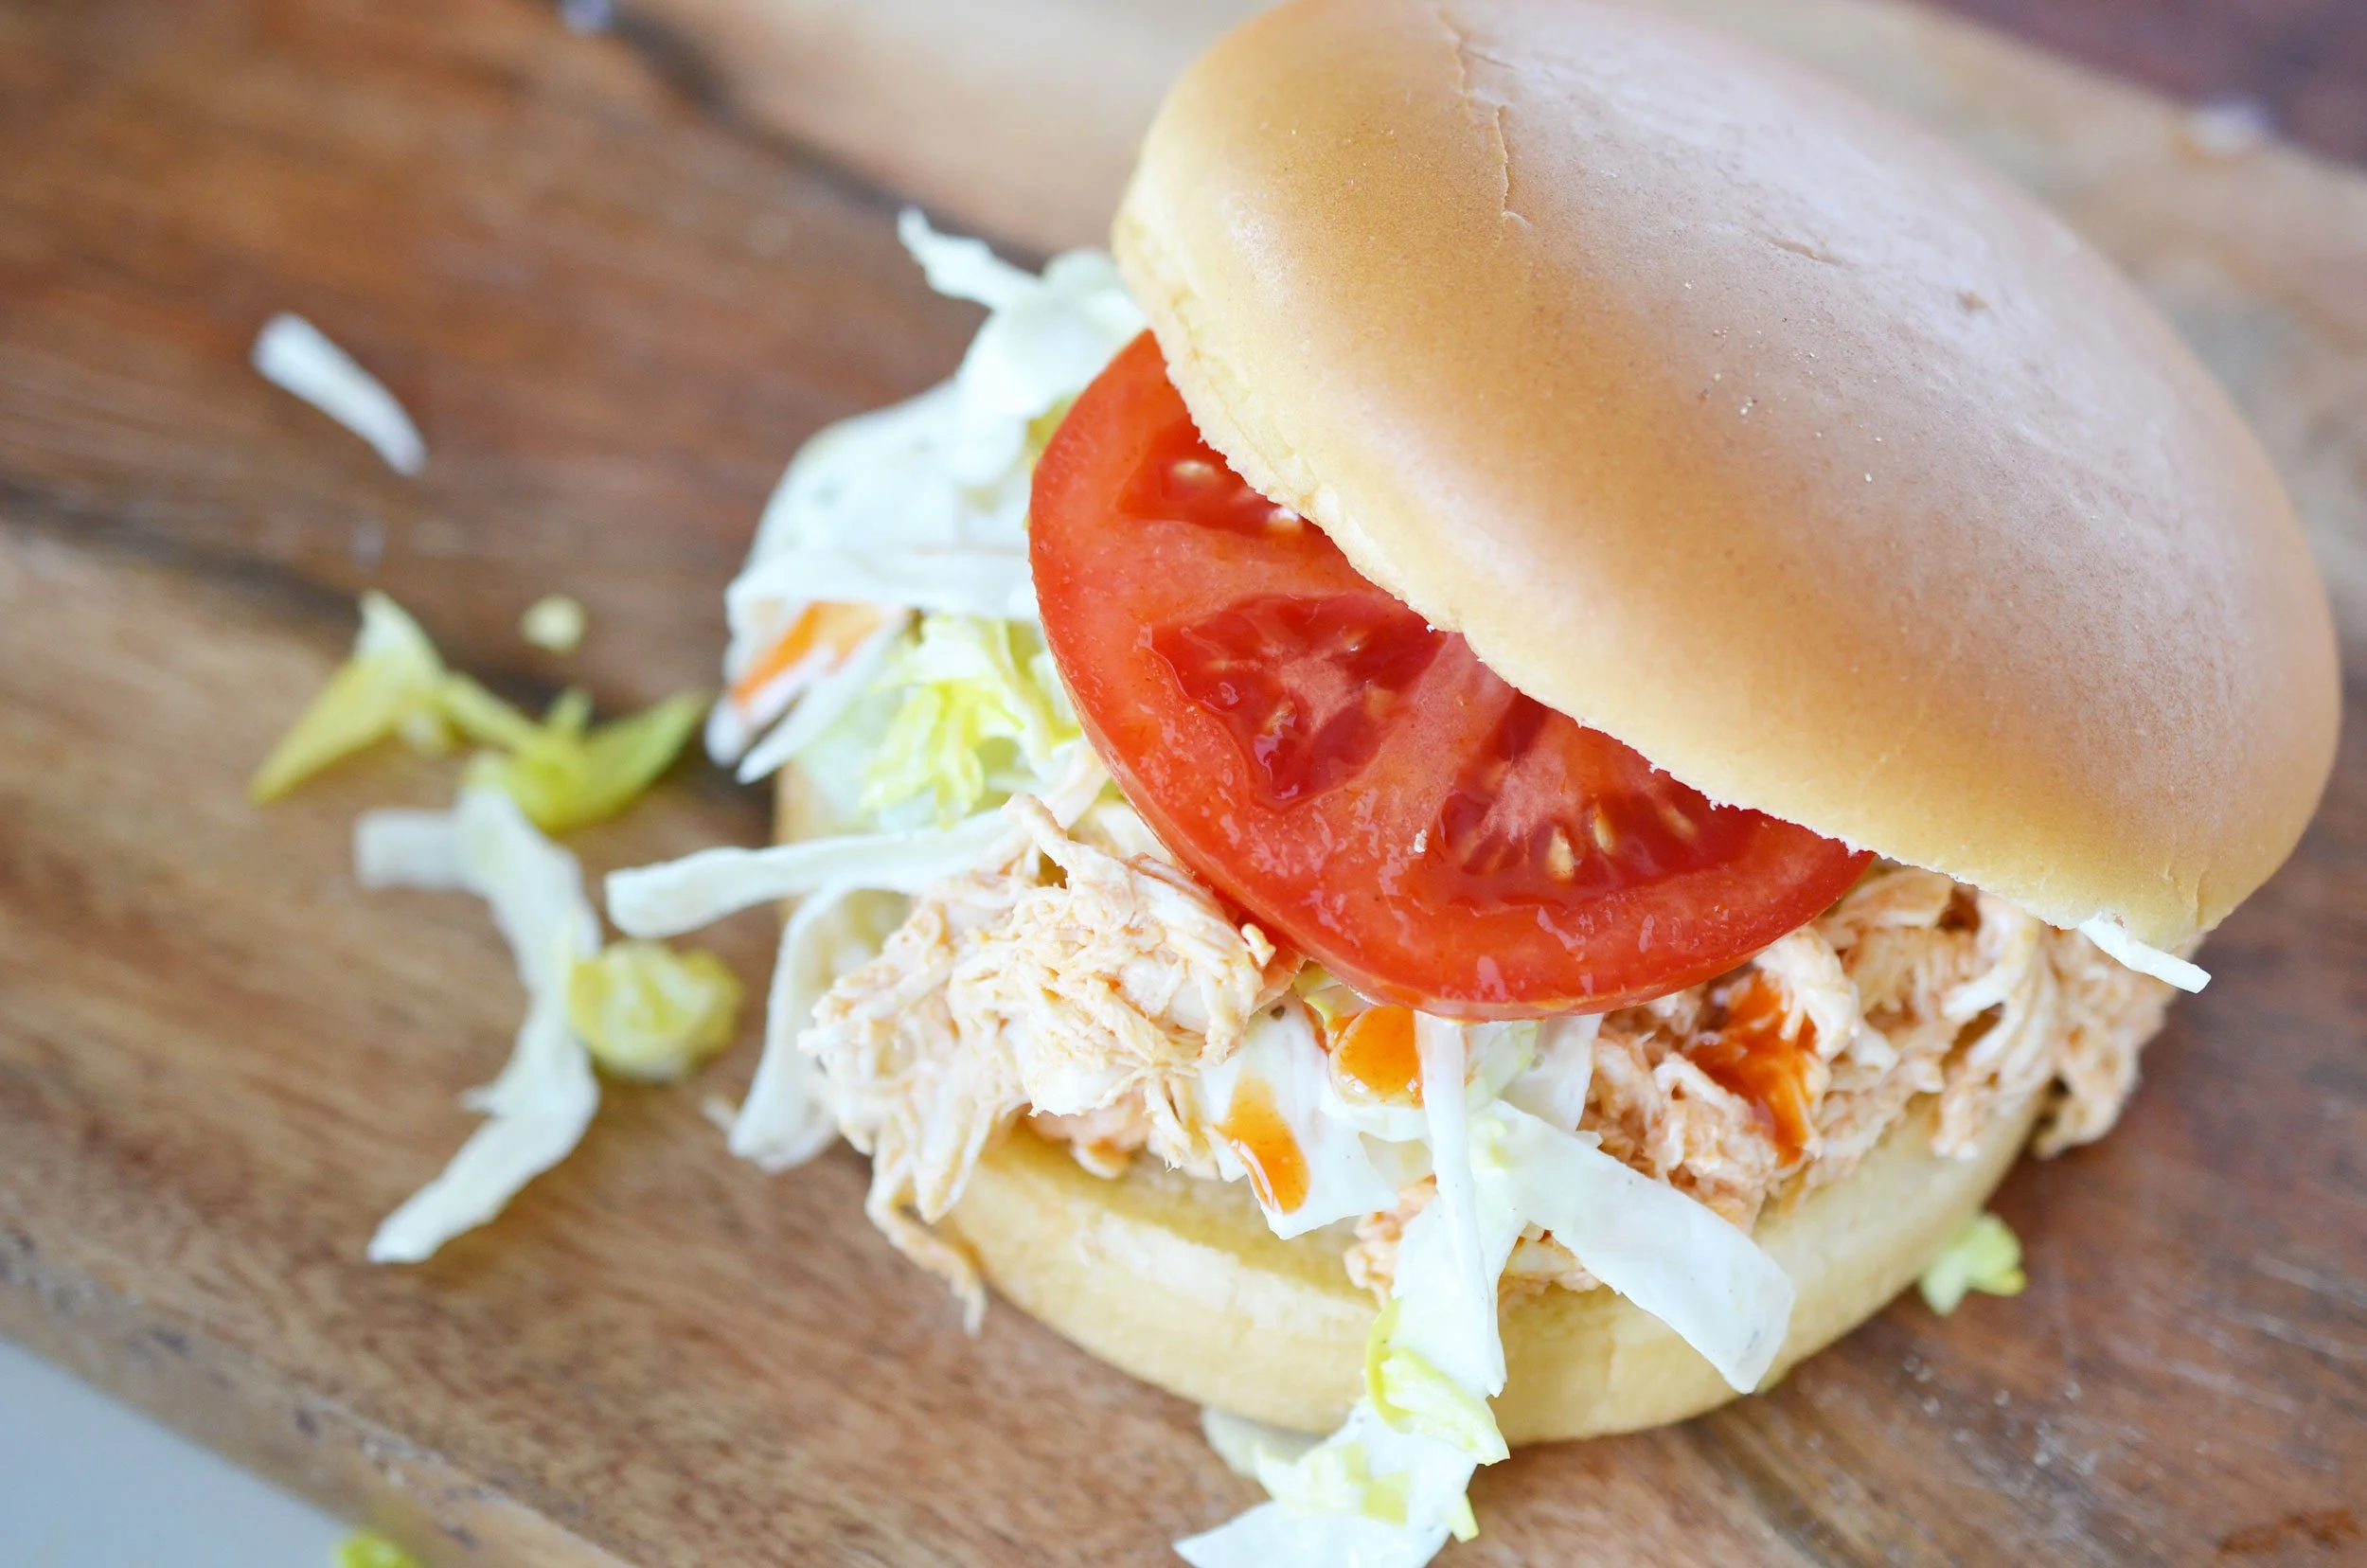
Buffalo Chicken Sandwich
I love a buffalo chicken sandwich and usually the chicken is fried. But you know what I hate doing at home, frying food. It’s messy. It’s smelly. And it feels so unhealthy when you see the actual frying of the food. When the restaurant makes it, I can overlook just how much grease it takes to fry the chicken.
So I decided to see how I felt about a “pulled chicken” sandwich with buffalo and let me tell you - it’s awesome. It’s so simple to pull off and has all of the same flavors that make a buffalo chicken sandwich great.
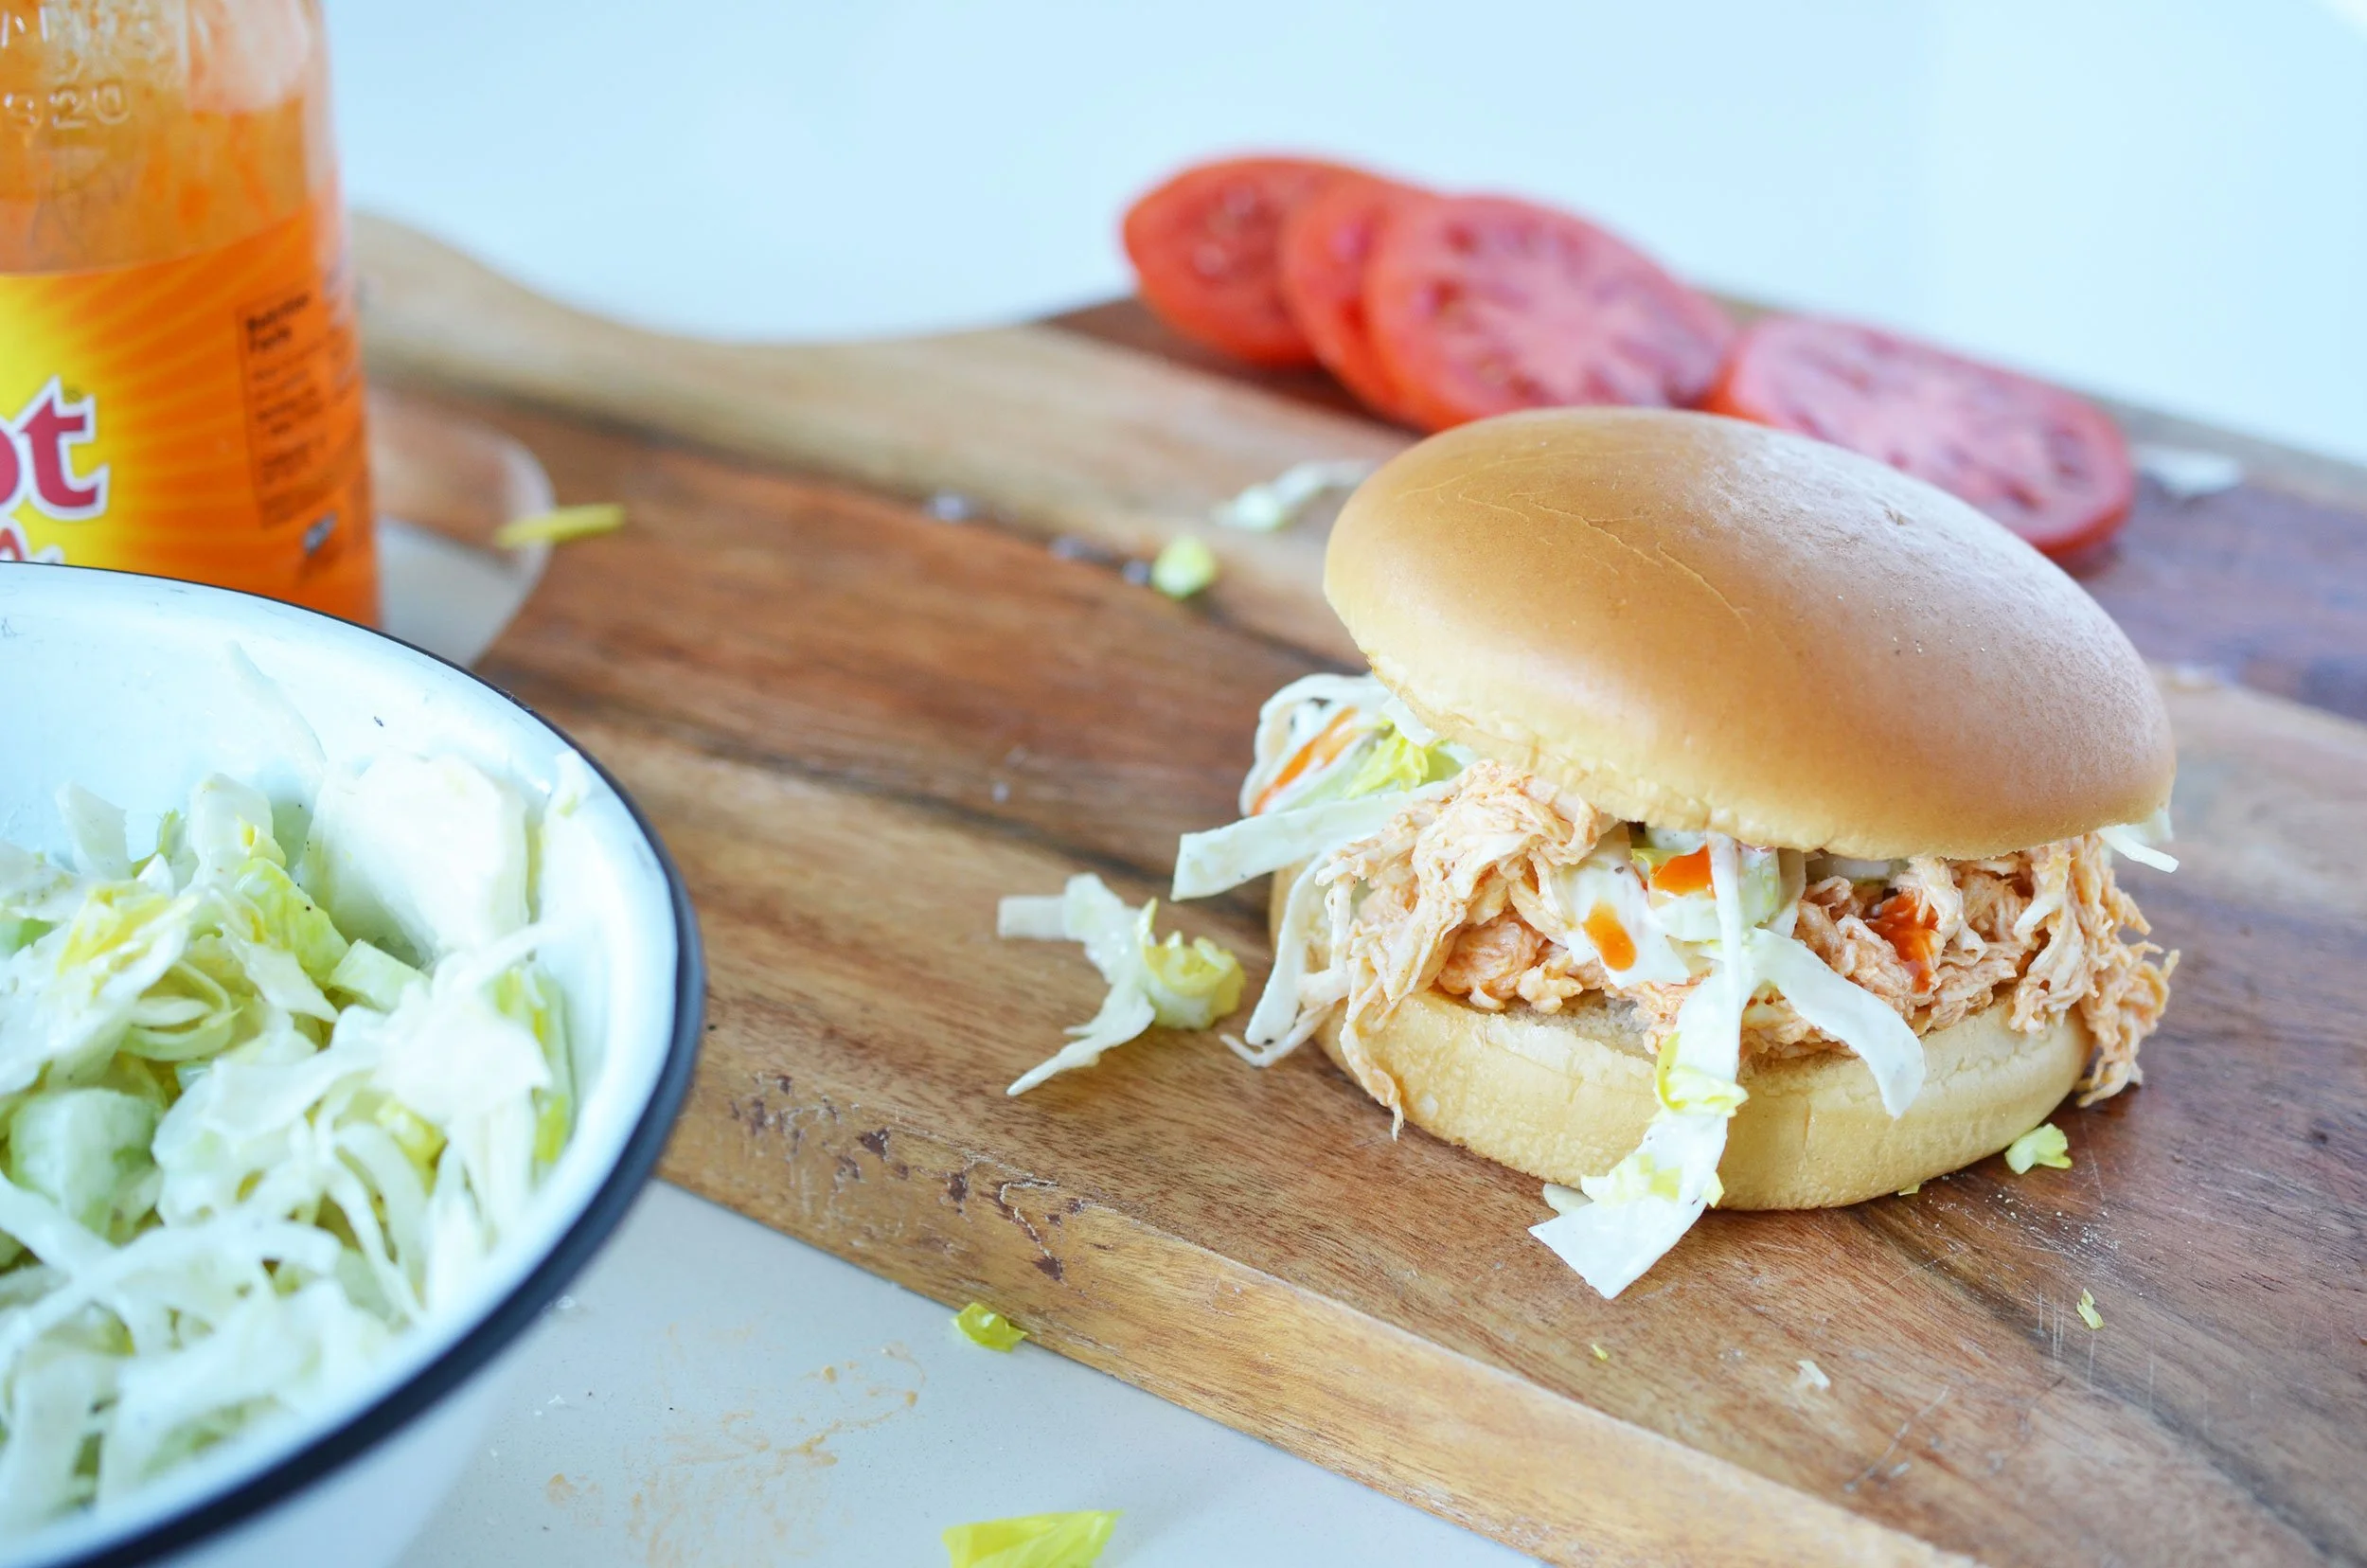
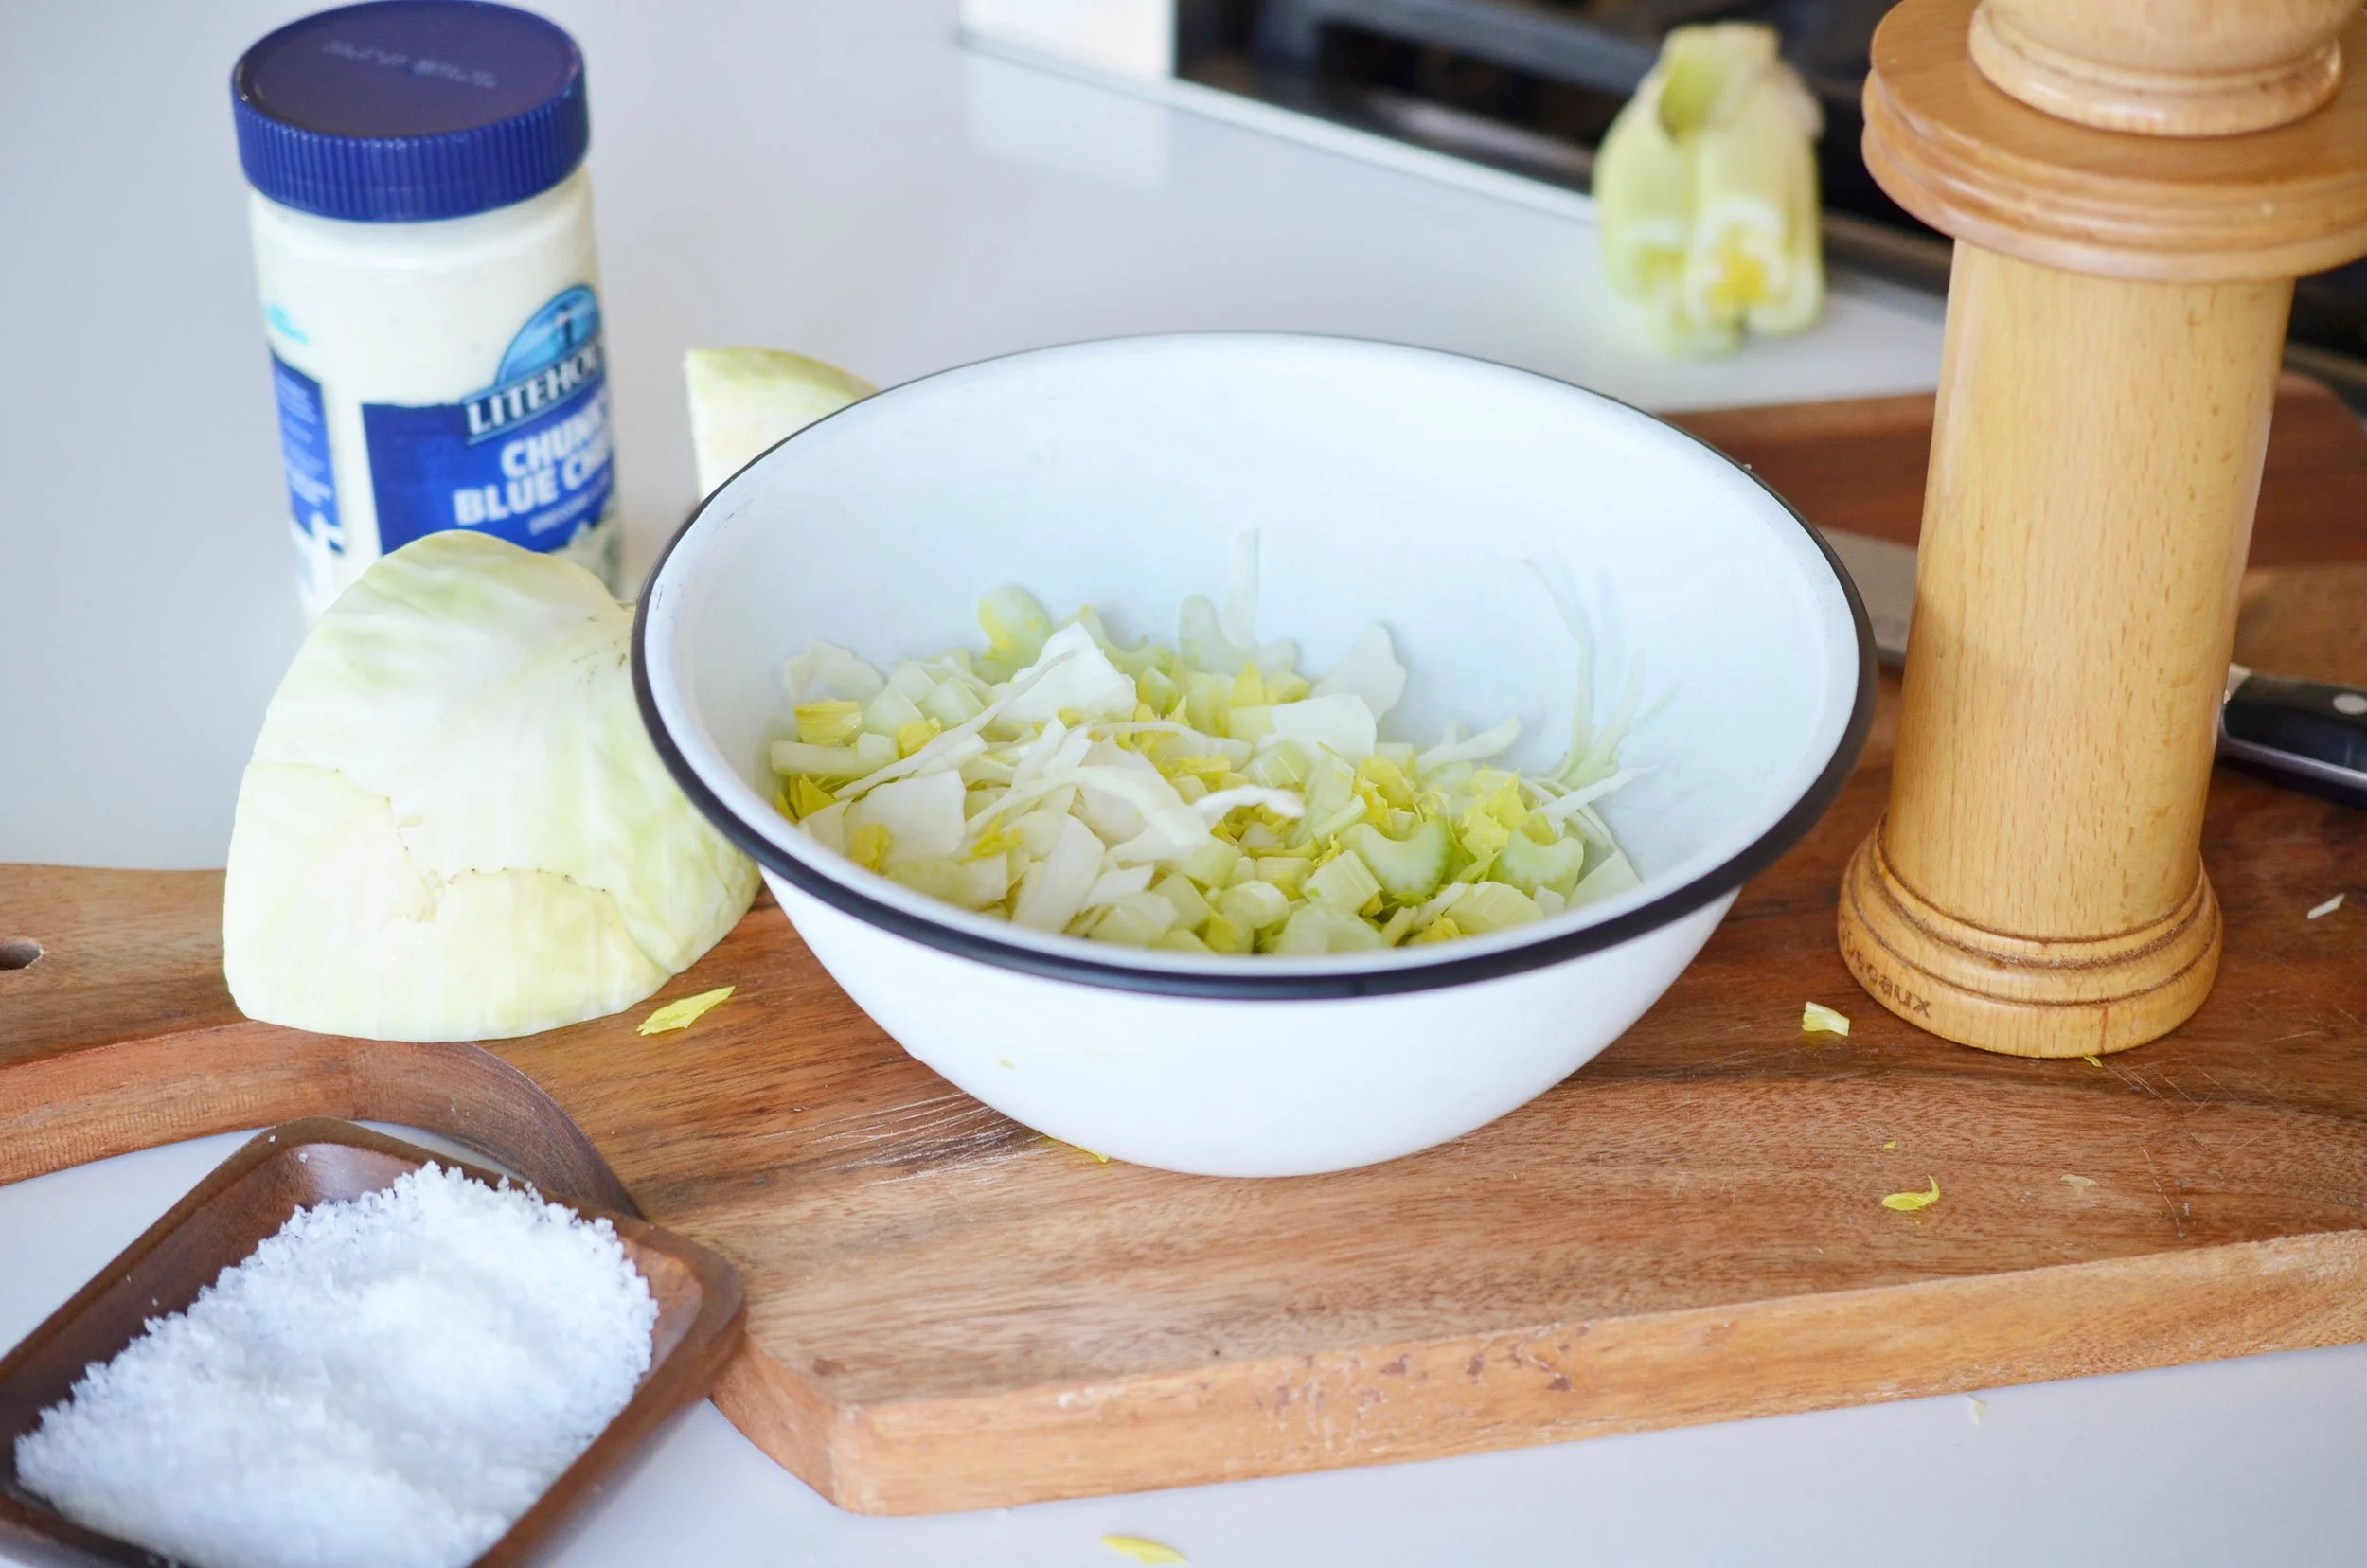
The slaw is a game changer too. It’s so simple, but has the blue cheese tossed into it, so the buffalo chicken vibe is all the way through the sandwich.
Buffalo Chicken Sandwich
makes 6 sandwiches
1.5 pounds chicken breast, shredded
2 tablespoons butter
1/2 cup Franks Wing Sauce
1 cup chopped celery
1 cup chopped cabbage
1/4 cup blue cheese dressing
salt & pepper
brioche buns
sliced beefsteak tomatoes
STEP 1
Toss the shredded chicken with melted butter and wing sauce. If you’re shredding your own chicken, I throw the butter in while it’s hot and let it melt on it’s own.
STEP 2
Toss together the chopped celery, cabbage and blue cheese dressing. Season with salt & pepper to taste.
STEP 3
Toast the brioche buns and top with shredded chicken, celery slaw, a big slice of tomato and extra wing sauce. Serve warm!
TIPS
Every part of this can be made ahead of time and stashed in the fridge. Right before serving, heat the chicken and toast the buns.
Shredding your own chicken is super simple - poach the chicken then toss it in the stand mixer with the paddle attachment and blend until shredded.


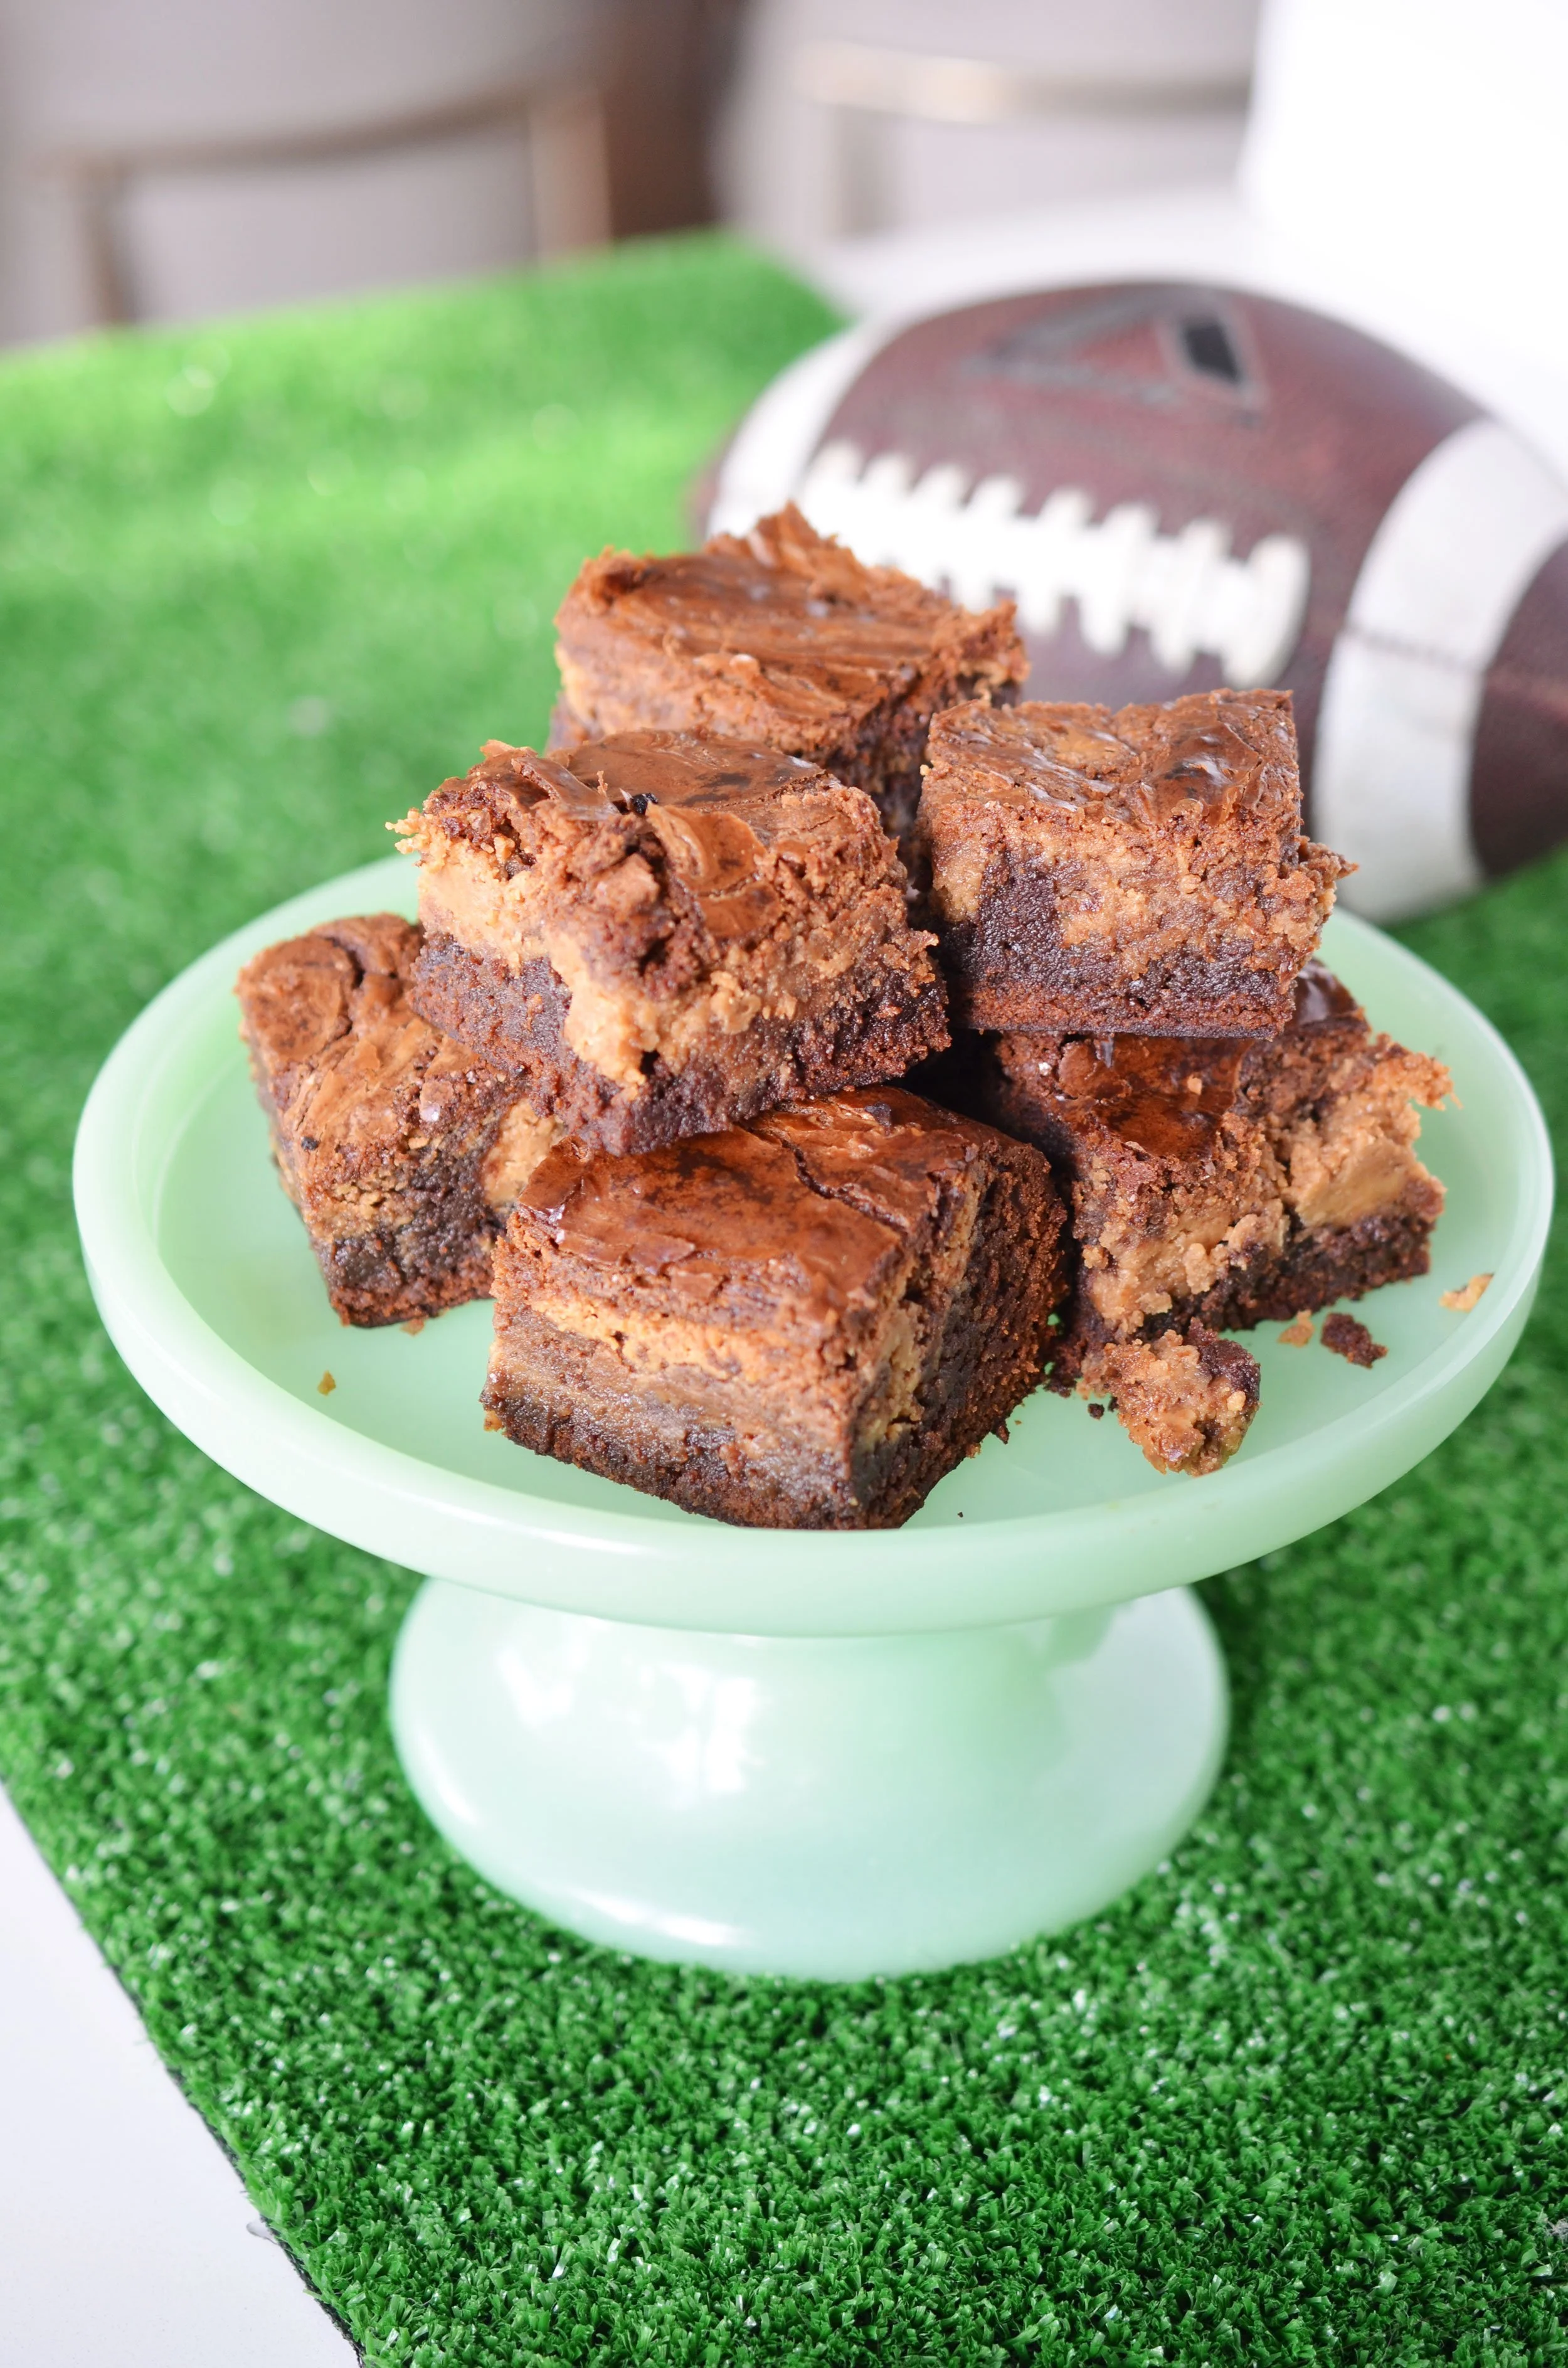
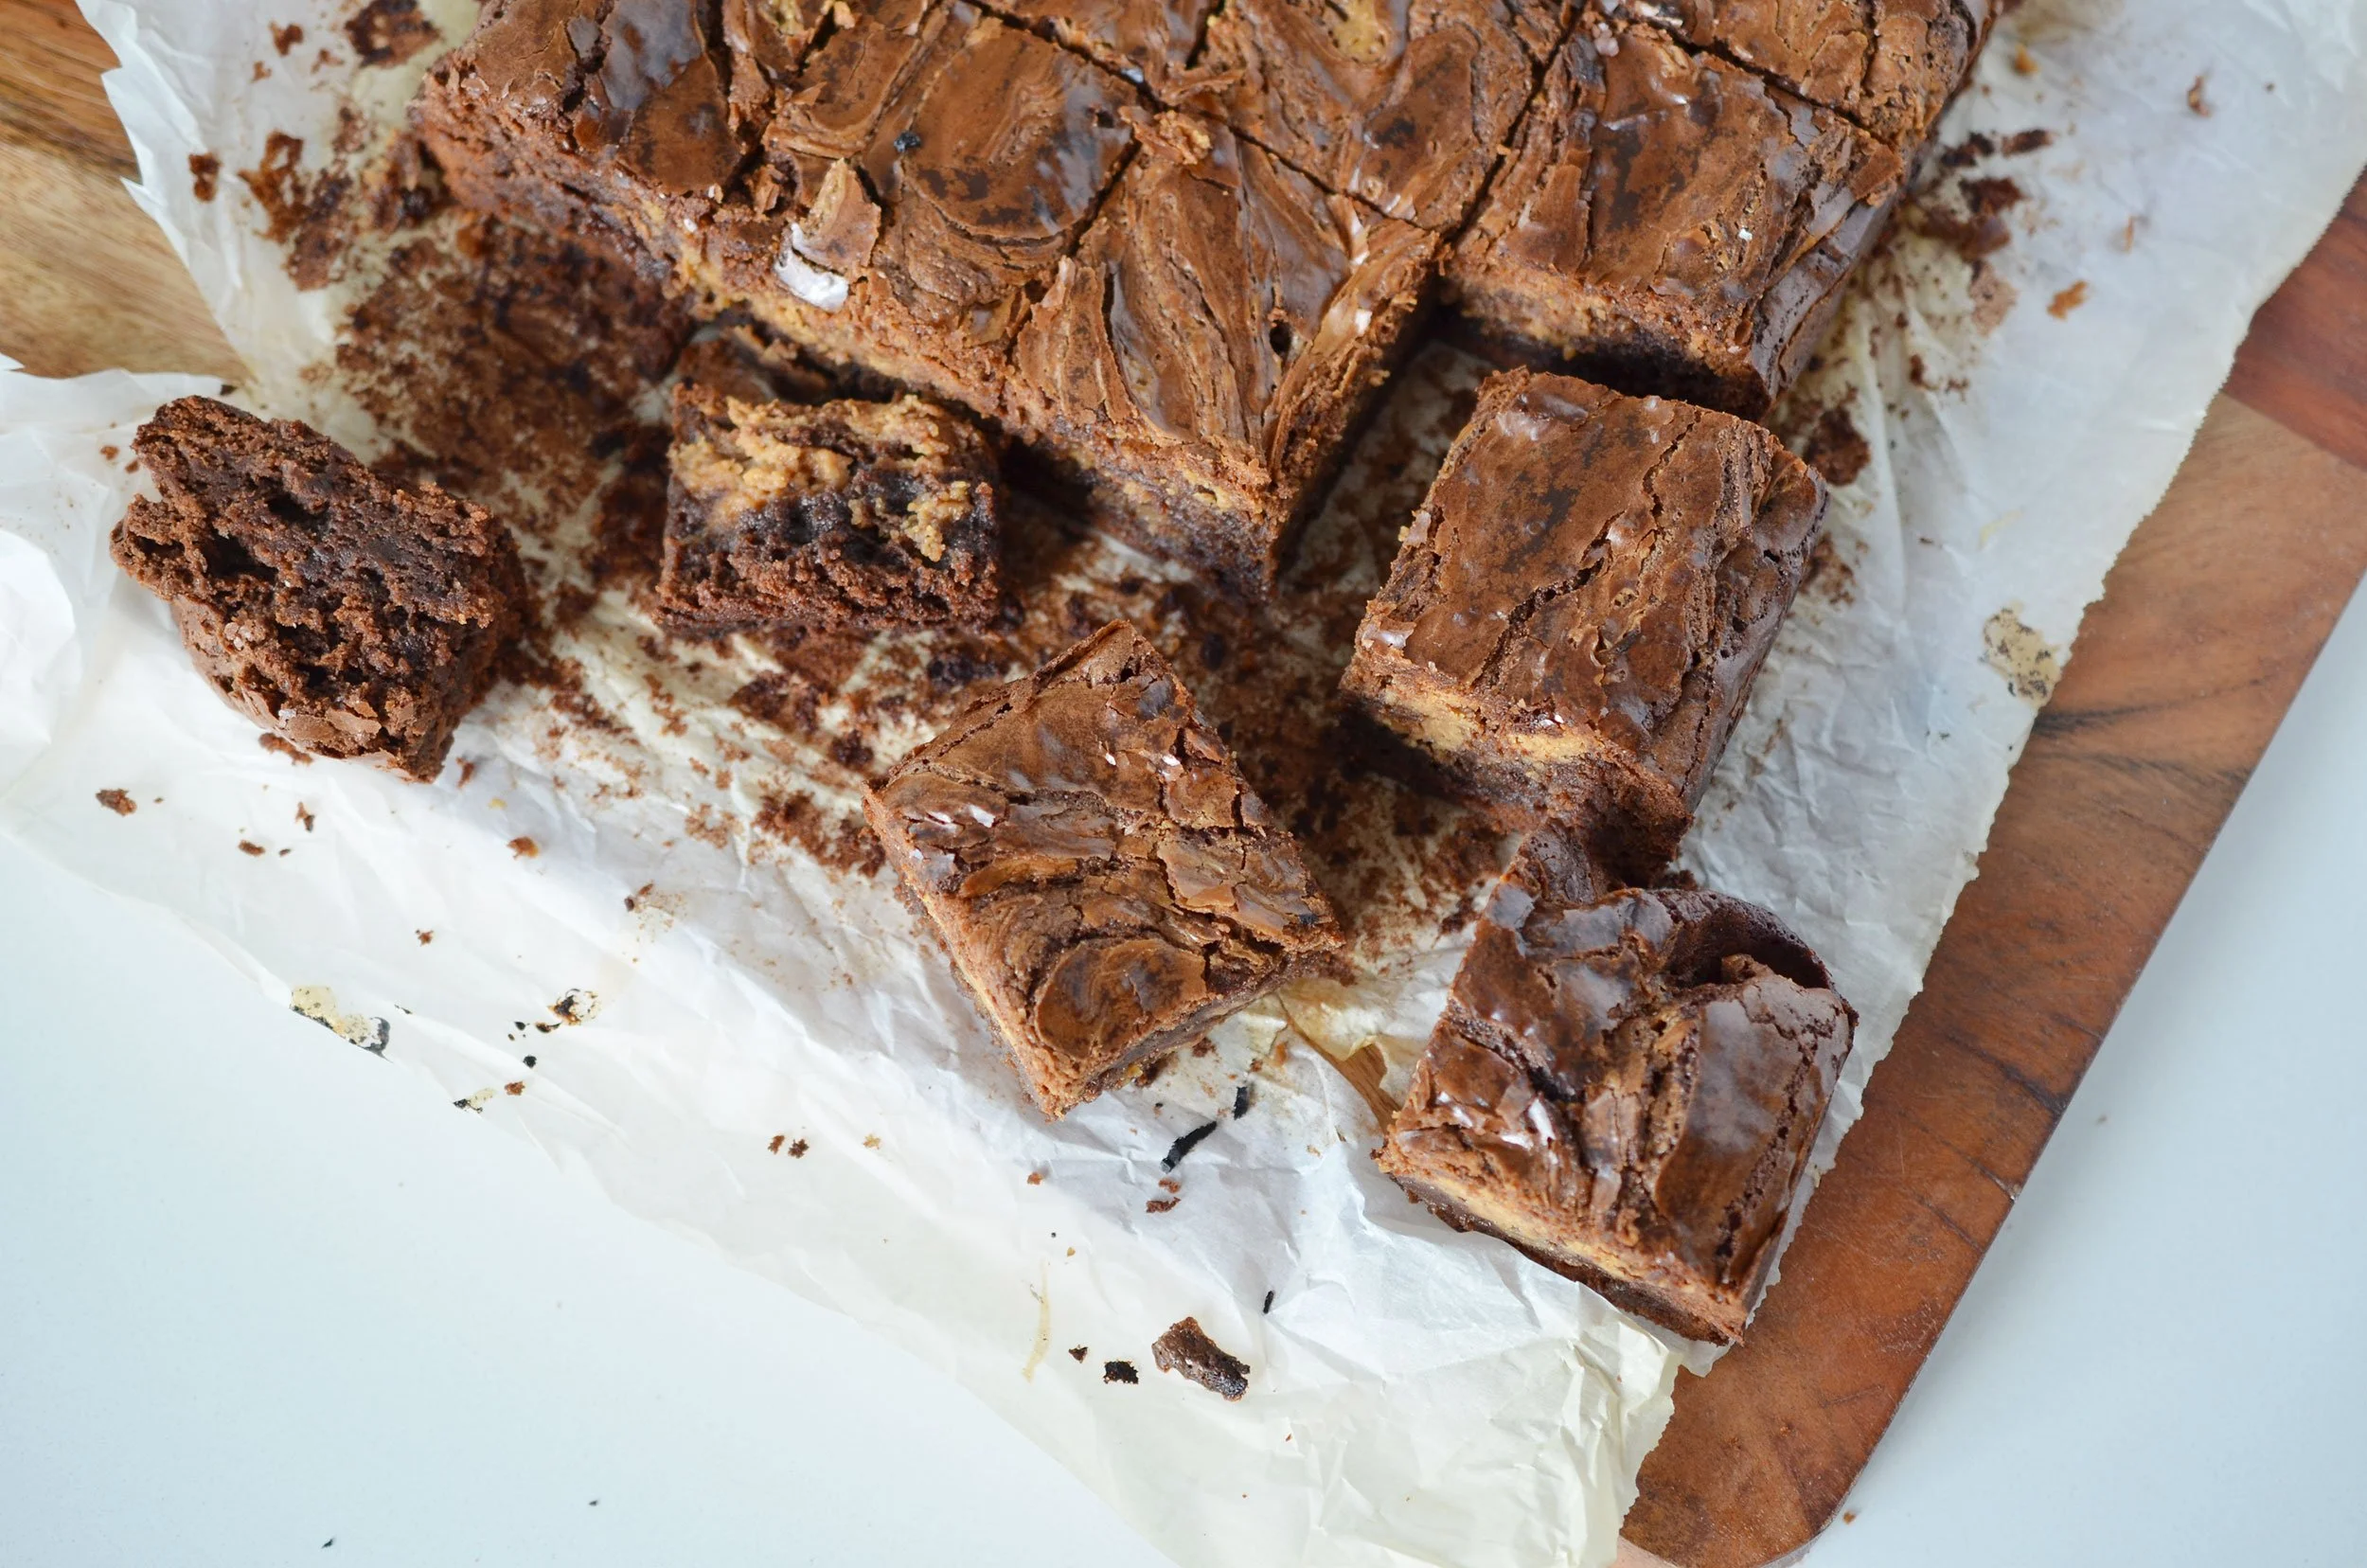
Peanut Butter Swirl Brownies
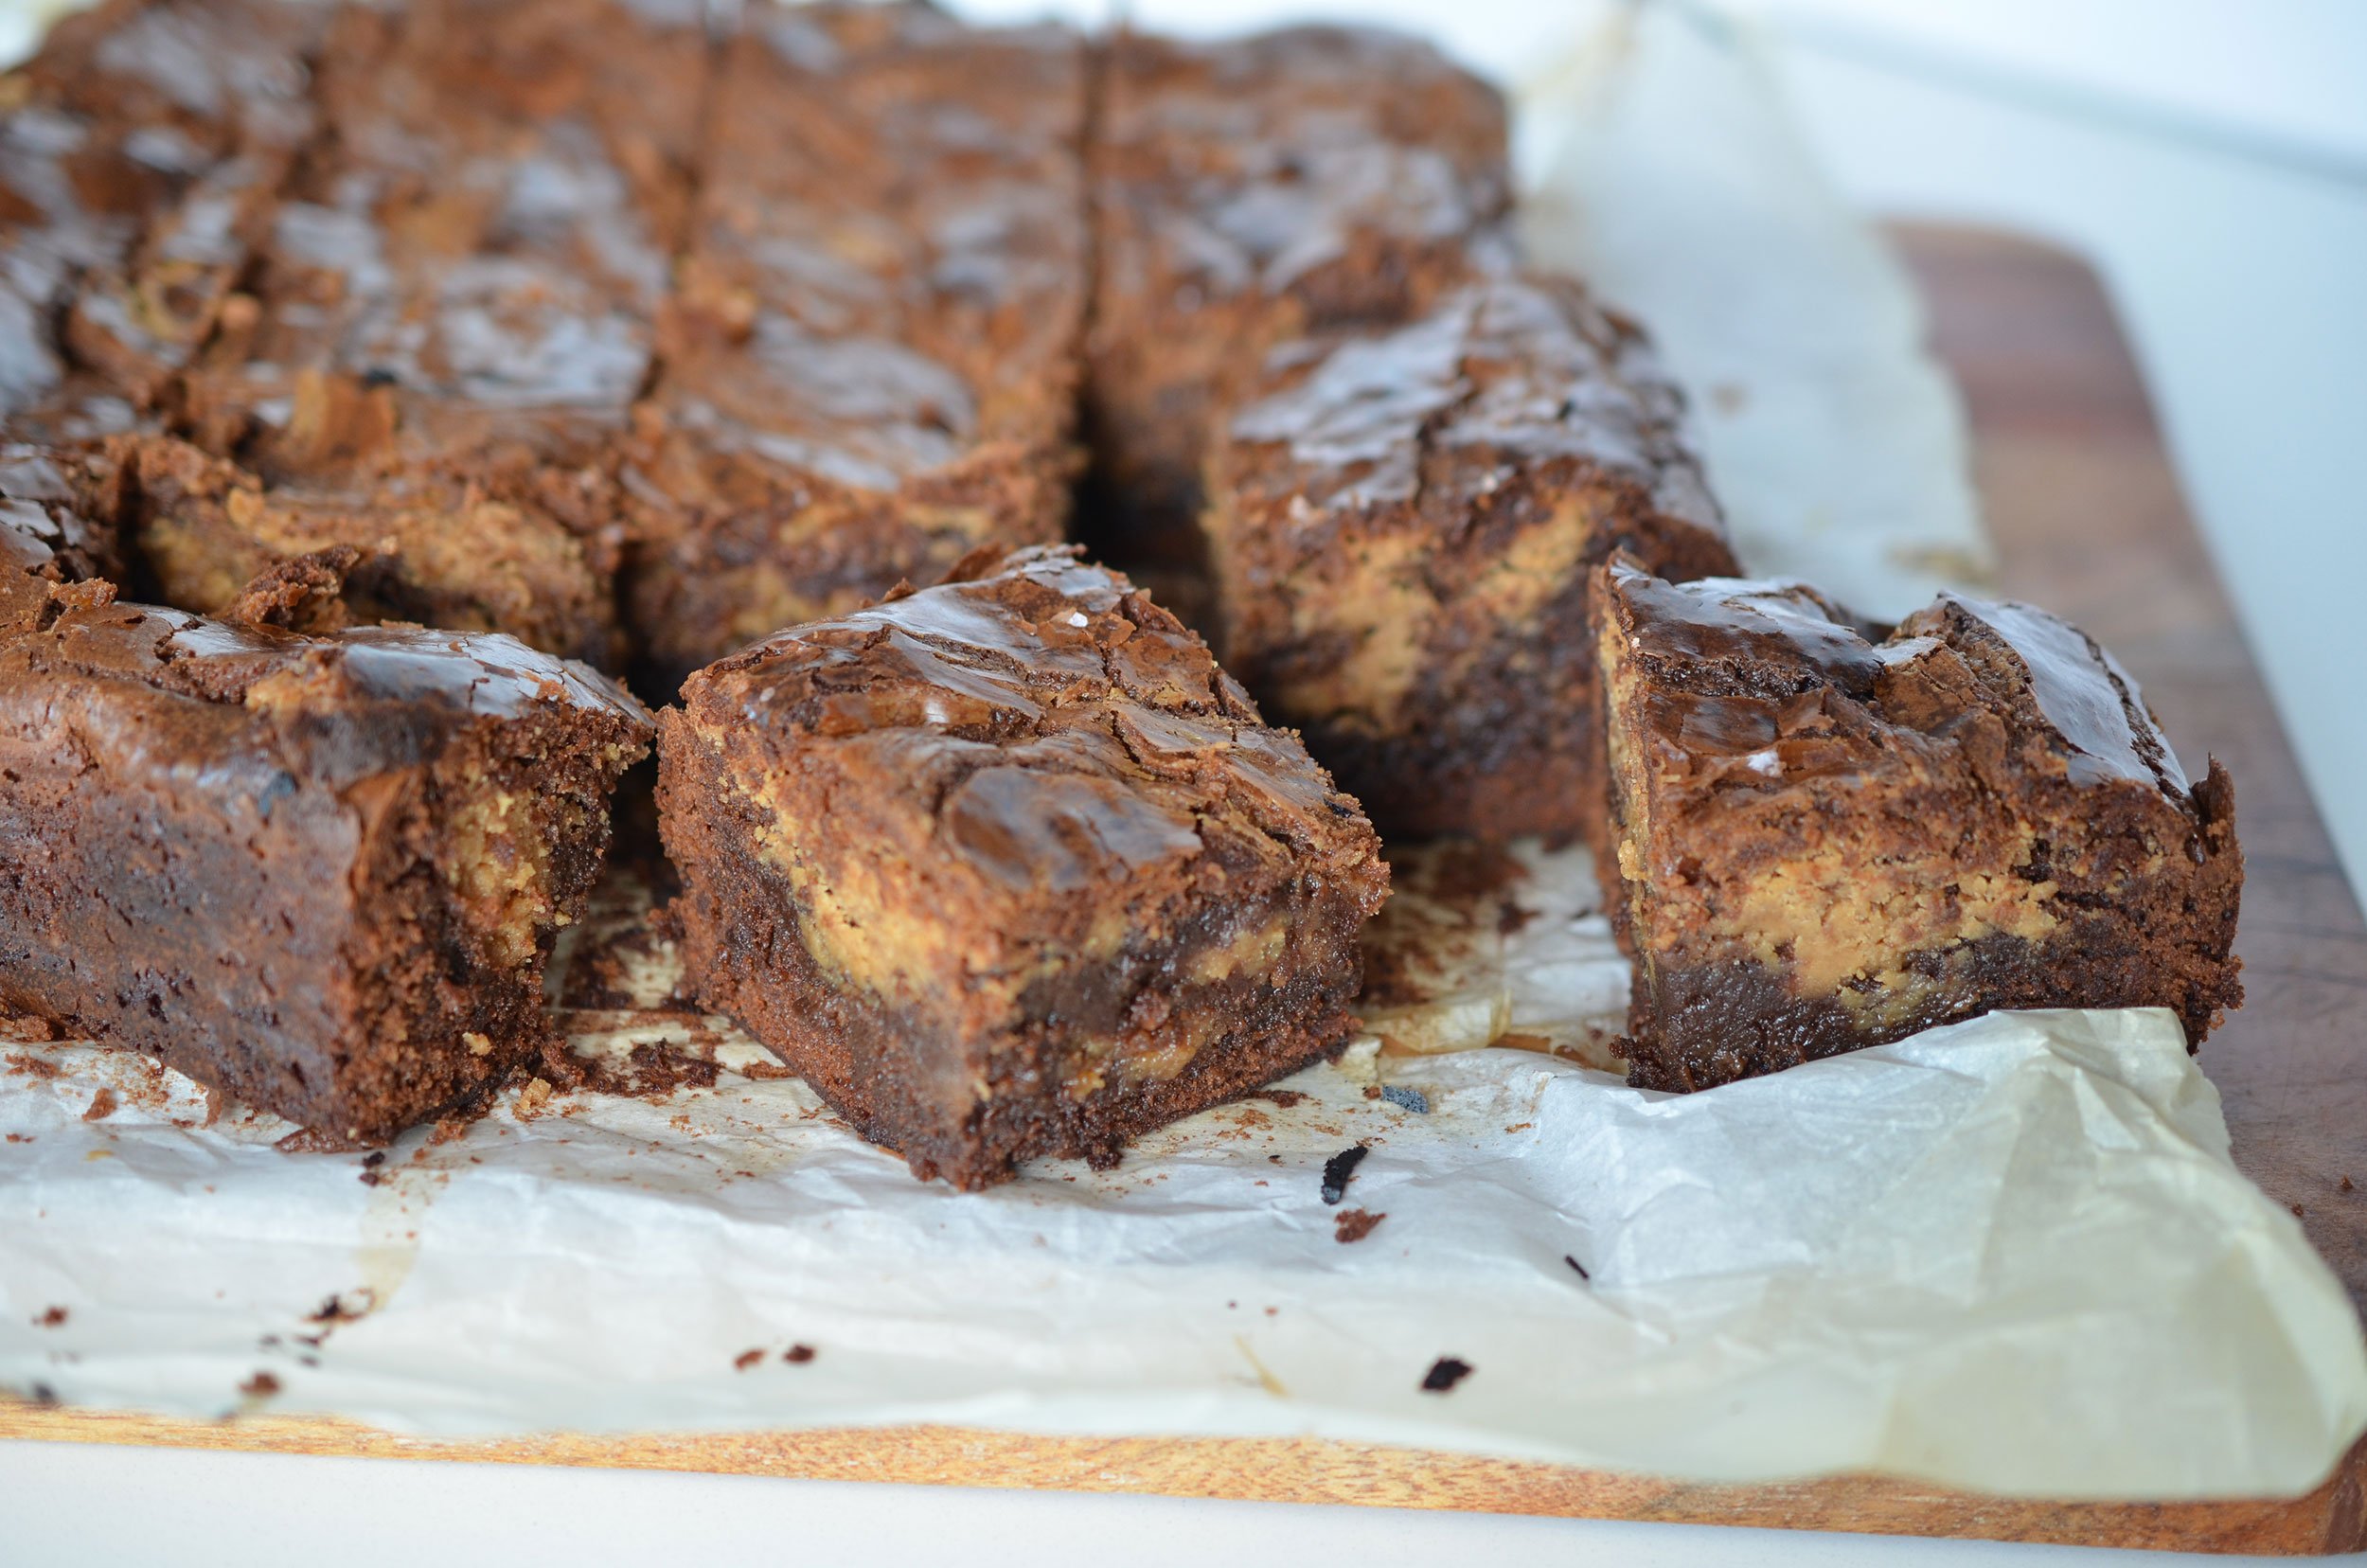
Peanut butter and chocolate is such a classic combination - I can’t imagine a better dessert than incorporating peanut butter into a brownie. These brownies are especially fudgy and gooey and perfect for a ribbon of peanut butter.
This is the kind of thing I will make for a football watching party because they are done the day before, they are crazy rich so you don’t need a huge batch, and they are epic - so they will disappear fast! They are also not too hard to make, so they seem like you worked hard (homemade brownies!) but they are as simple as a regular cookie.
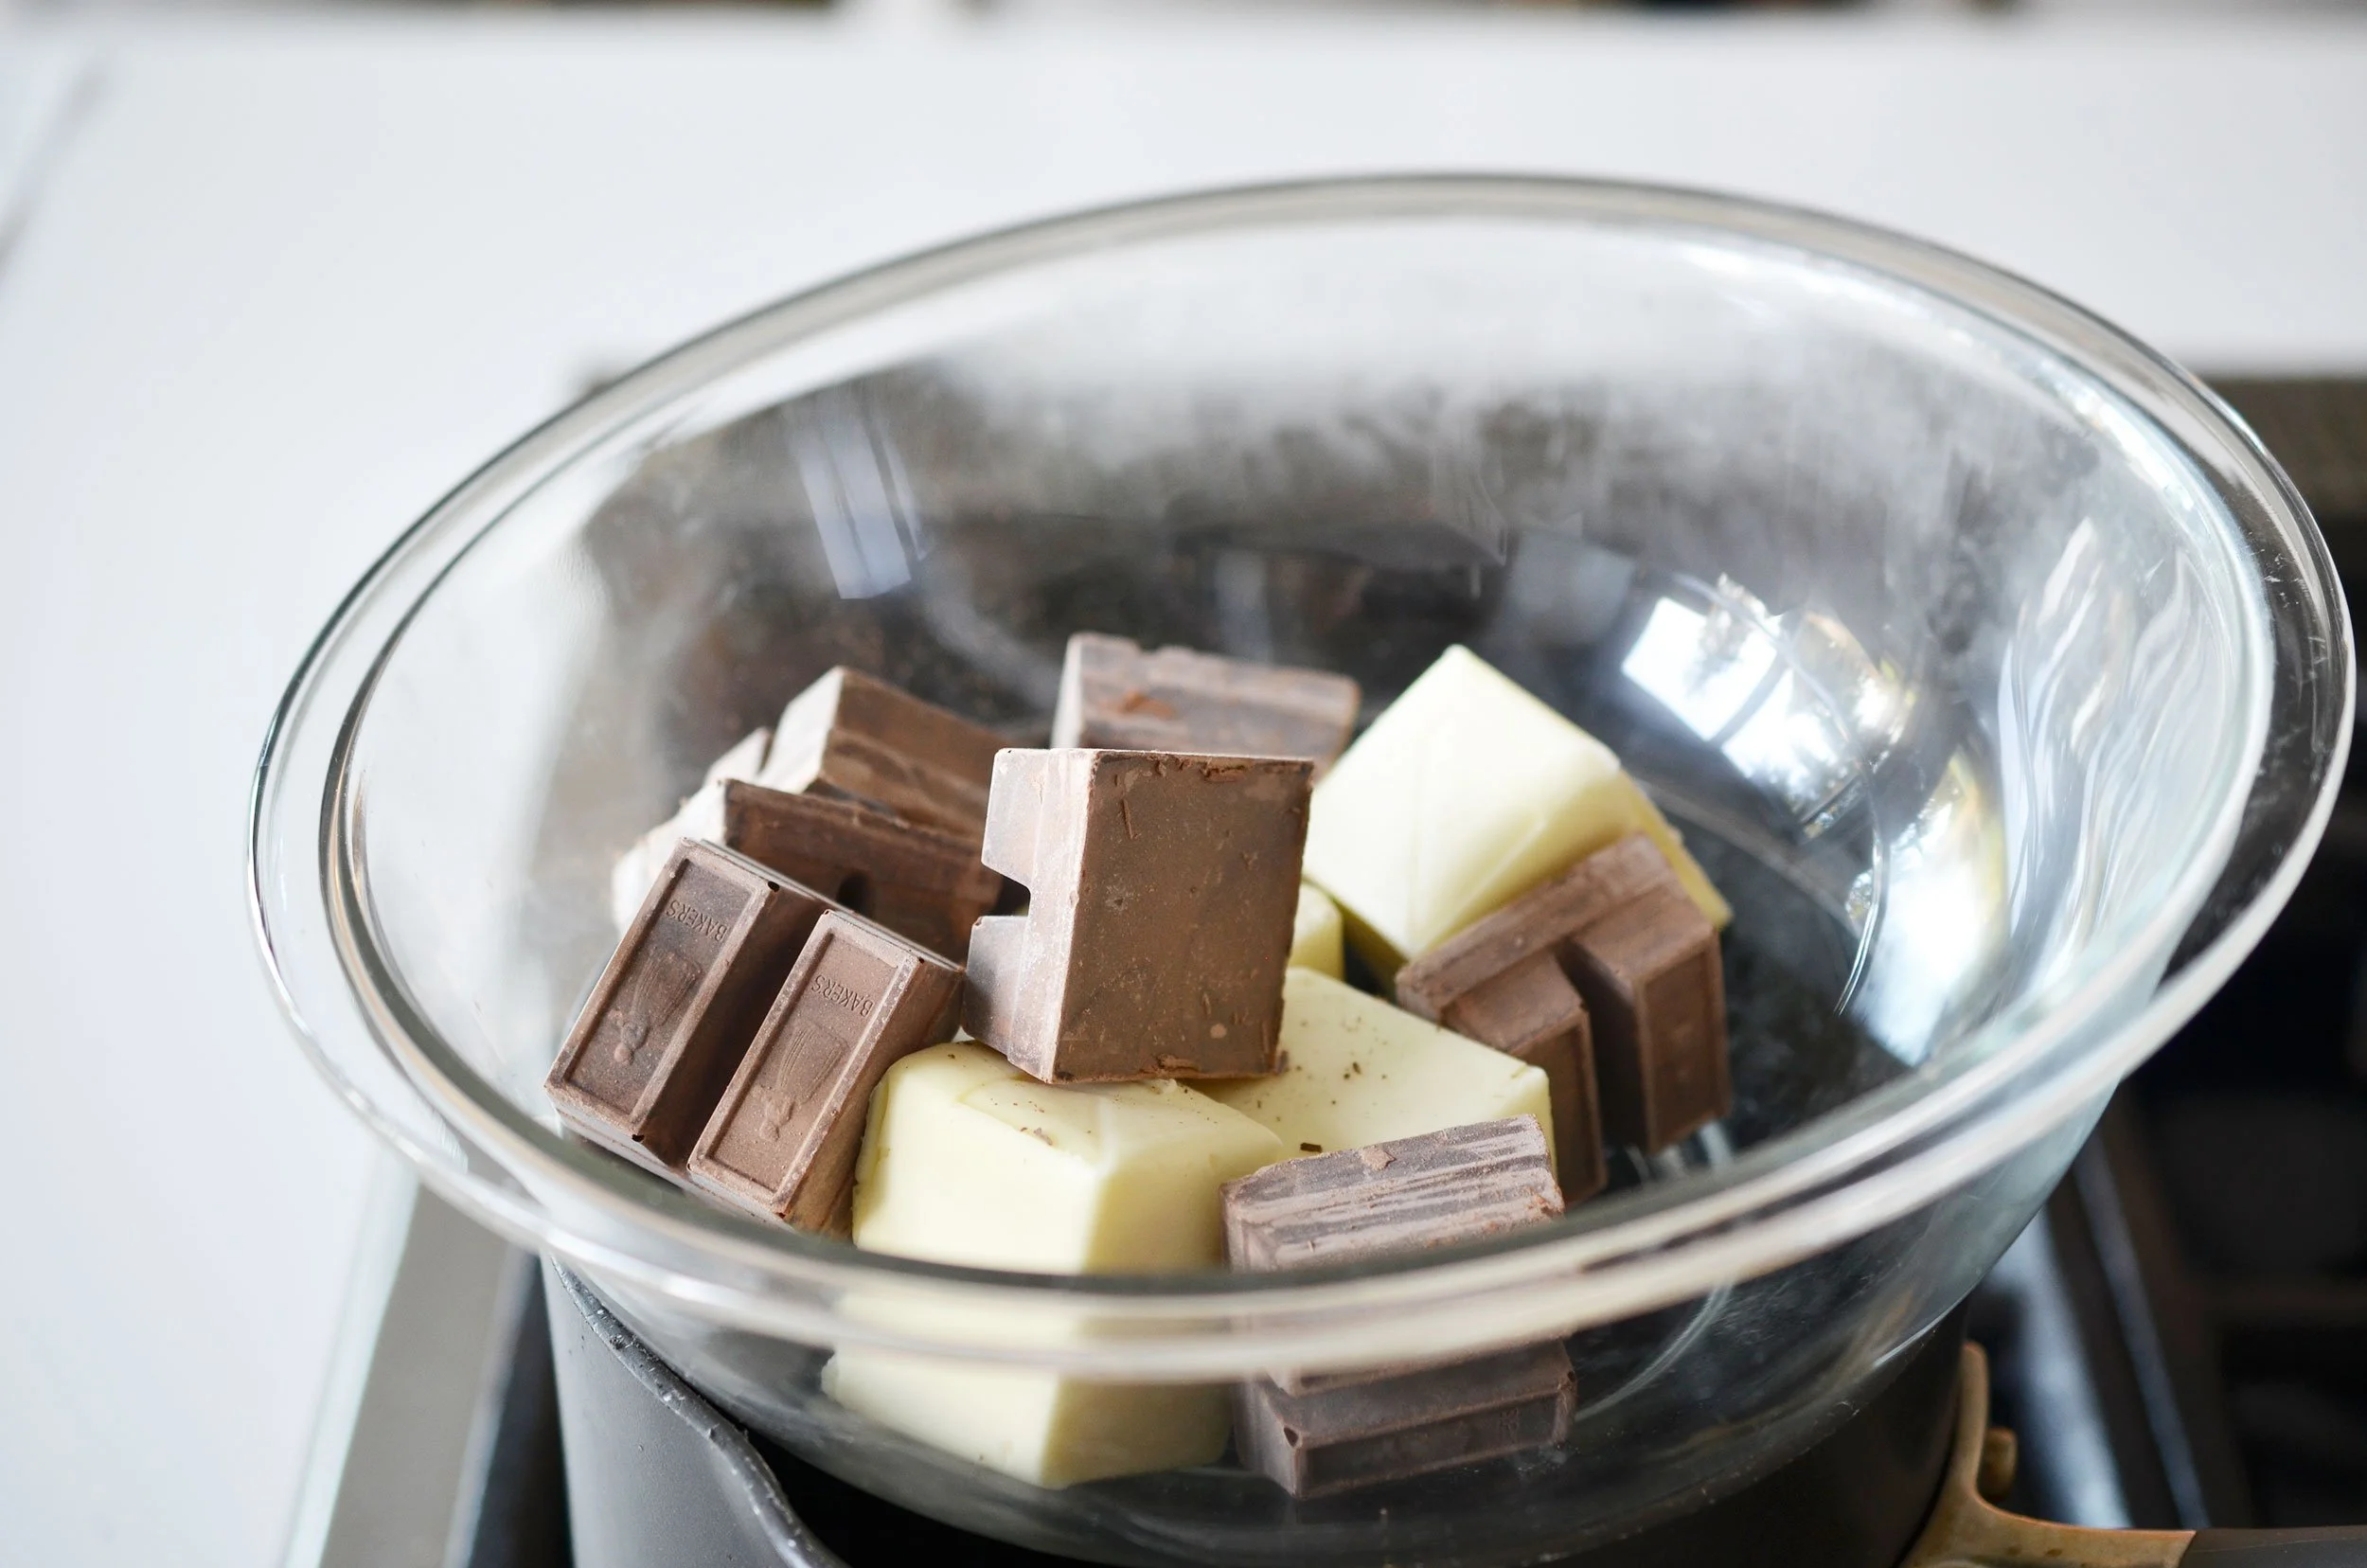
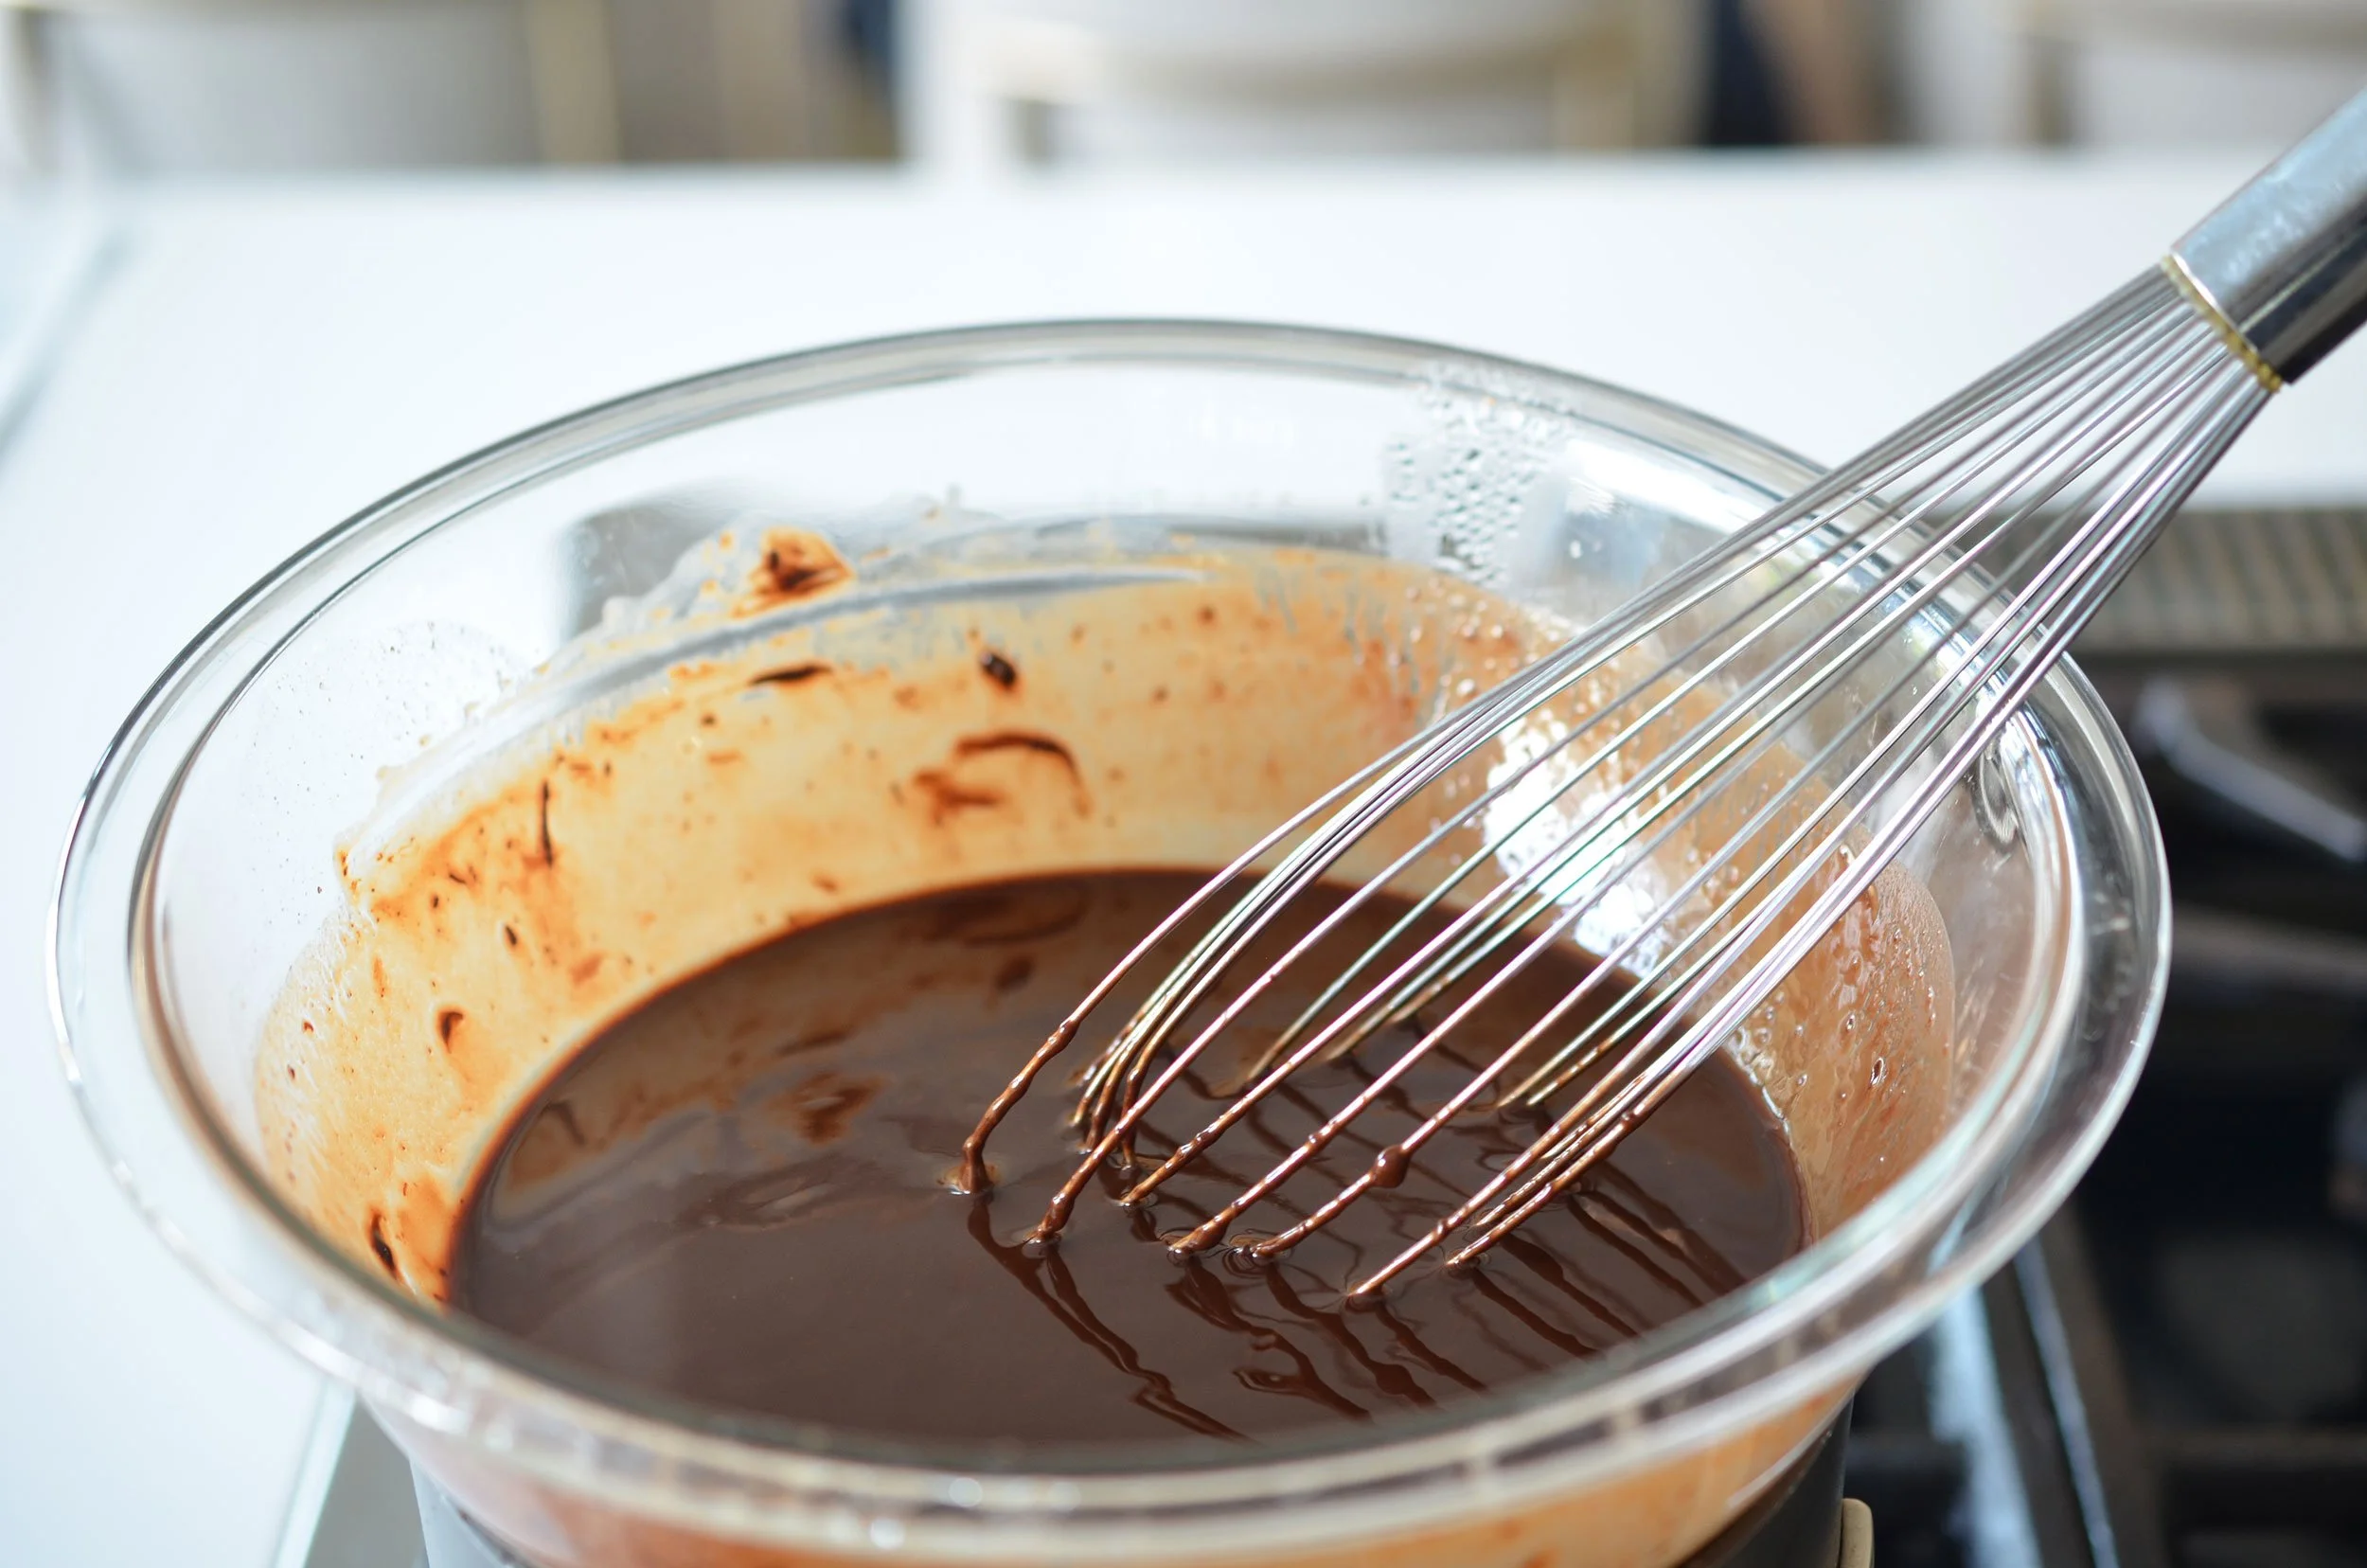
The thing that may throw you off is the double boiler. Really, this is a bowl over a pot of hot water. You’re trying to slowly melt the chocolate and butter together to get it to be liquidy. You can do this in a microwave too, it’s just a little more effort because you have to keep checking it and starting the microwave again. The double boiler - over a medium low heat - will do the work itself with just a little whisking.
The only other “trick” to remember is to go super slow when adding the chocolate mixture to the egg mixture. If you go too fast, the eggs will turn into little bits of scrambled eggs and that’s not delicious in a brownie. I just turn on the mixer, go slow, and let it splash a little bit. As long as you’re pouring slow and the mixer is on low, the splashing won’t be too bad.
Peanut Butter Swirl Brownies
makes about a dozen
8 ounces semi sweet chocolate
8 tablespoons butter
1 1/2 cups brown sugar
4 eggs
3/4 cup flour
1 cup smooth peanut butter
1/2 cup softened butter
1/2 cup powdered sugar
1 teaspoon vanilla
STEP 1
Preheat the oven to 350 degrees. Line a 9x9 pan with parchment paper and set aside.
Make a double boiler by layering a glass bowl over a boiling pot of water. Place the 8 tablespoons butter and 8 ounces chocolate in the double boiler and whisk over medium heat until melted.
STEP 2
In the bowl of a stand mixer, blend together the brown sugar and eggs until smooth. With the mixer running, pour the chocolate in a slow steady stream. If you go too fast, you’ll end up with scrambled eggs.
STEP 3
Once the chocolate has been incorporated, stir in the flour 1/4 cup at a time. When everything is just incorporated, scrape the batter into the prepared pan.
STEP 4
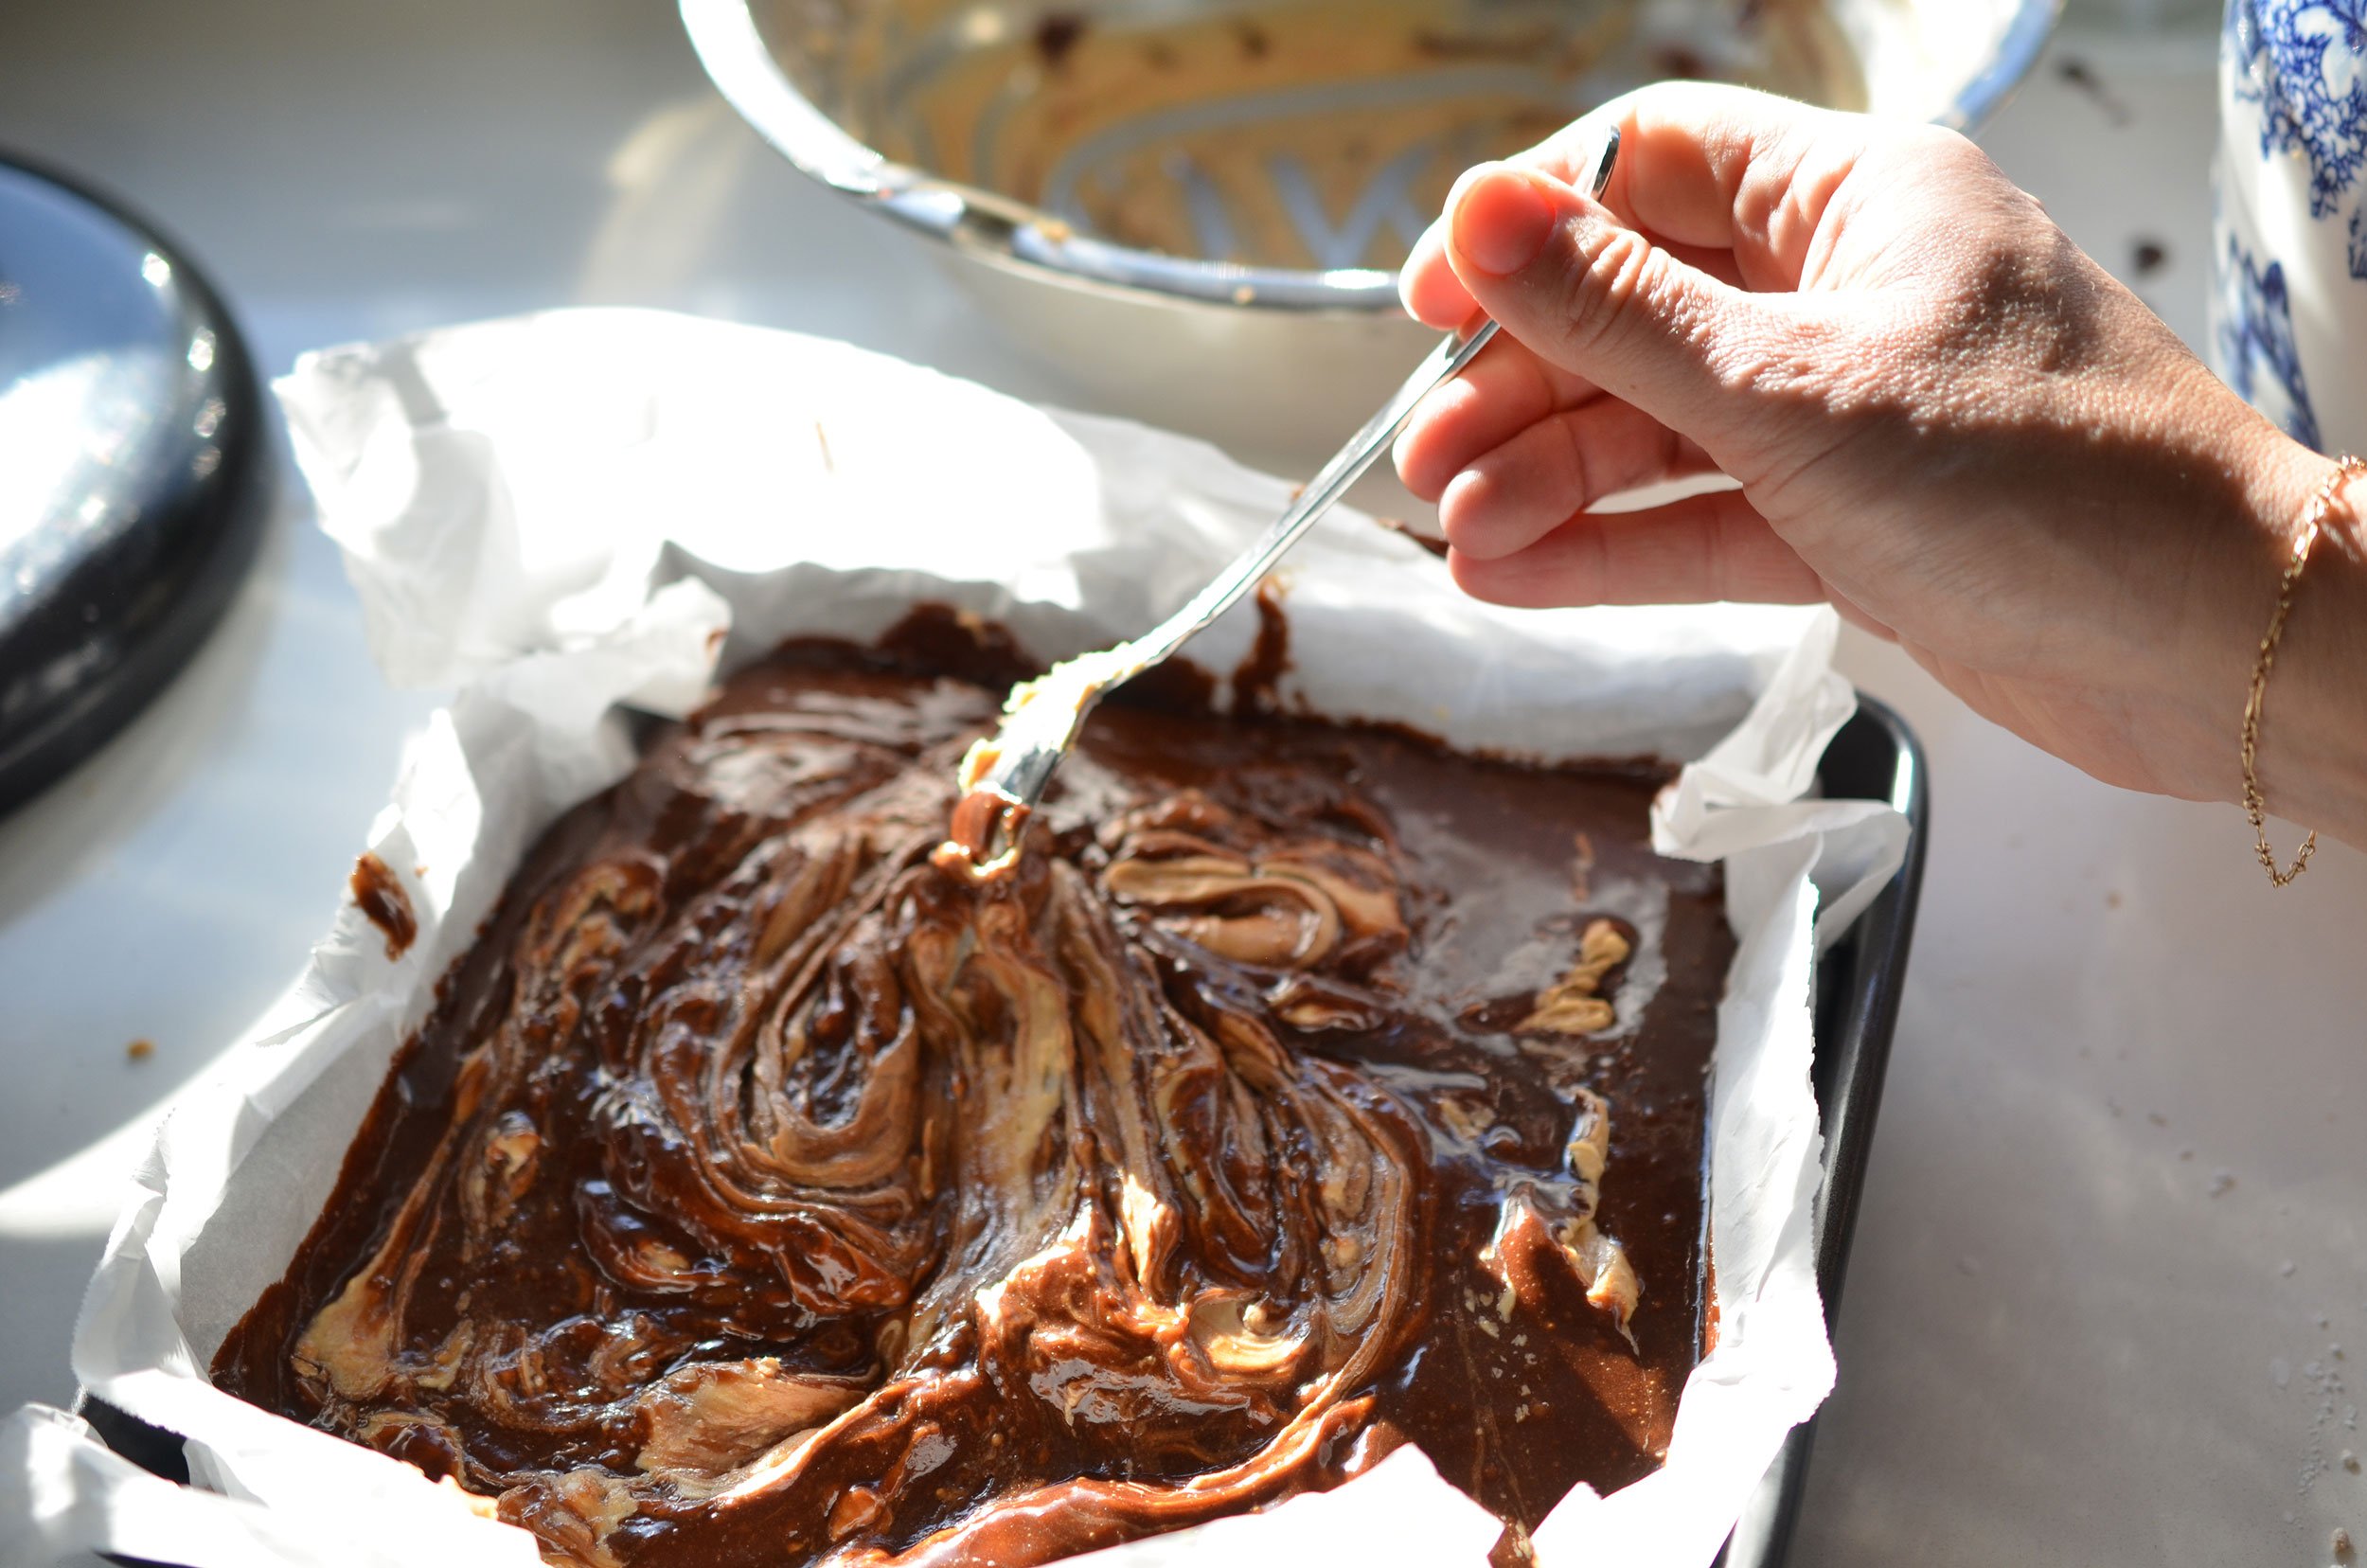
In a separate bowl, combine remaining butter, peanut butter, powdered sugar and vanilla. Whisk until smooth. Dot the top of the brownies with the peanut butter mixture and swirl in to incorporate.
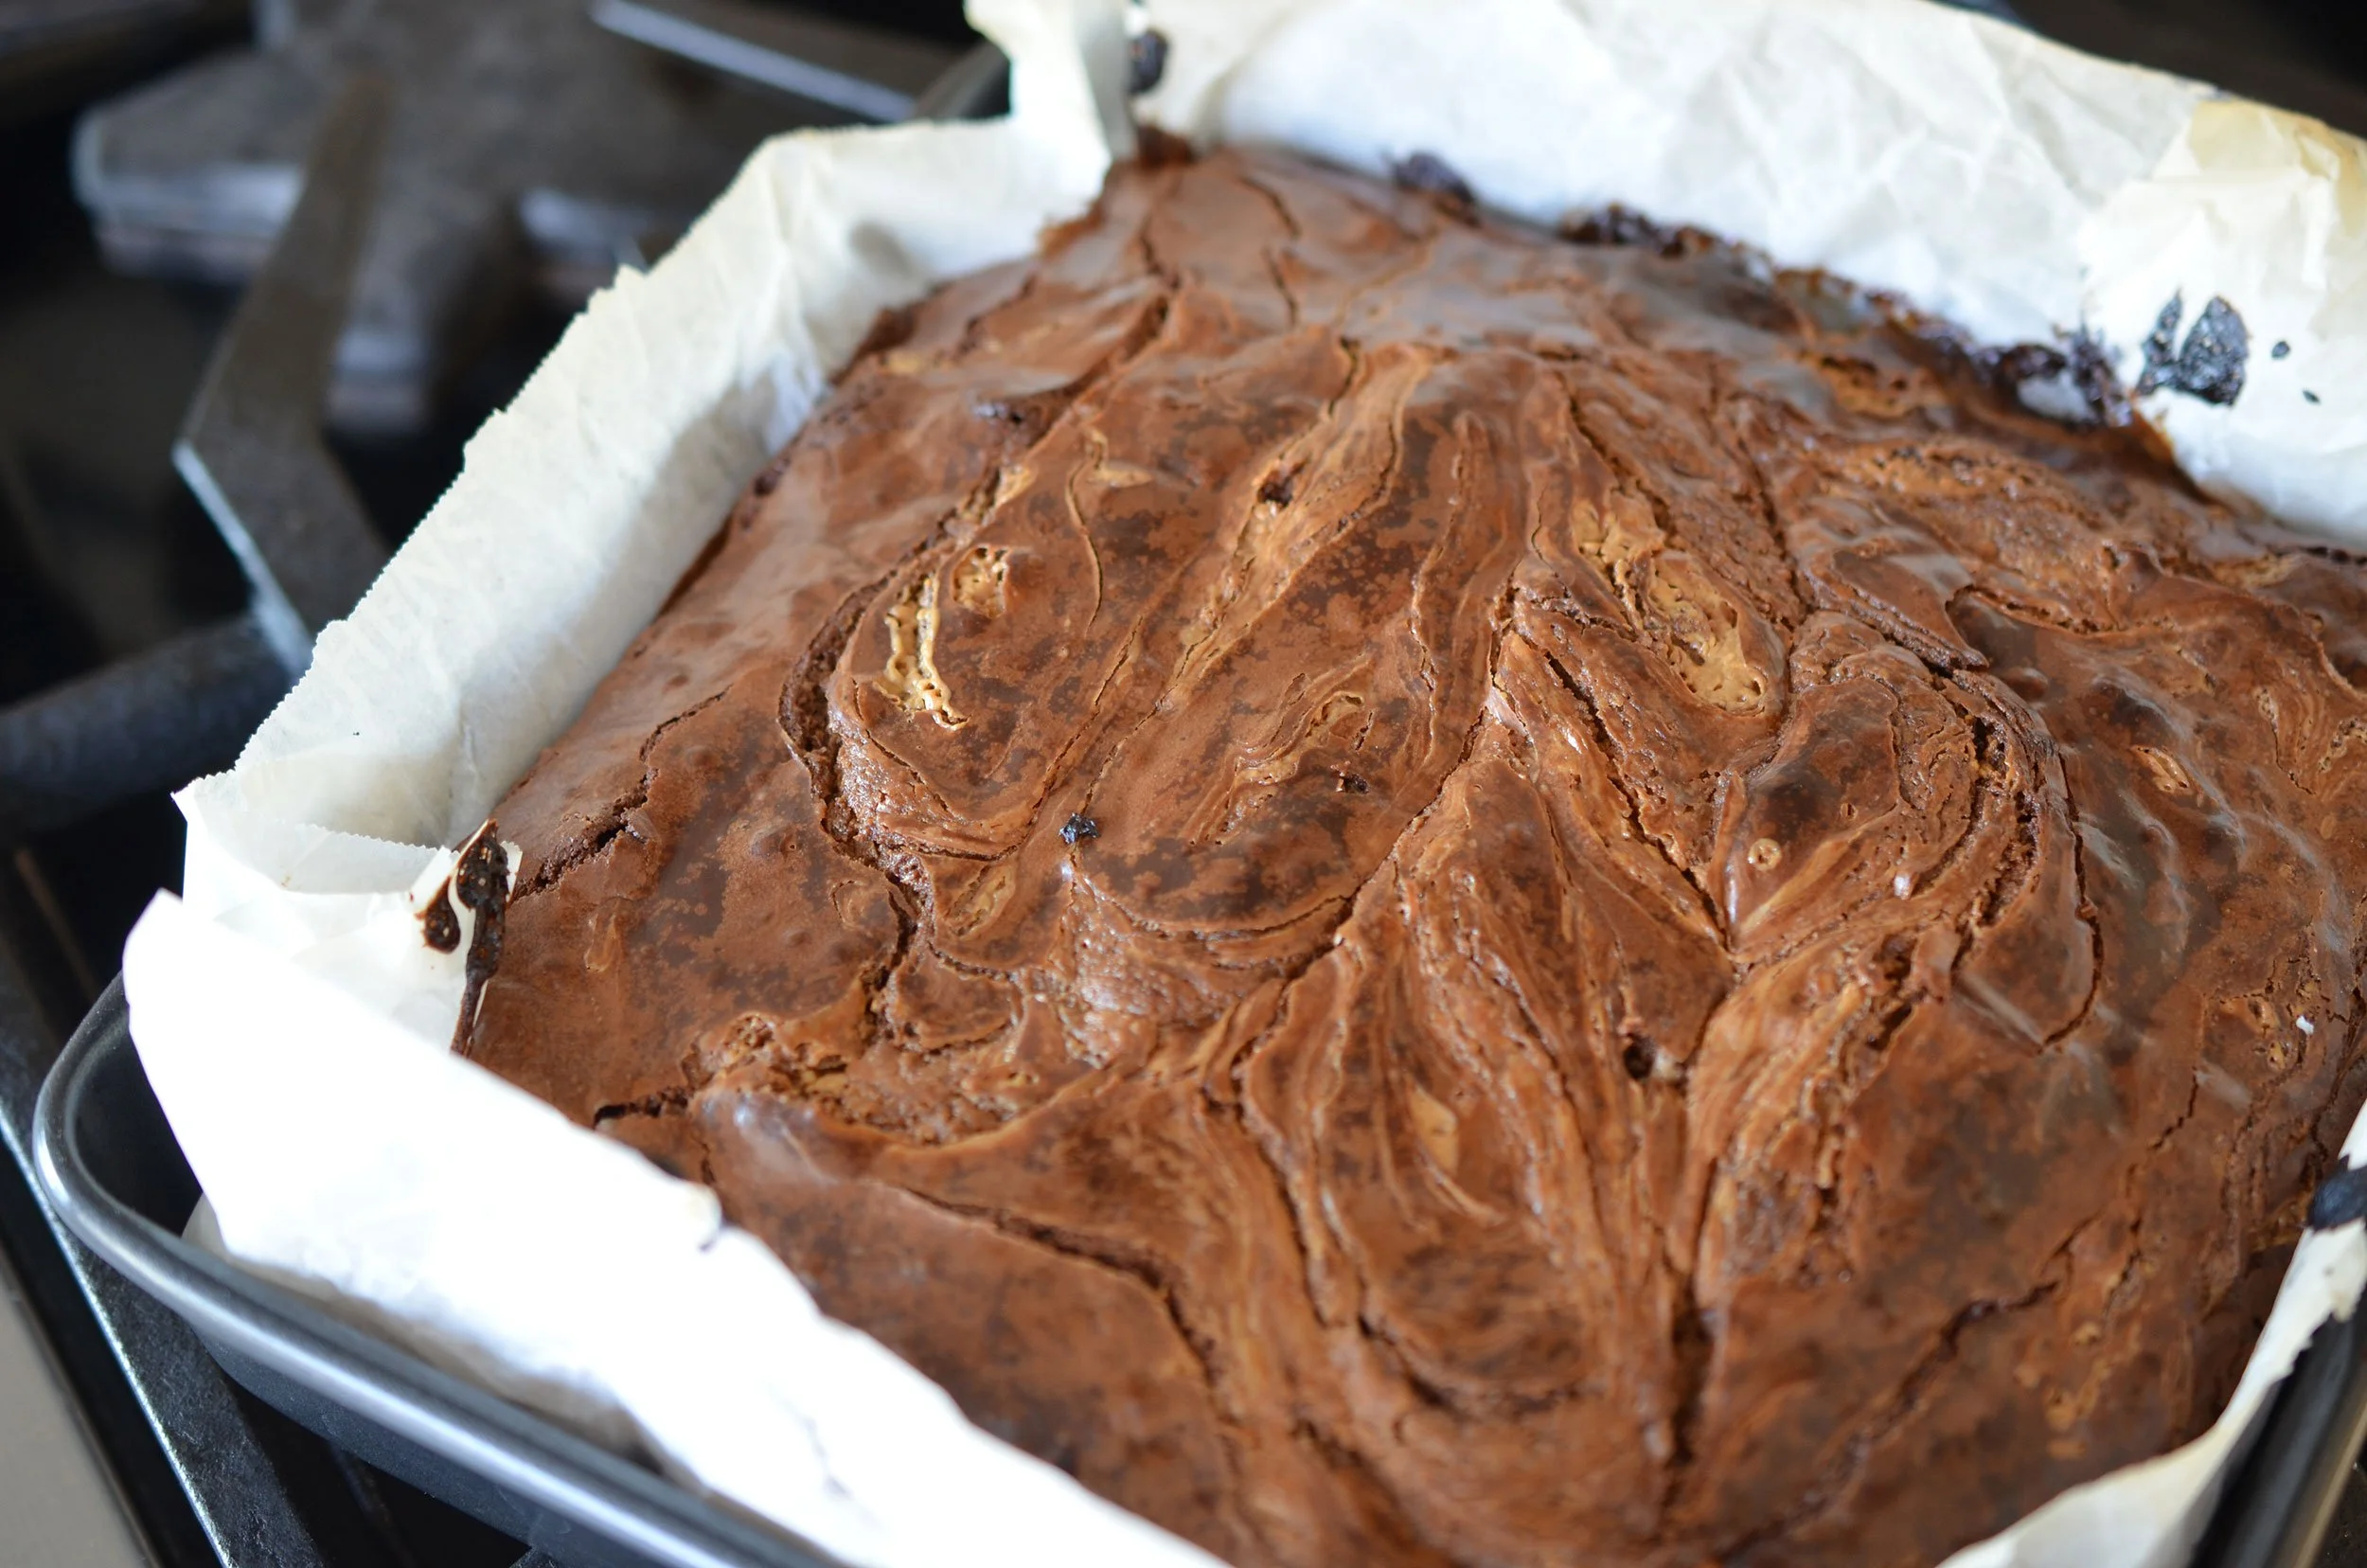
STEP 5
Pop into the oven and bake 45-50 minutes until a toothpick comes out clean. Or clean-ish - a few crumbs will come up at the very end.
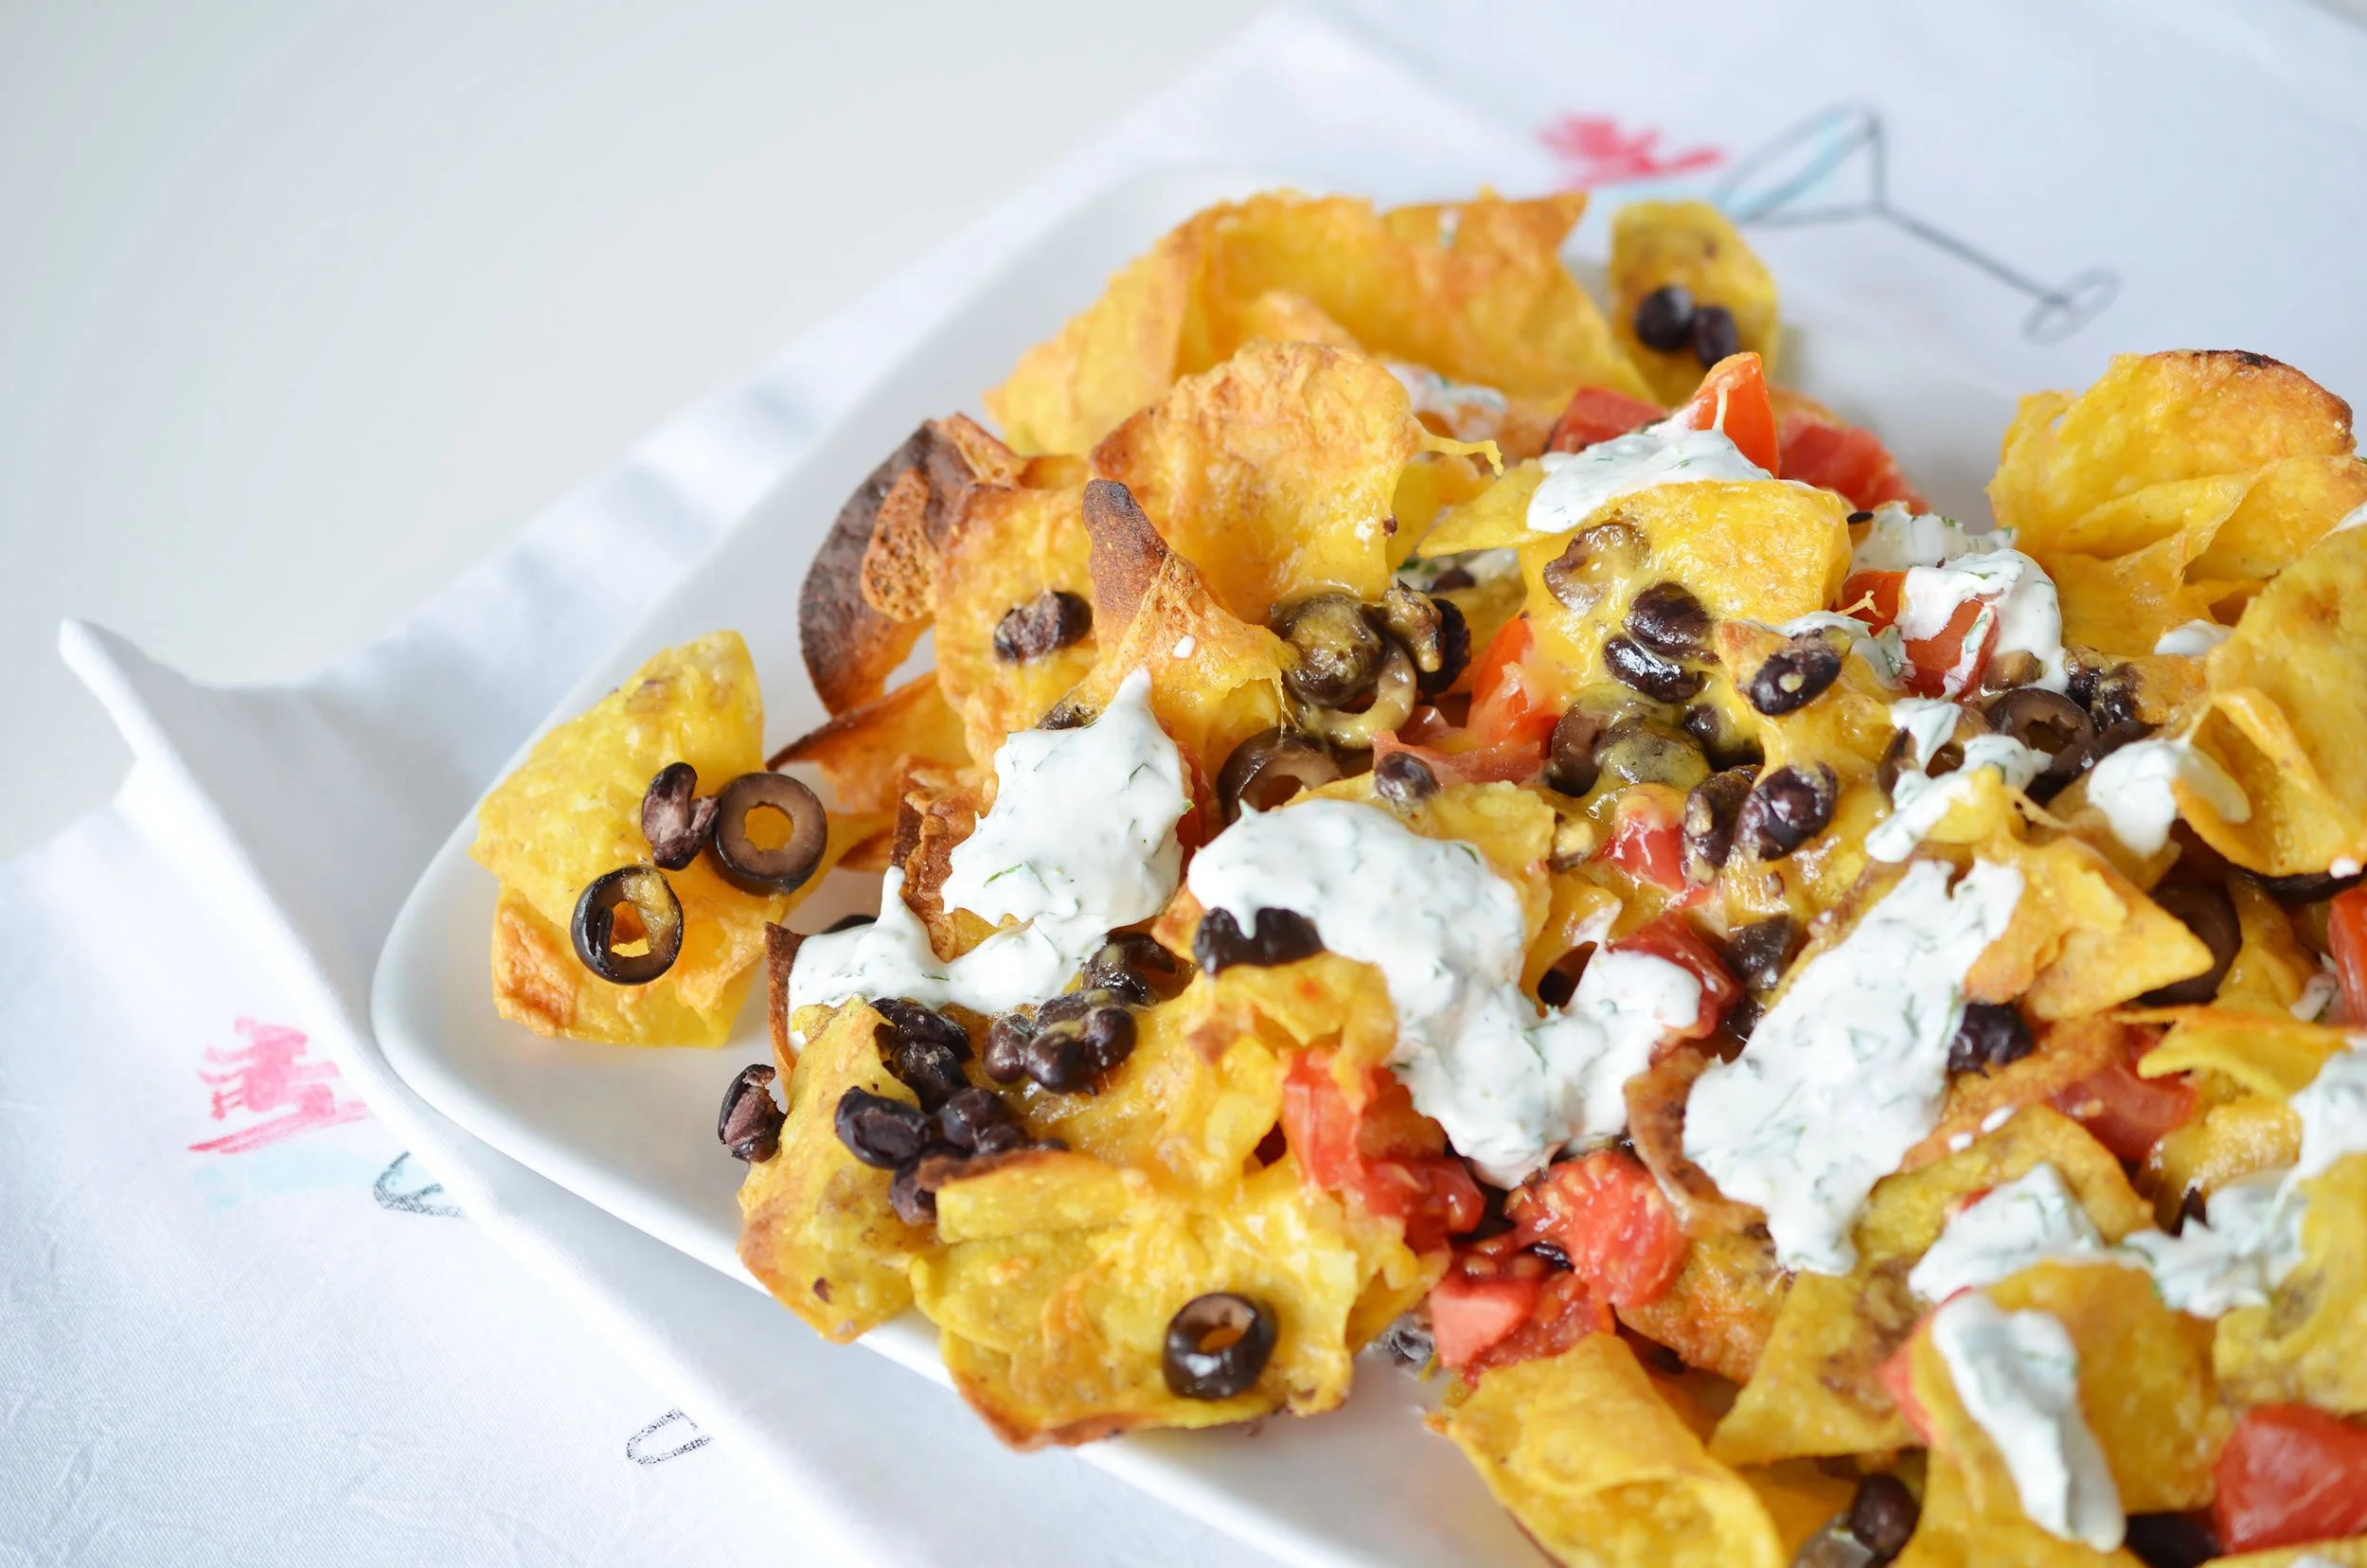
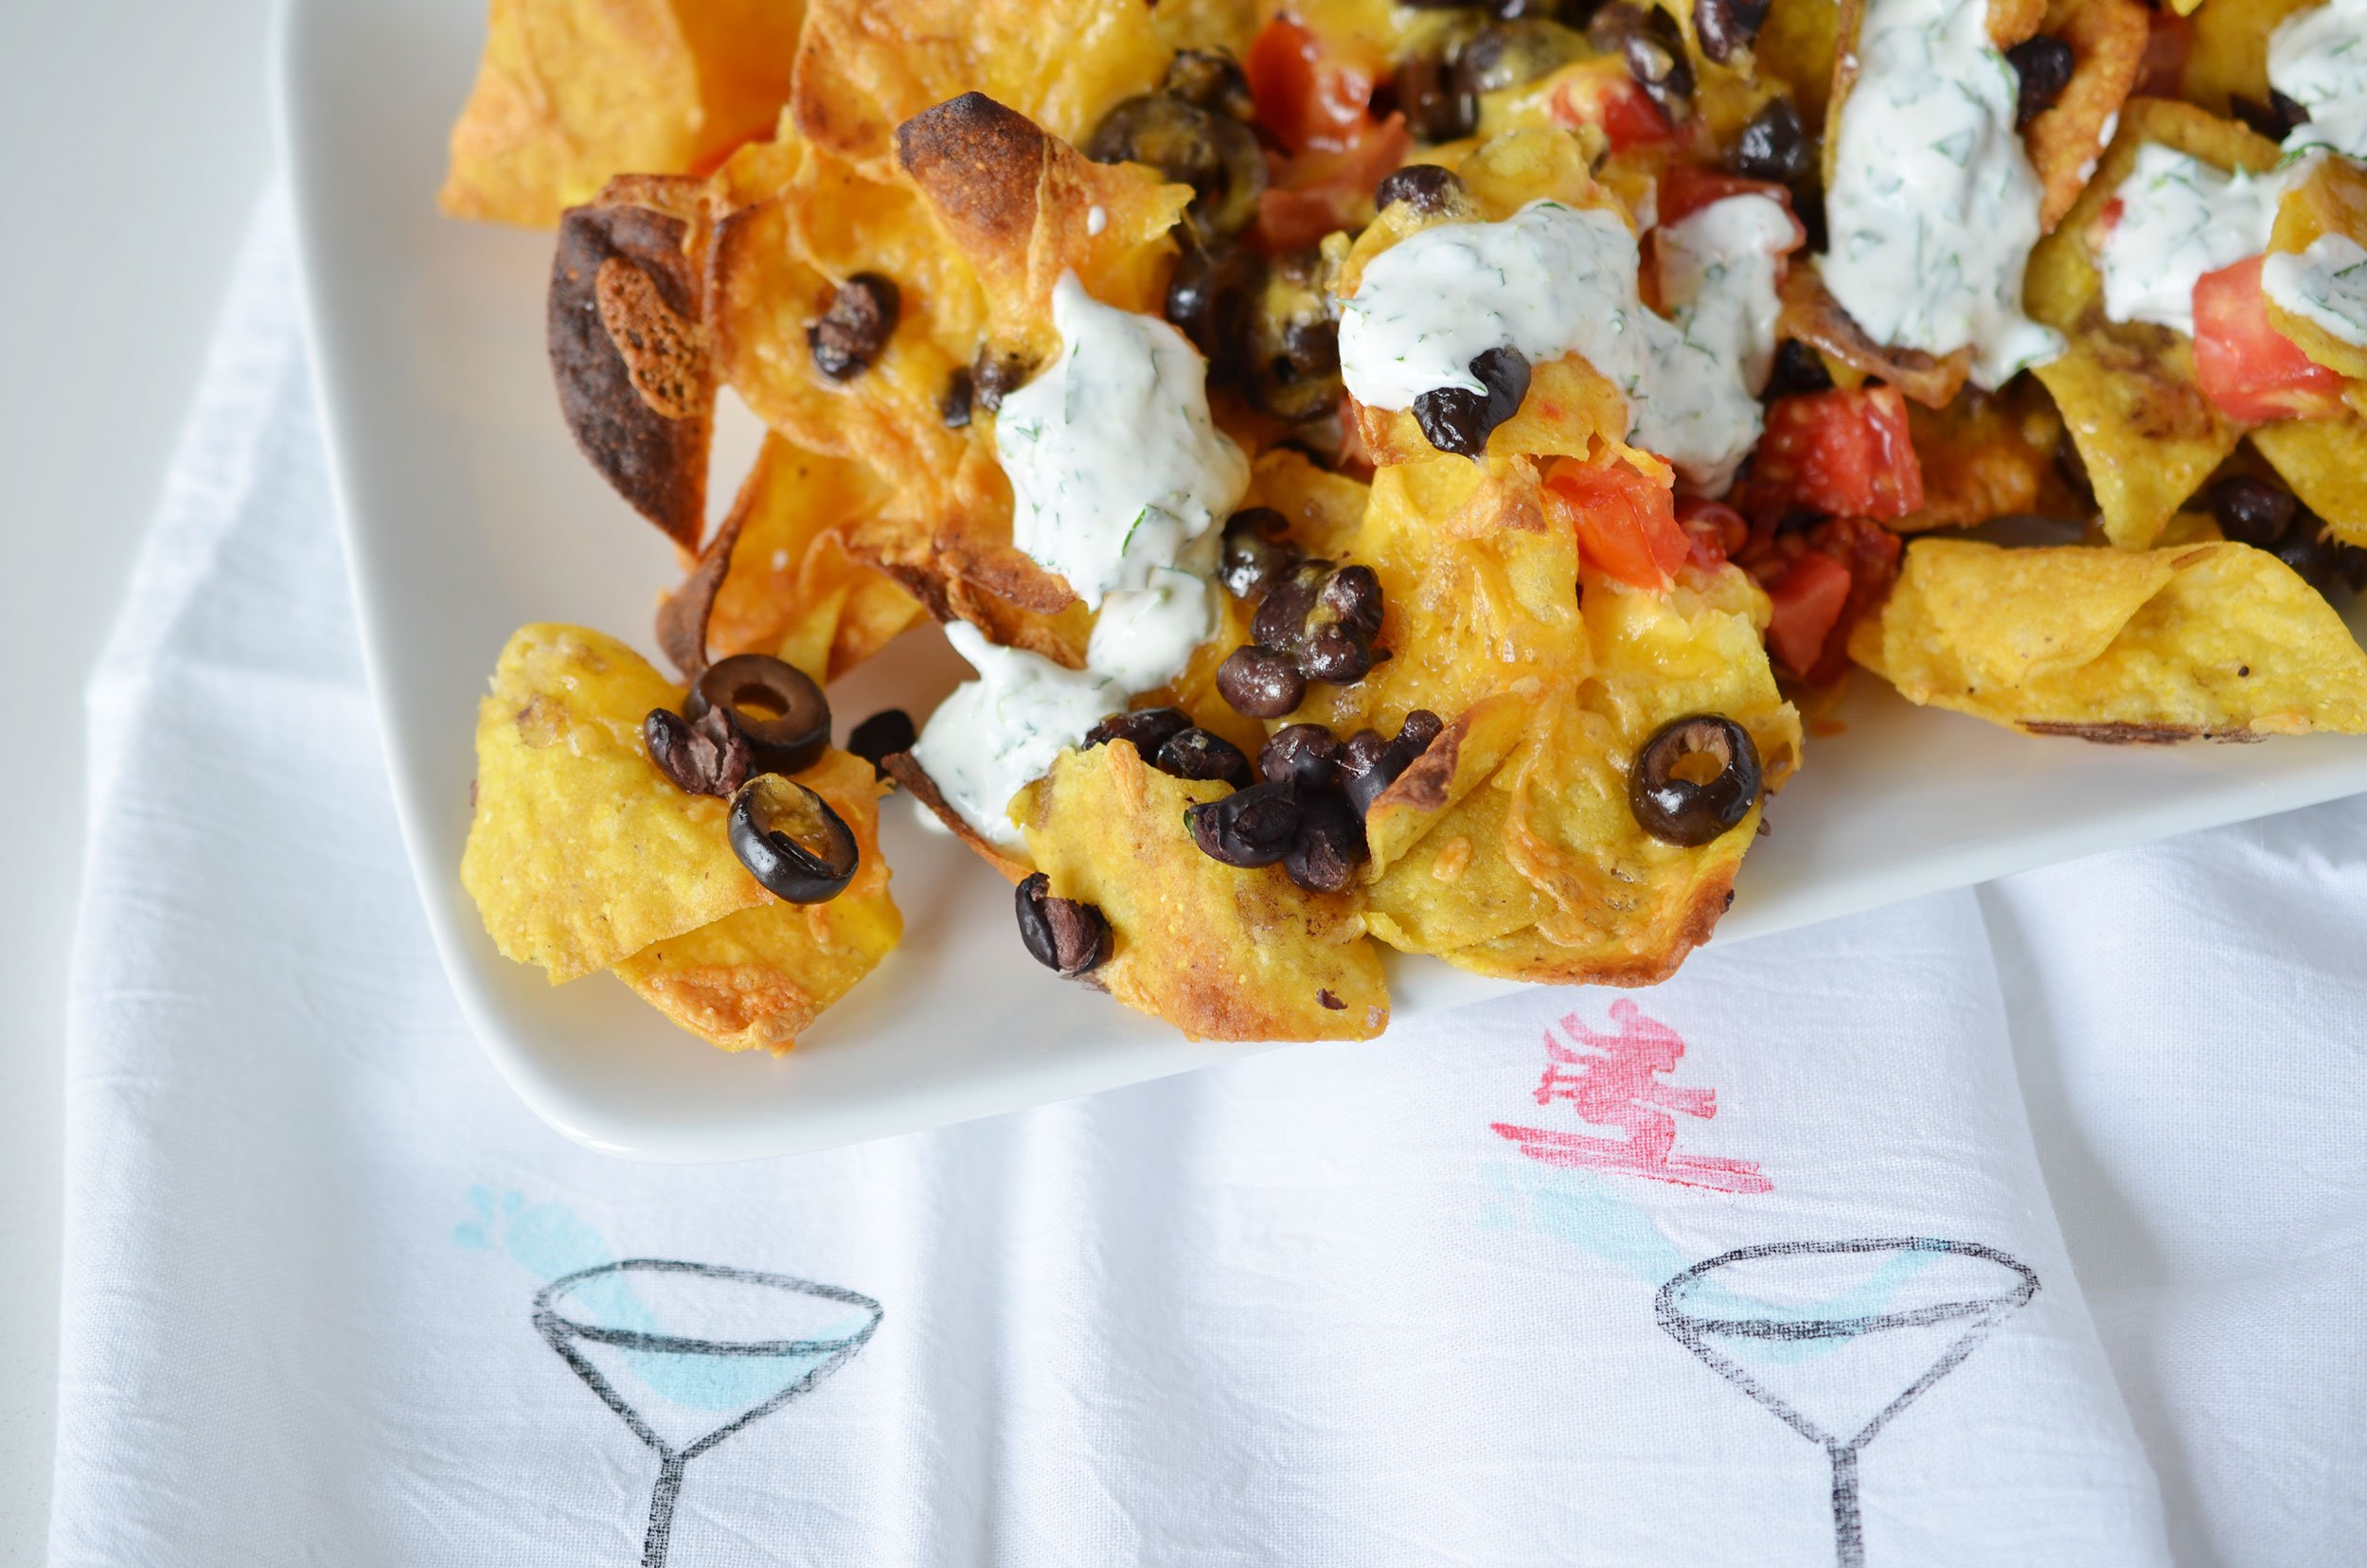
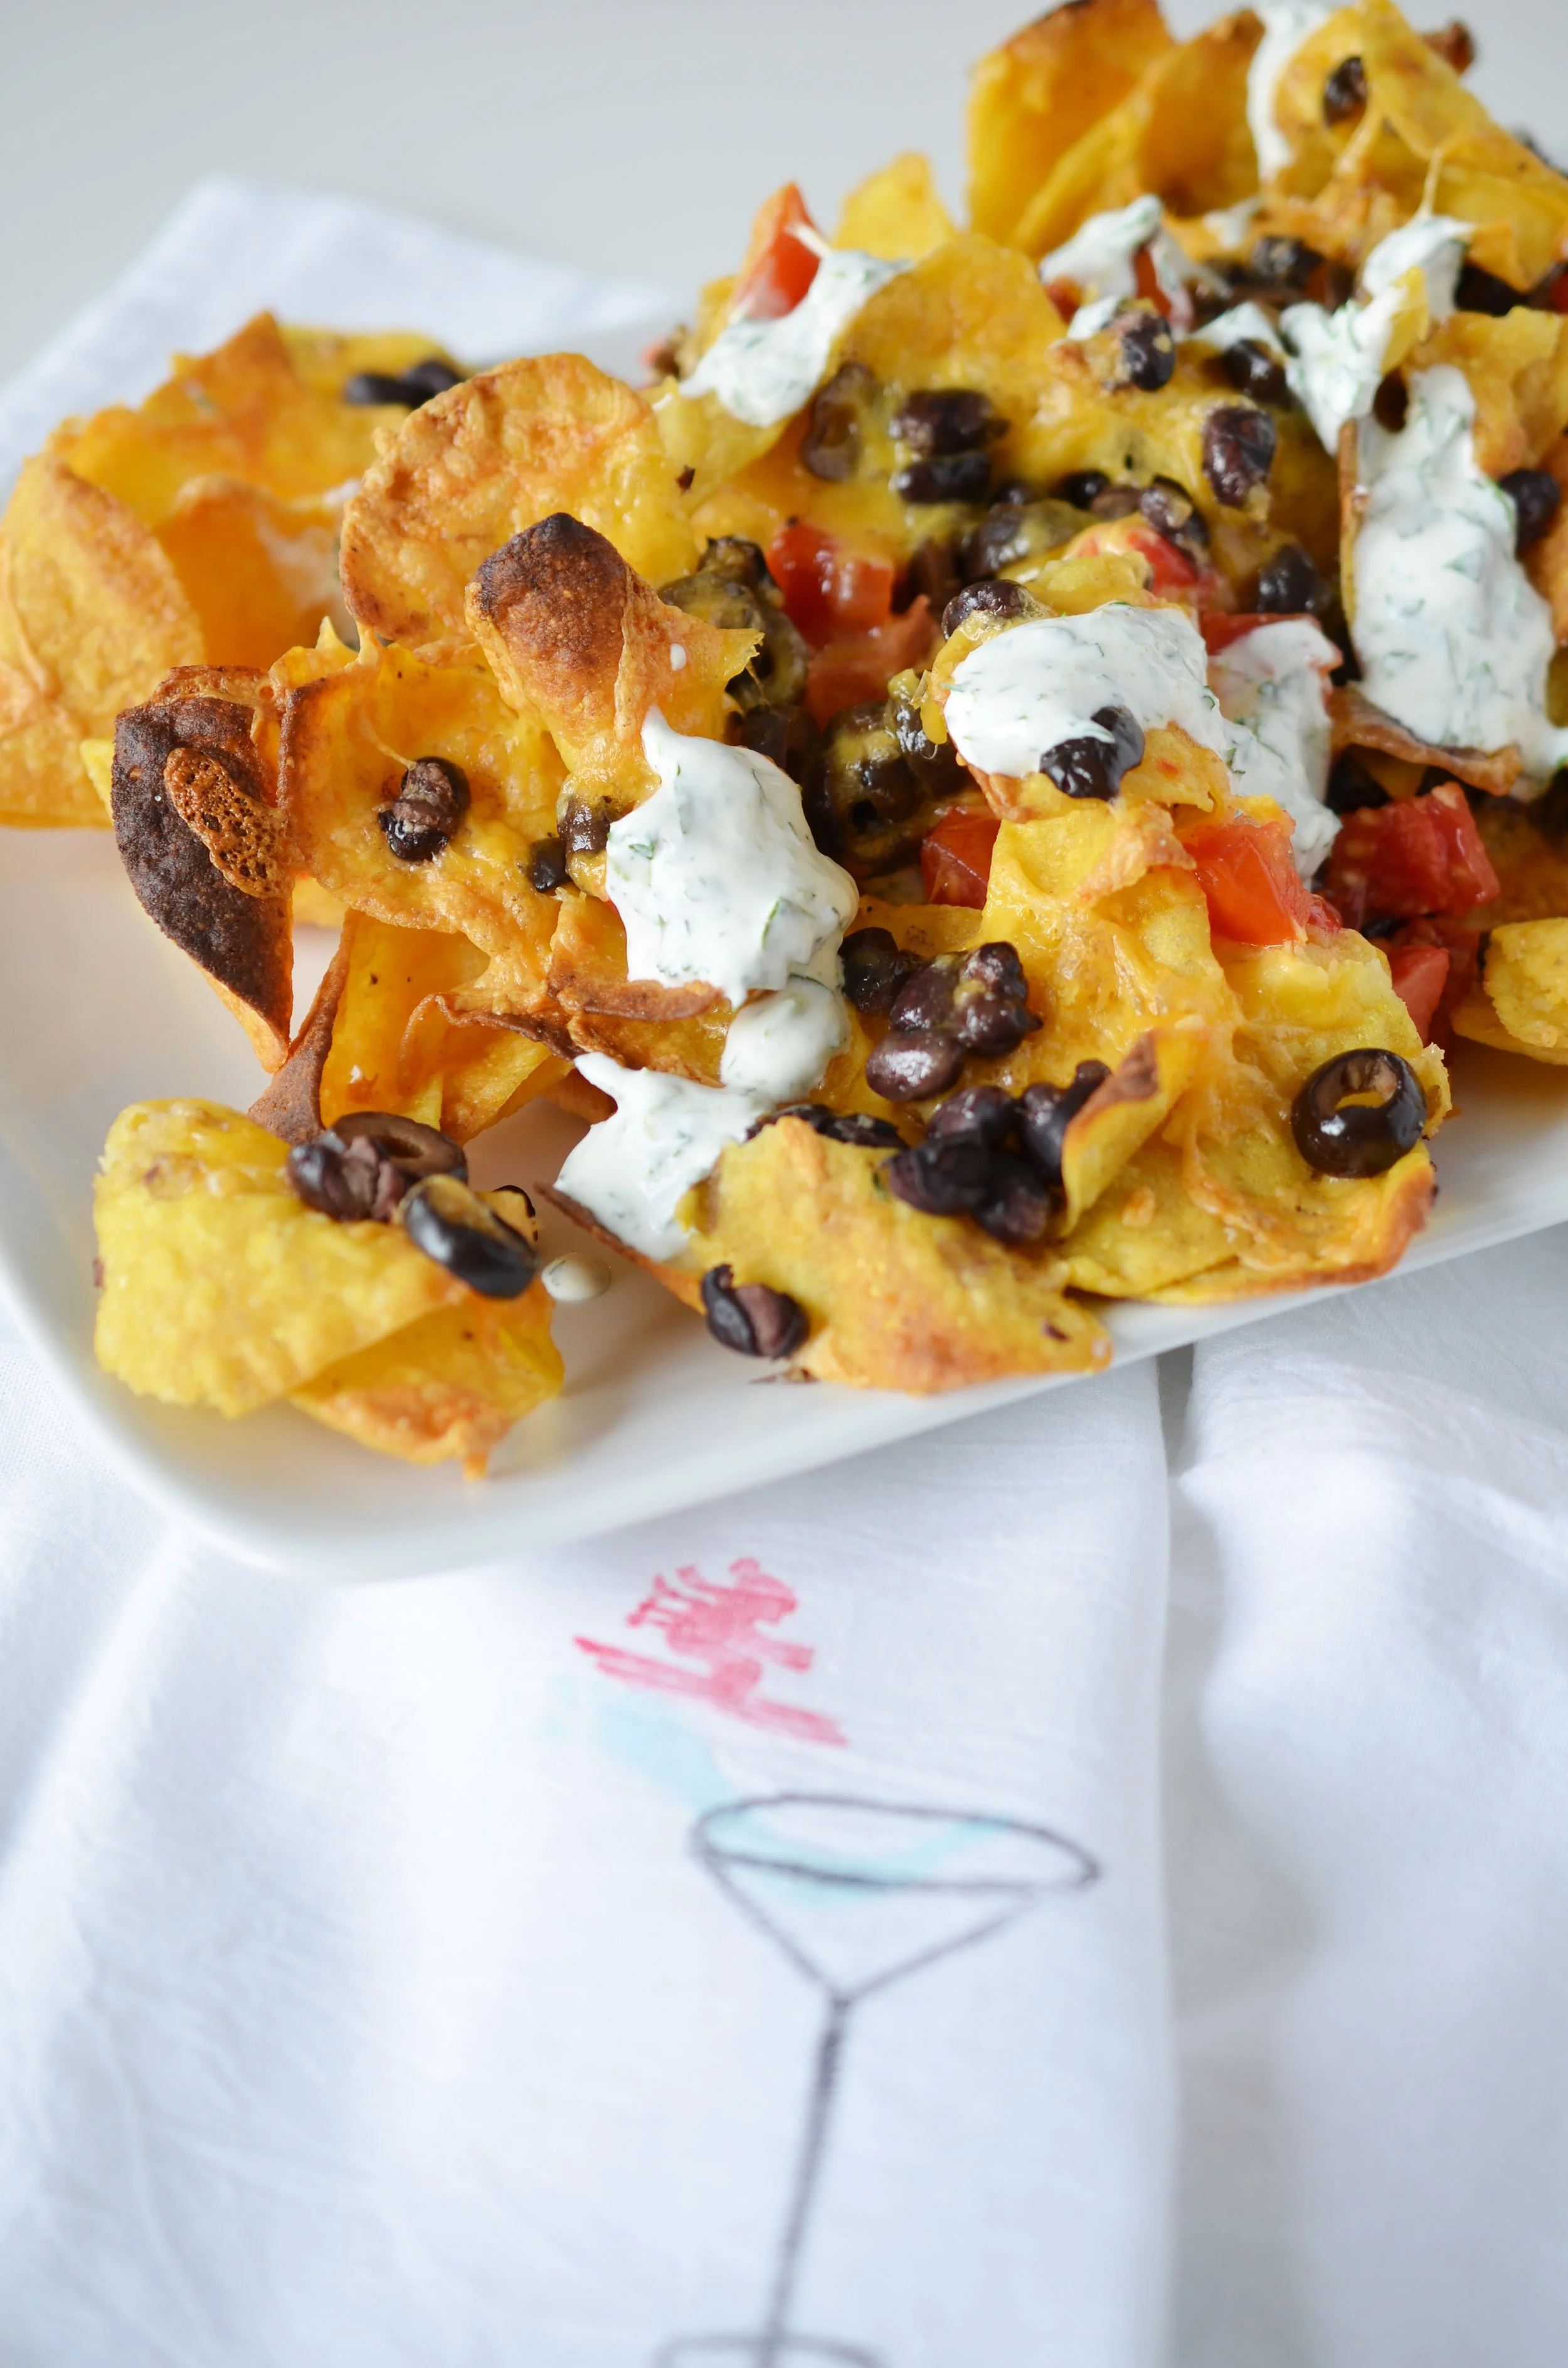
Après Ski Nachos
There are occasions that call for fancy, over the top, loaded nachos - and then there’s the après ski version. Après nachos need to be delicious, warm, cheesy, and served with a sauce that is unbeatable. These are so easy and so perfect when your fingers are cold and your toes are numb.
There are three tips to making the perfect nacho:
You have to grate the cheese yourself. The pre-grated has potato starch on it and it won’t melt properly.
Make one thin layer on nachos on a baking sheet lined with parchment. When they come out, quickly layer the nachos on top of each other to serve.
You need the perfect sauce. Here is that perfect sauce. Serve with hot sauce + Cilantro Lime sauce.
Topping options are obviously endless. The toppings I used here are the ones I had on hand - and are the ones I basically always have on hand. Cans of beans and cans of olives go a long way to making nachos feel packed full of something.
If I have leftover chicken or steak - they are going on top too - but not before I toss them in some taco seasoning first. It’s dramatic the improvement to leftover meats when you toss them in a little seasoning before they head onto the top of the nachos.
Cilantro Lime Sauce
1/2 cup sour cream
1/4 cup chopped cilantro
zest of one lime
juice of one lime (more or less)
Combine everything together. And drizzle over the top of the nachos when they are hot.
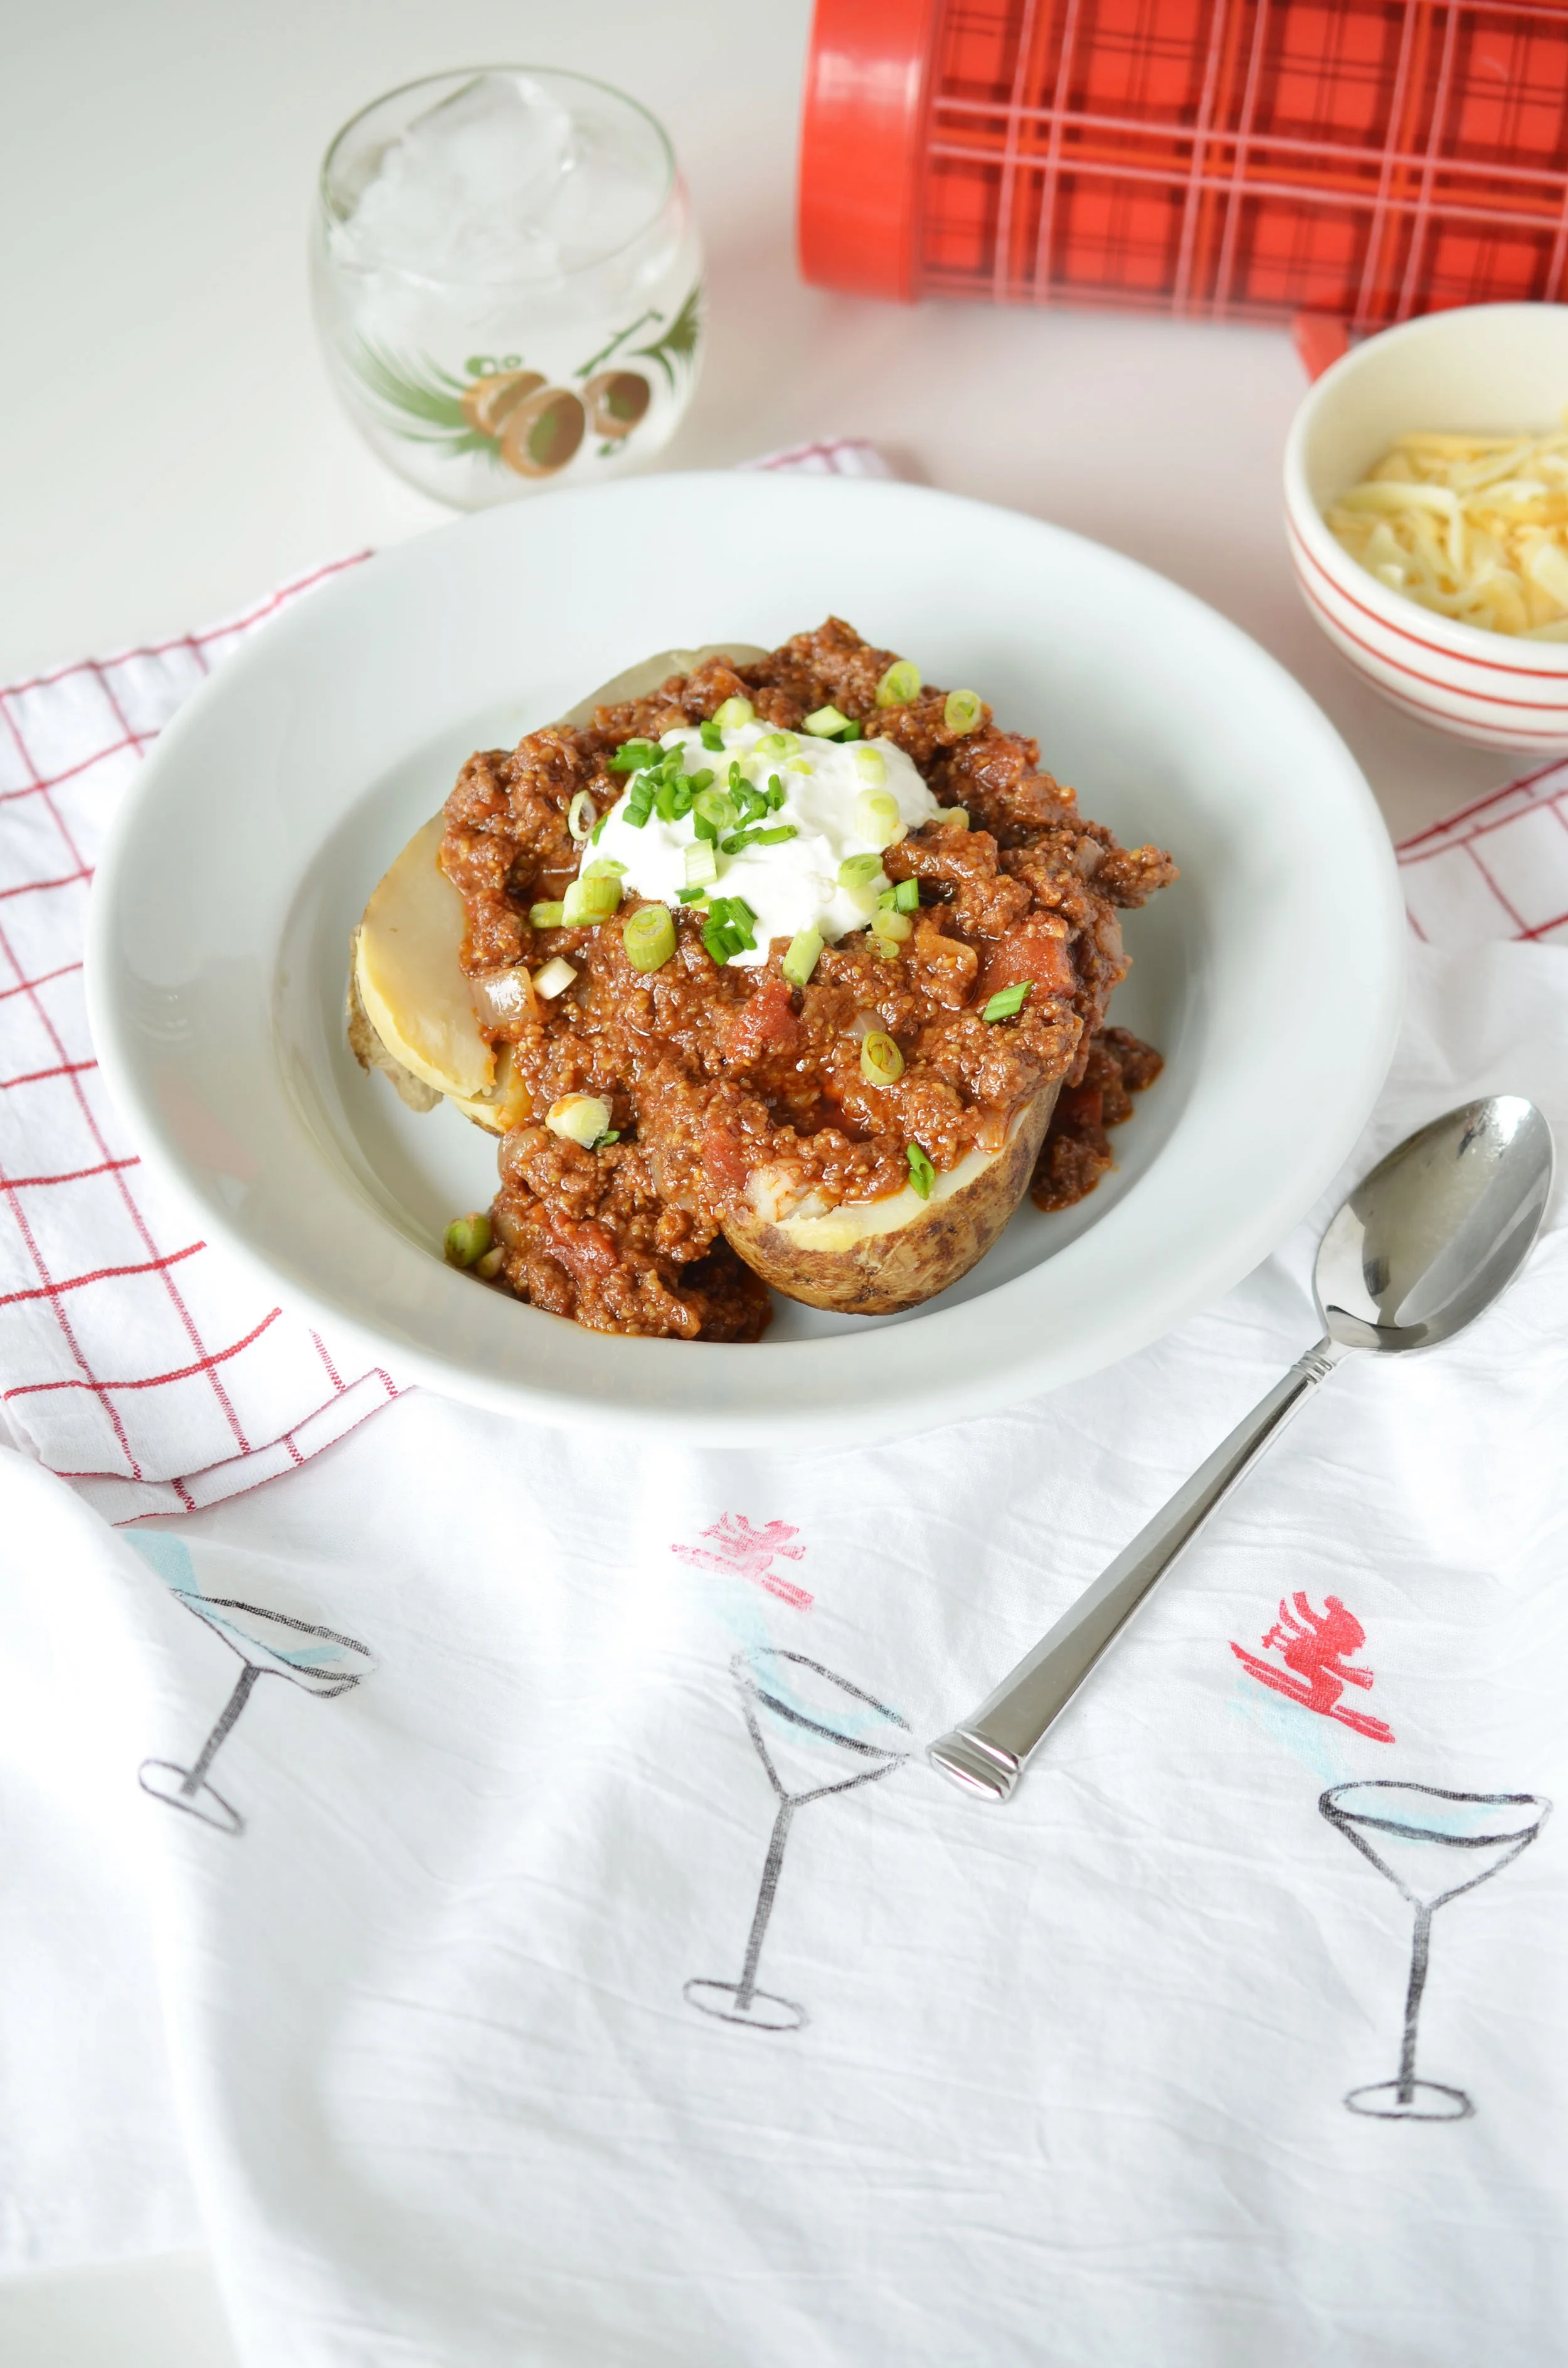
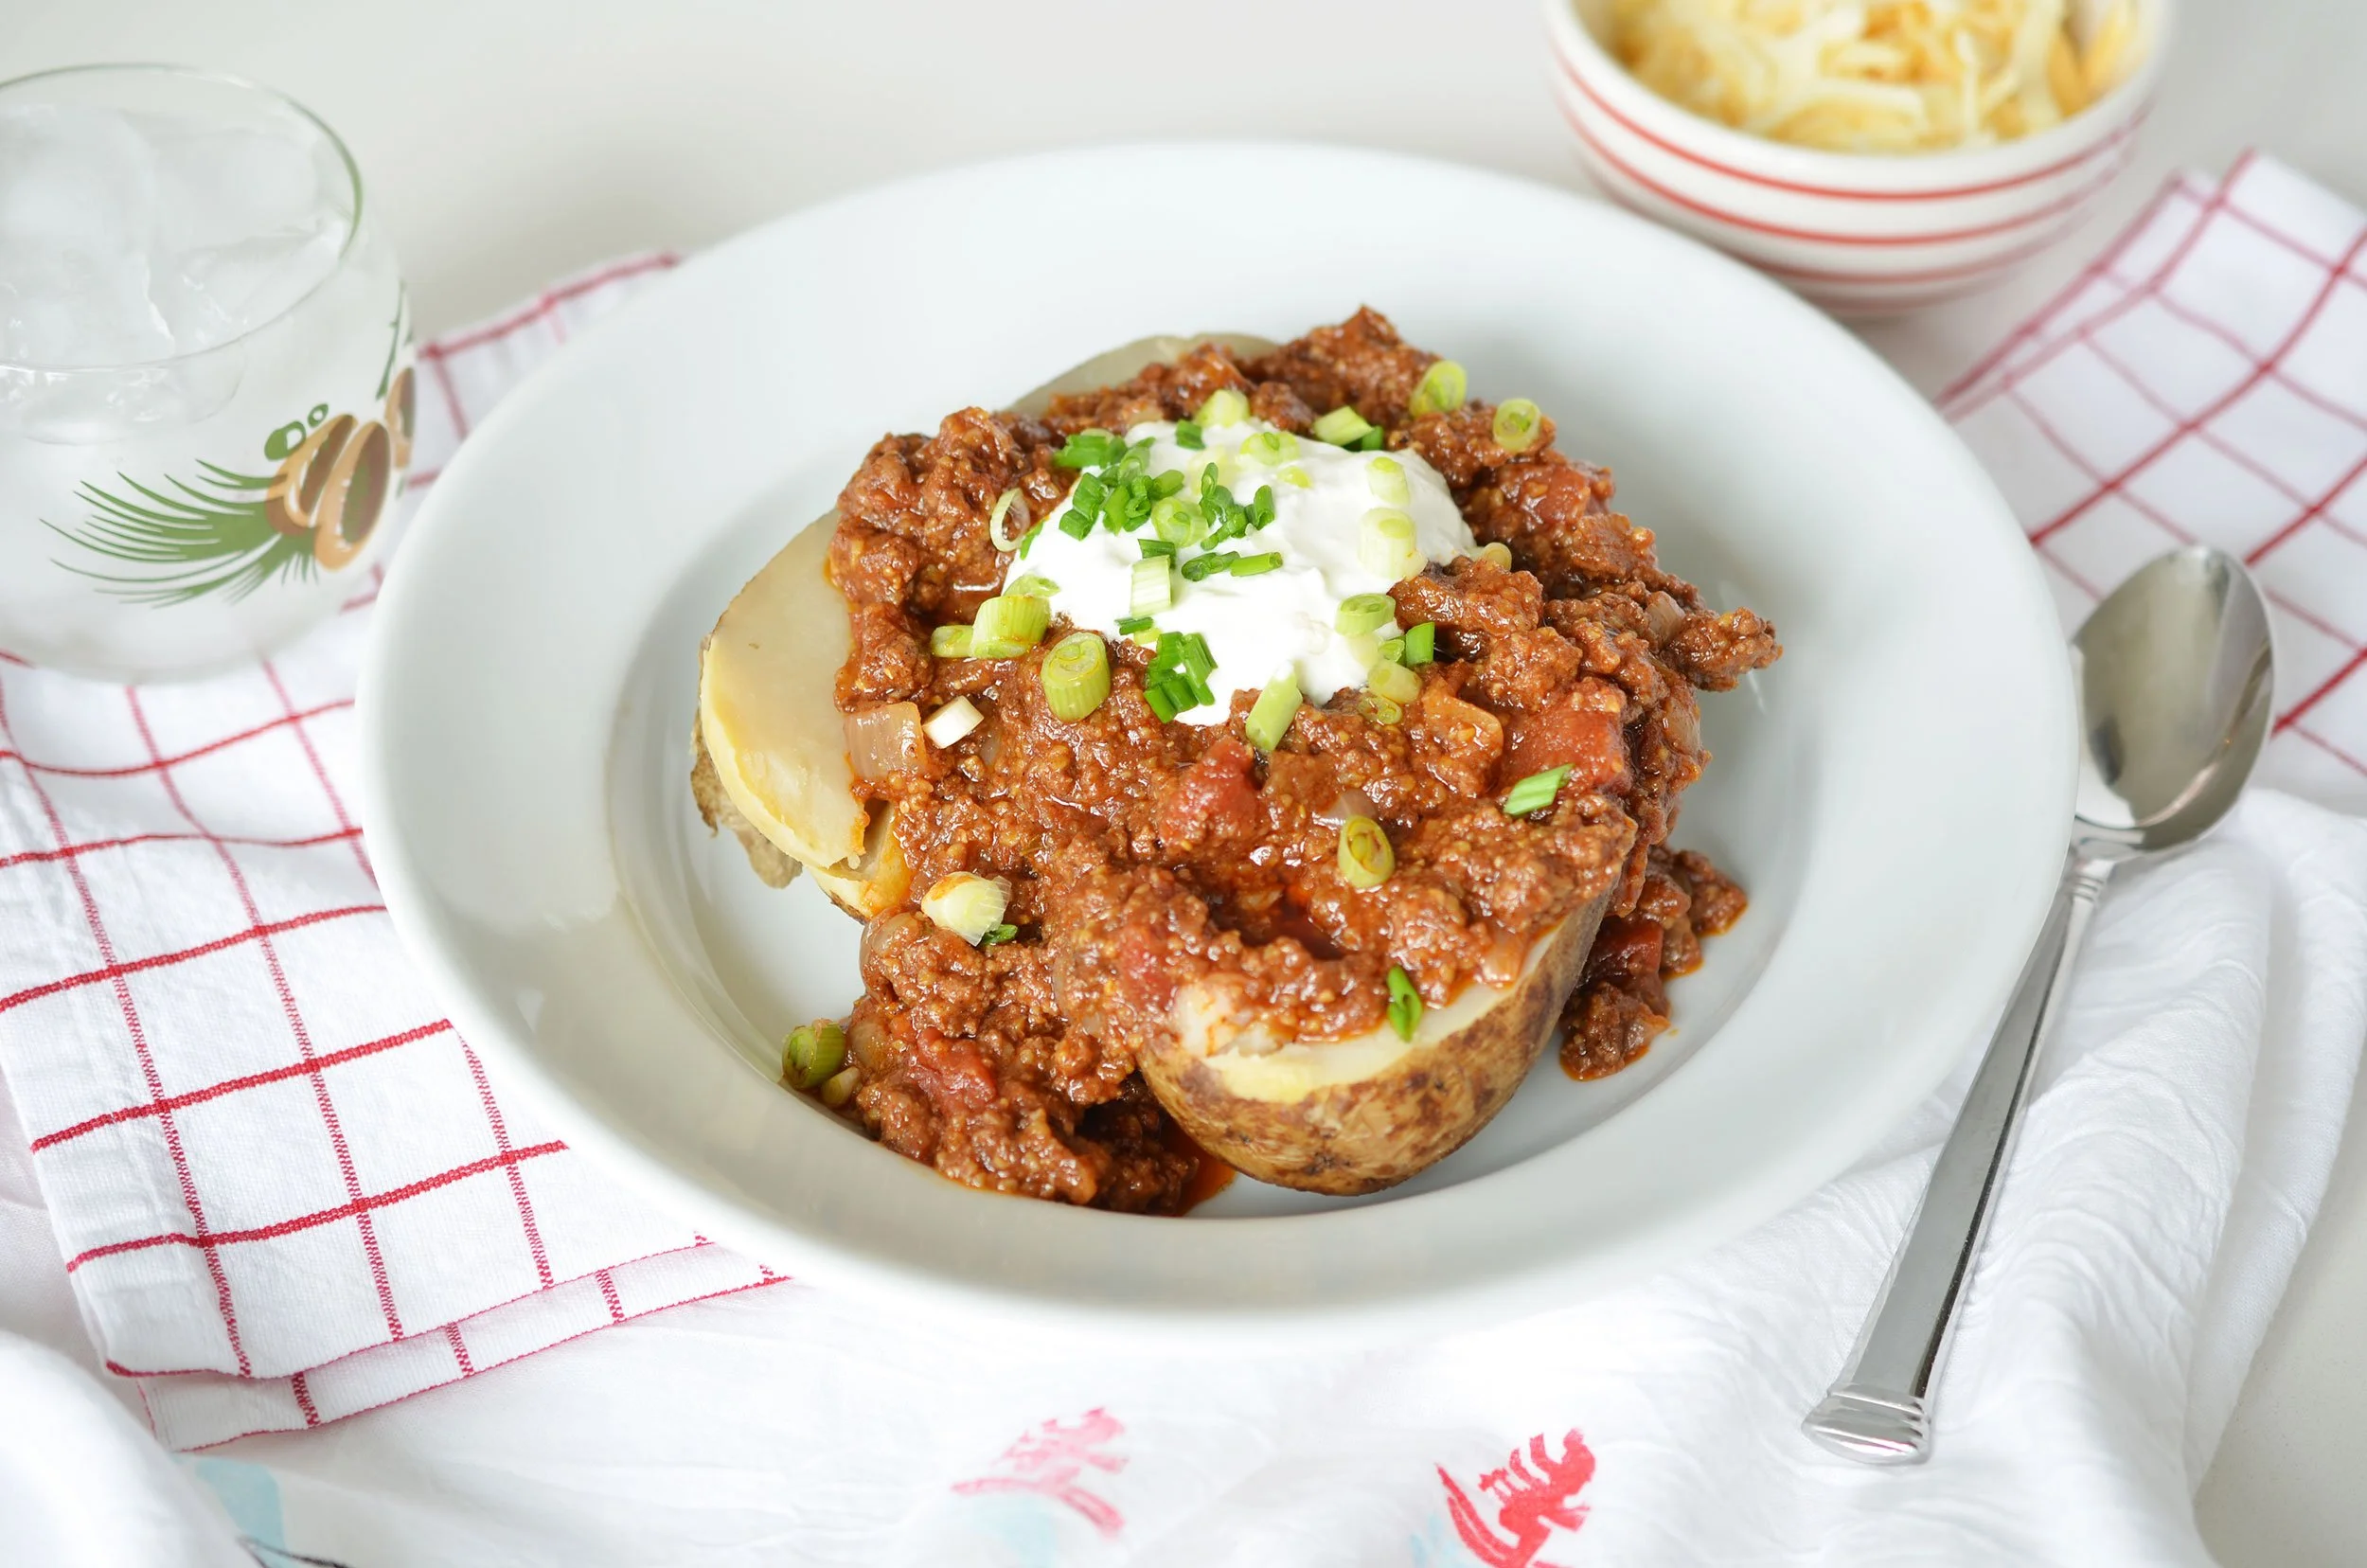
Après Ski Chili
Our family loves skiing. I love skiing because we have the best family moments right after skiing when we decompress, laugh about mistakes we made on the hill, and have a cocktail together. It’s more than just a trendy time to post on Instagram; Après Ski is a great time to connect.
Making this chili in the morning ensures that our après isn’t just crackers and cheese, but is something hearty and warm. It’s also the world’s easiest chili. It takes almost no time to put together and can either simmer while you are on the hill (make sure someone is around to stir occasionally!) or pop it in the fridge and bring it to a boil when you’re back off the hill.
Serve with shredded cheese, green onions, and corn chips. You might not even need dinner!
Après Ski Chili
1 medium sweet onion, chopped
2 pounds ground beef
2 cloves garlic, rough chopped or grated
1 - 28oz can diced tomatoes
1 -15oz can tomato sauce
1 tablespoon beef bouillon or one cube
1/4 cup chili powder
1 tablespoon garlic powder
1 tablespoon cumin
1/2 tablespoon dried oregano
2 tablespoons cornmeal
1 teaspoon ground pepper
STEP 1
In a large dutch oven, brown the onions with the ground beef and garlic. When the beef is browned, pour off any excess fat if it rendered out.
STEP 2
Add the spices + cornmeal to the meat and stir until completely covered and you can smell the spices.
STEP 3
Pour in the tomatoes and stir. Lower the heat to a simmer and cover. Let simmer on low/very low for several hours. Serve with baked potatoes, rice, corn chips and sour cream on top.


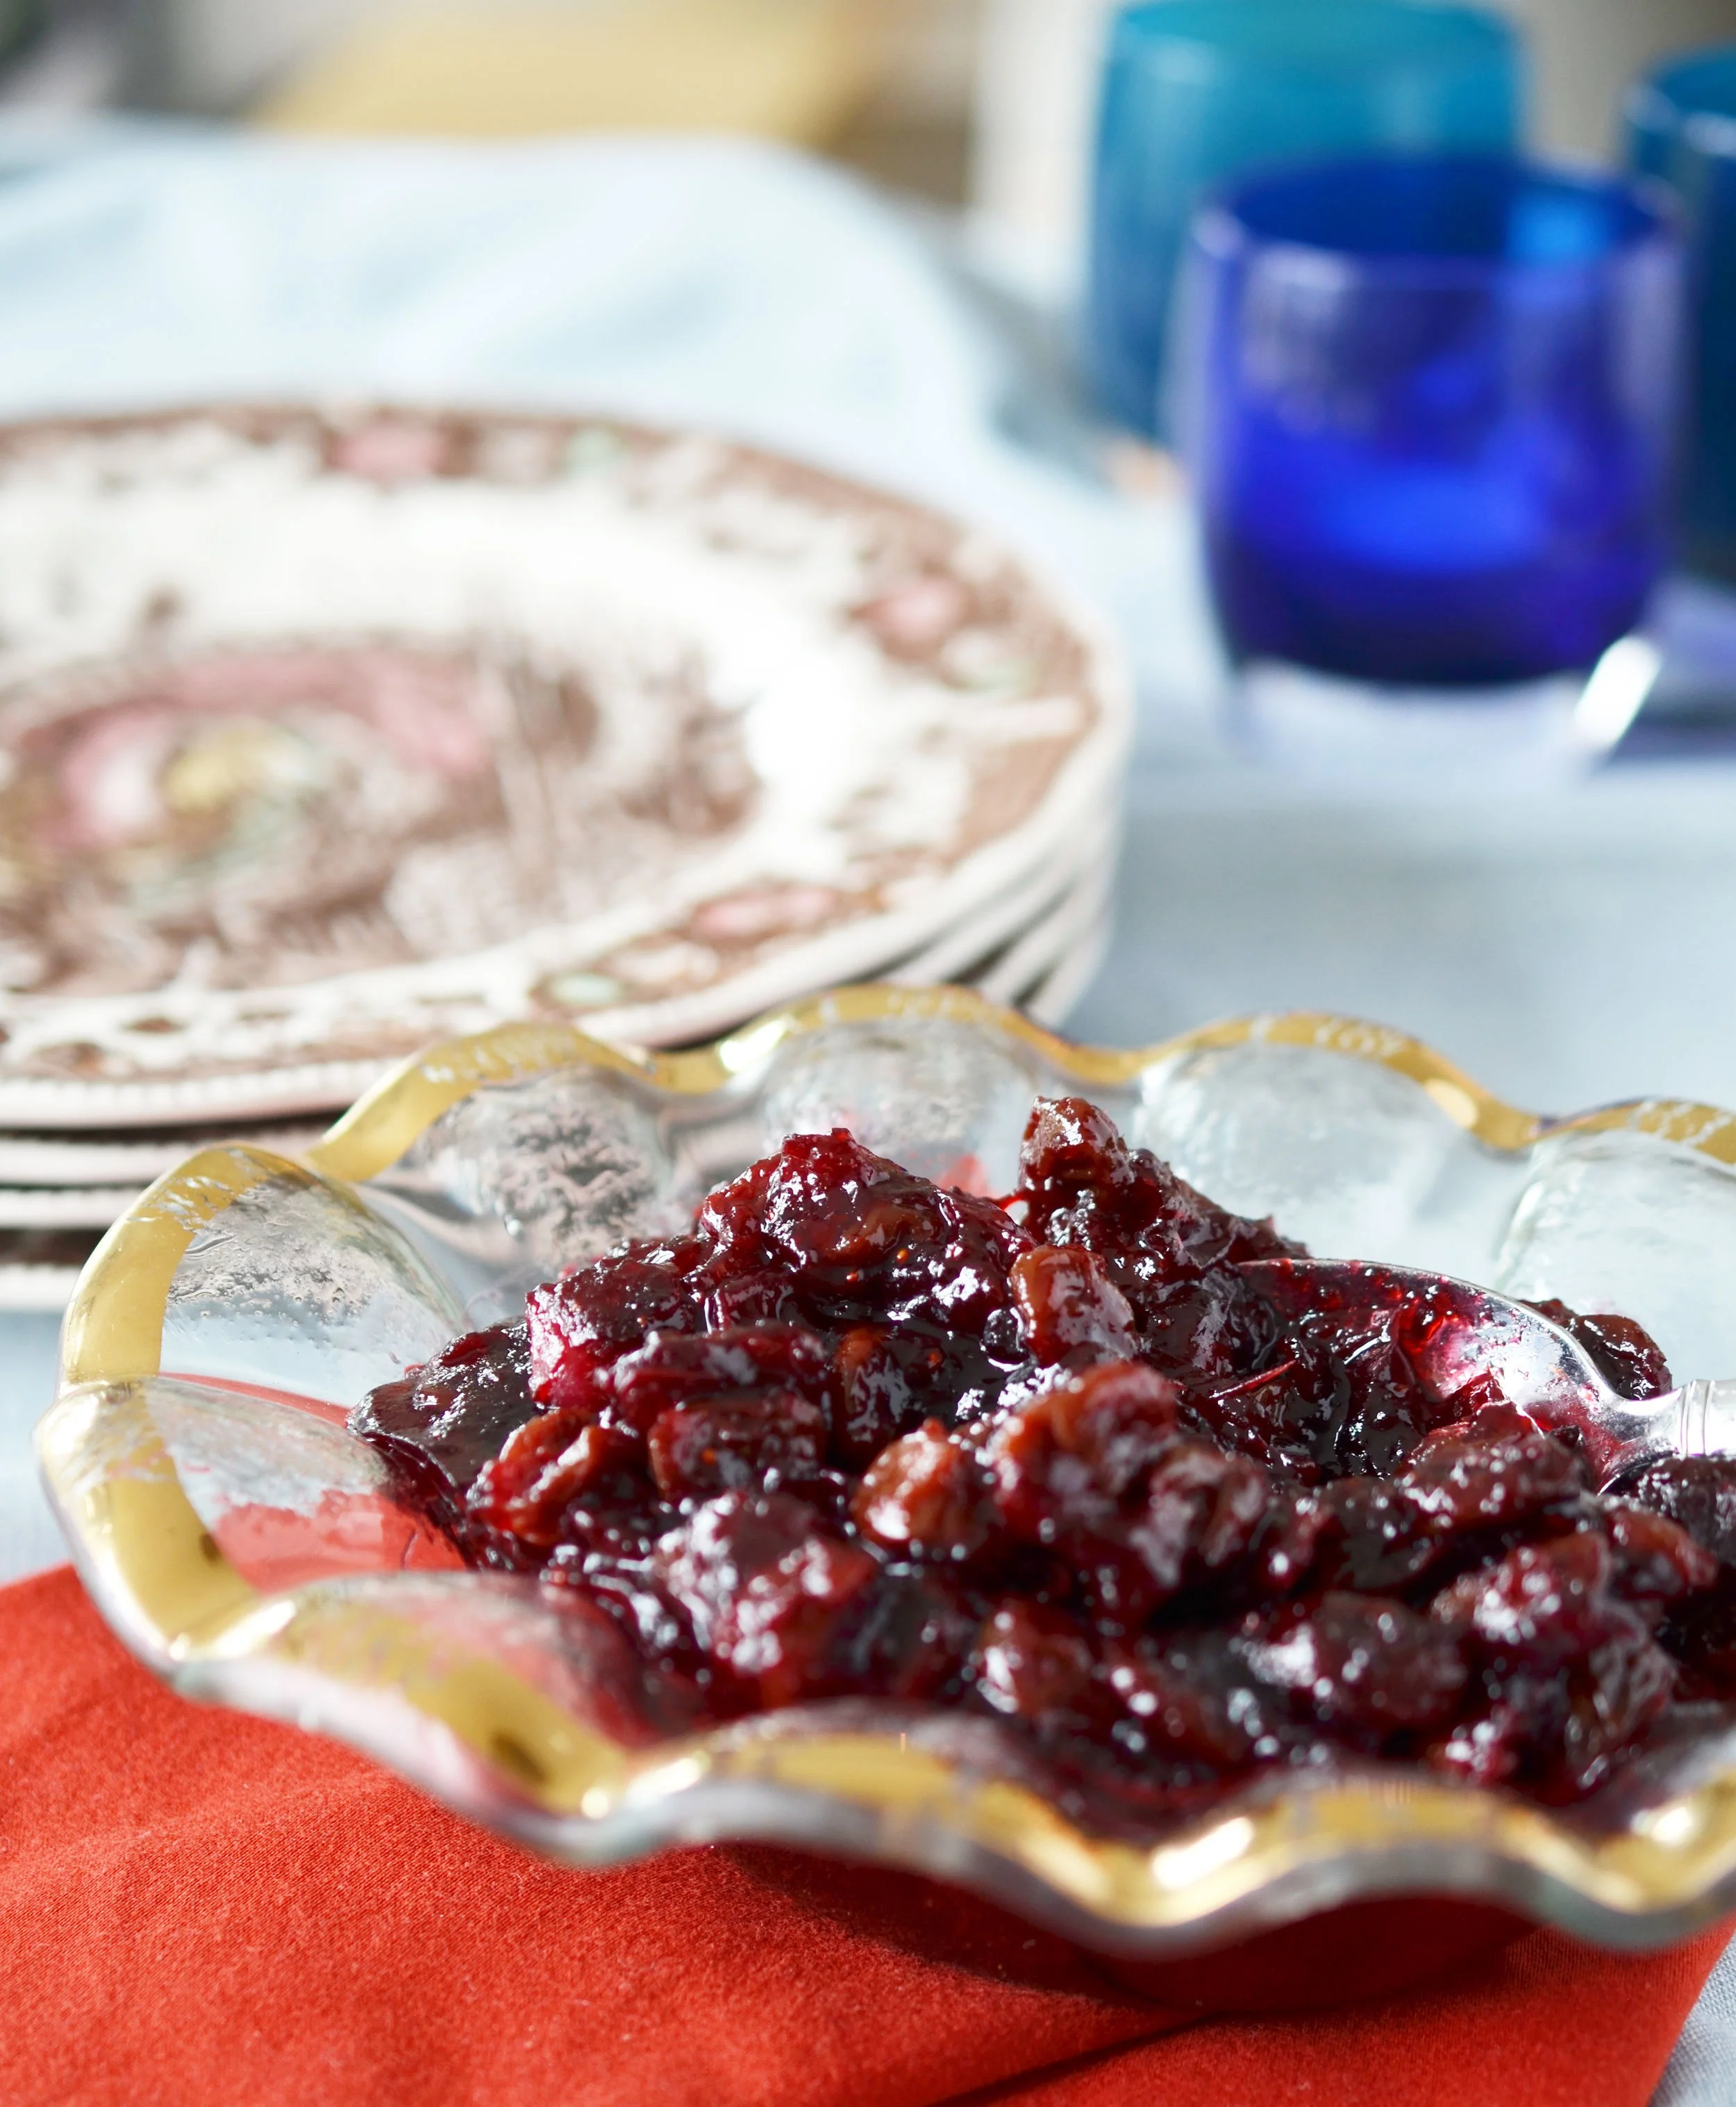
Cran-Cherry Relish
This is one of the simplest ways to create a cranberry relish that is packed with flavor but not hard to make at all. It’s also something you can do WAY ahead of time. When you refrigerate it, it will set up like a jelly. As it warms to room temperature it will loosen up. But if you want it looser, faster, then pop it in a pan (or the microwave) and let it warm up.
This is a great Thanksgiving side- but it’s amazing all holiday season on your table or as an appetizer over brie.
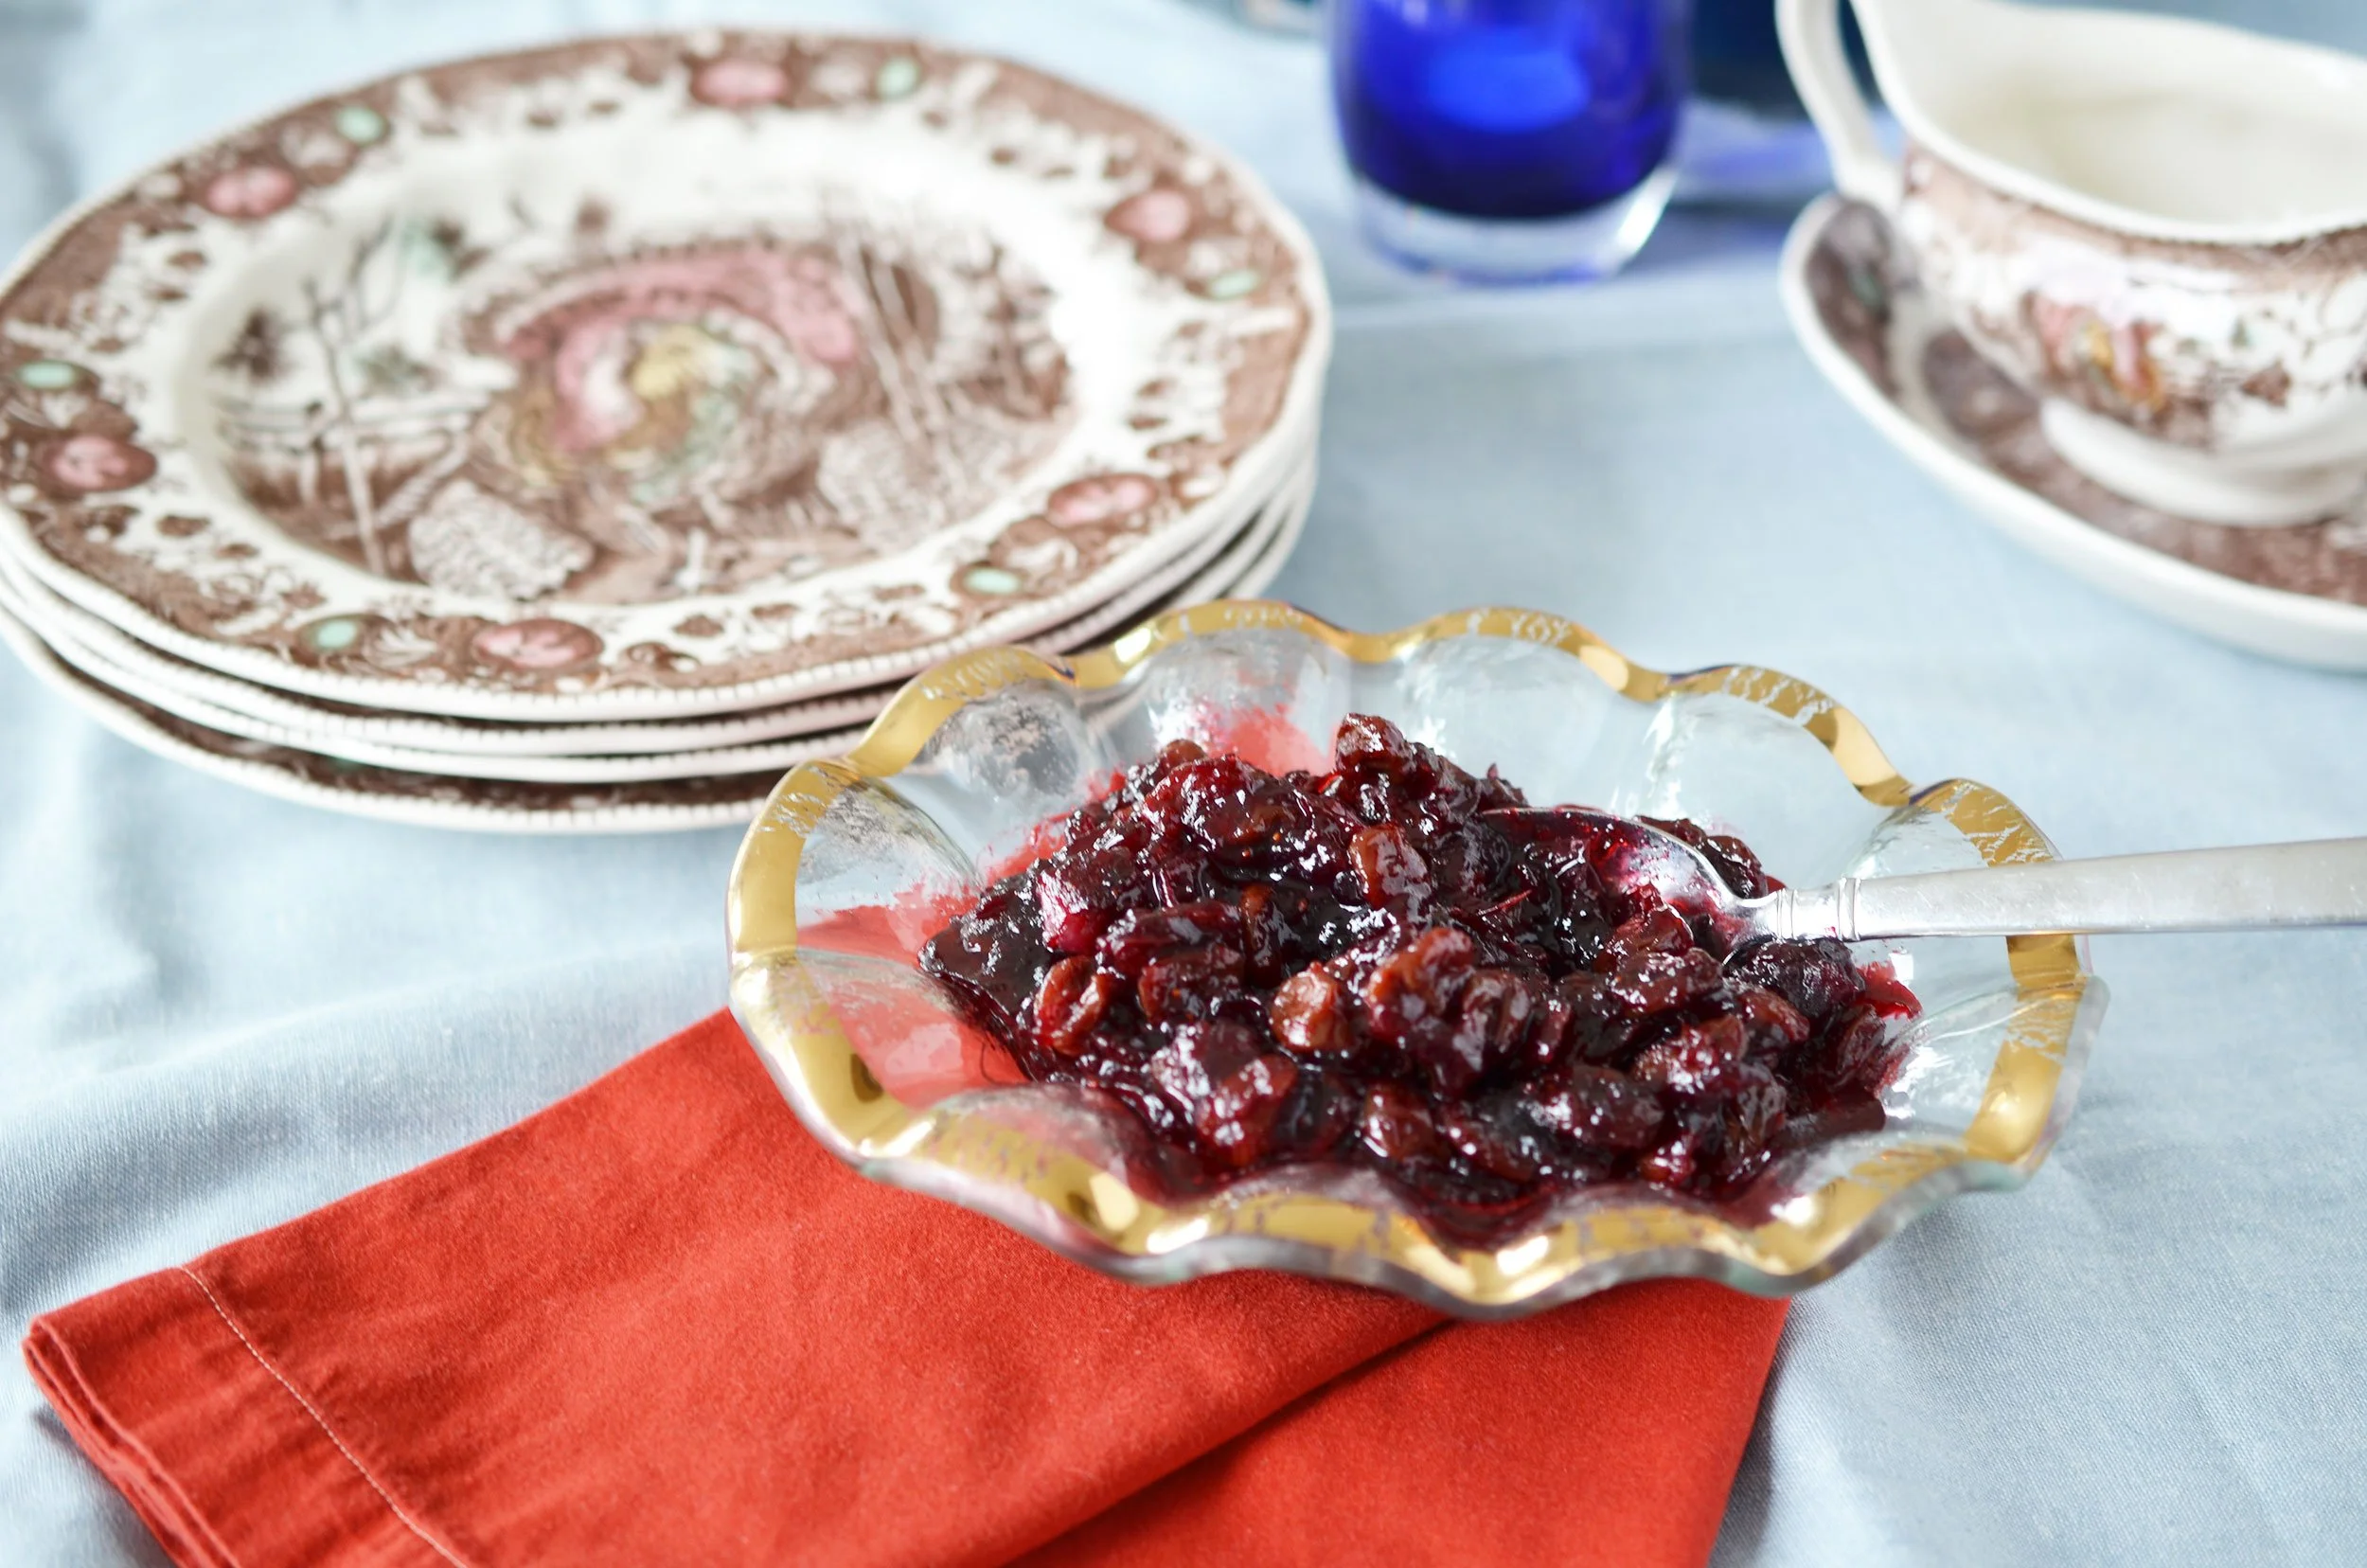
Cran Cherry Relish
2 cups fresh cranberries
1 cup dried cherries
1 cup tart cherry juice
1/2 cup sugar
Bring all ingredients together in a pan and bring to a simmer. Cook until the liquid has reduced by half. Pour into a dish and serve hot - or refrigerate and serve later on the table.


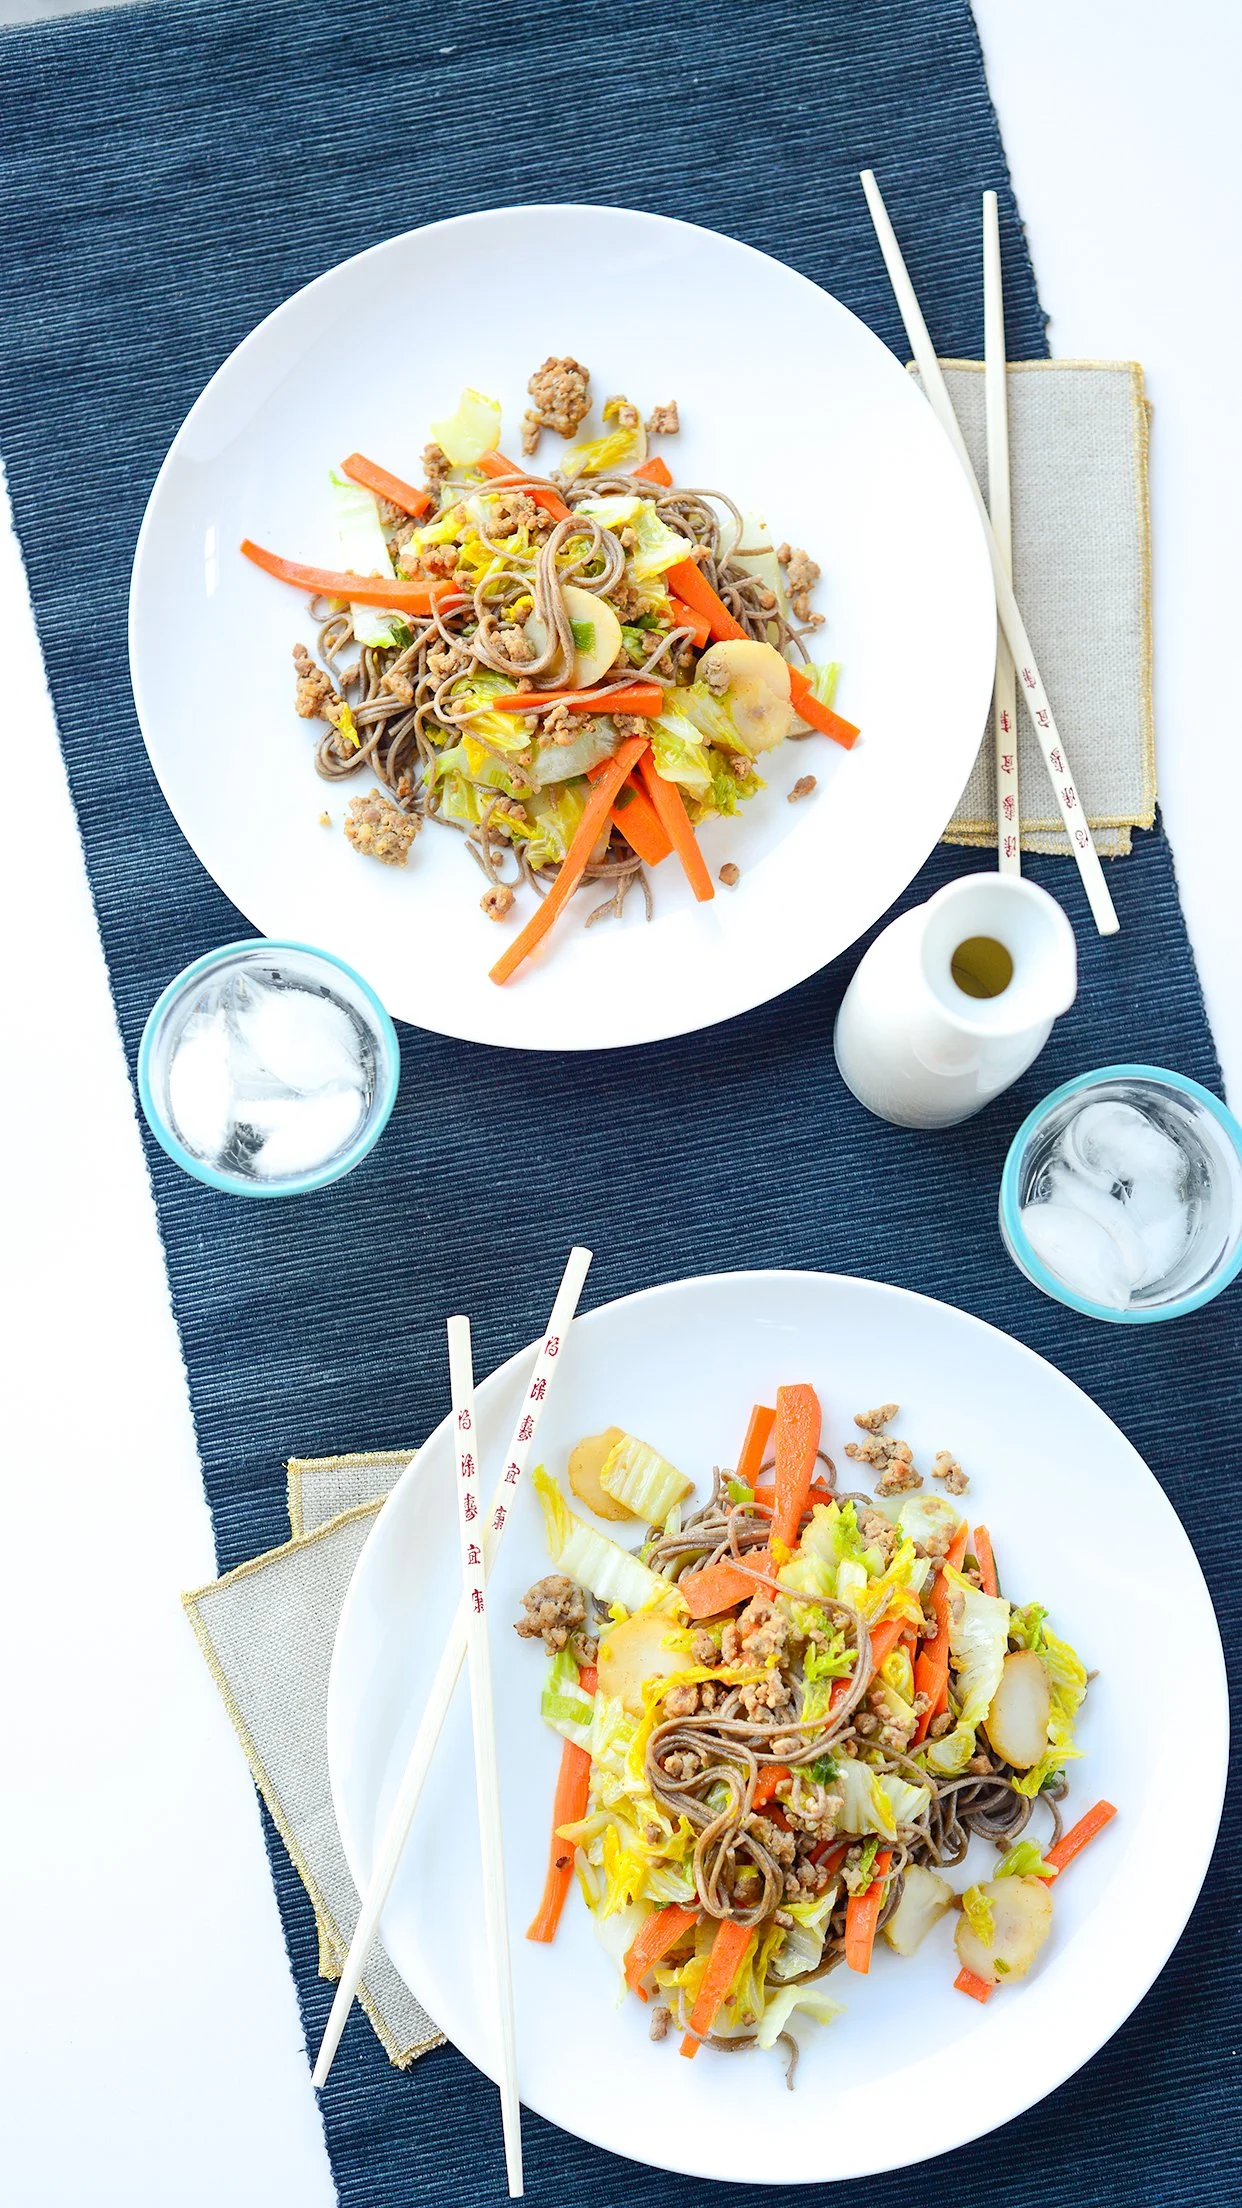
Potsticker Pasta
This is one of those recipes that I cannot believe I have not shared with you! It’s a regular on our table because it’s so fast, full of vegetables AND full of flavor. My kids like it, I like it - and it’s makes good left overs too.
There is no trick to this. Just be sure to have all of your veggies chopped first because once you start cooking, it goes faster than you realize. Which is perfect because we only have a few minutes to get dinner on the table any way.
OPTIONS
Use ground chicken instead of pork if that’s your jam.
You can buy the carrots pre-grated.
Use regular cabbage if that’s what you have OR Napa cabbage heads are enormous (sometimes they are).
If you can’t find soba noodles (check the ‘international’ section) a very thin regular pasta works just fine
I make this is a giant dutch oven any more. It’s so much easier to have all of the space to toss the noodles - and pop the lid on in case you have to keep it hot for late plates.

Potsticker Pasta
Serves 4-6
2 lb ground pork
1 tbs ginger, grated
2 cloves garlic, grated
1 tsp sriracha
3-4 green onions, whites & greens sliced
1 tsp hoisin
1 small head Napa cabbage, sliced thin (you end up with about 4 cups)
1 can water chestnuts, sliced
2 carrots, sliced thin (or about 2 cups shredded carrot)
2 tbs sesame oil
1 tbs rice wine vinegar
1 tbs soy sauce or tamari
8 oz soba noodles (about 2 bunches)
1 tbs sesame seeds
STEP 1
Place sliced cabbage in a bowl and sprinkle the top with salt. Let rest for up to an hour.
STEP 2
In a zip top bag or a bowl, combine pork, ginger, garlic, sriracha, the whites from the sliced onions, and the hoisin. Mix it together and let rest.
STEP 3
Bring water to a boil and cook soba noodles until done. Toss the noodles with sesame oil, rice wine vinegar, and soy sauce.
STEP 4
Cook the pork over high heat until browned.
STEP 5
Wrap cabbage in a paper towel and squeeze out excess moisture. Toss the cabbage in the pan with the pork. Add carrots and water chestnuts to the pan and cook lightly until heated through.
STEP 6
Toss the pork mixture with the seasoned noodles and serve with a sprinkle of sesame seeds on top. My family likes the chili crunch or extra soy sauce on top too!
